Zynq UltraScale+ MPSoC Ubuntu part 1 - Running the Pre-Built Ubuntu Image and Power Advantage Tool
This page is deprecated and is no longer being updated. The content is being retained for reference. For more information about running Ubuntu on Zynq UltraScale+ MPSoC, please refer to Canonical Ubuntu
Table of Contents
Document History
Updated for 2017.1 tools| Date | Version | Author | Description of Revisions |
| 1stOct2016 | 1 | Upender Cherukupally Jerry Wong Srikanth Erusalagandi | Initial Image only release |
| 22ndDec2017 | 1.1 | Aniket Kolarkar | Updated with 2017.1 tools release. |
Description/Summary
Zynq® UltraScale+™ MPSoC delivers unprecedented levels of heterogeneous multi-processing and combines seven user programmable processors including Quad-core ARM® Cortex™-A53 Application Processing Unit (APU), Dual-core 32-bit ARM® Cortex™-R5 Real Time Processing Unit (RPU), and ARM® Mali™-400 MP2 Graphics Processing Unit (GPU). It is Industry’s First Multi-Processor SoC delivering 5x system level performance-per-watt and any-to-any connectivity.This demonstration showcases the fully featured desktop-class operating system running multiple applications on symmetric multiprocessing (SMP) Linux on APU and graphics rendering on the GPU. Users can install and run any required applications from open source. The demo also enables quick migration of Linux/Ubuntu Desktop based applications to Zynq UltraScale+ MPSoC.
- Ubuntu Desktop environment on SMP Linux with multiple applications in-built; and flexible to create, download and install new applications on APU subsystem.
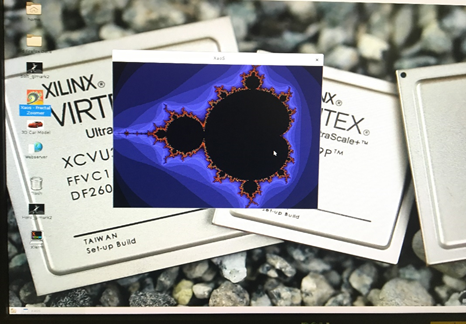
- Multiple telnet based applications like Mandelbrot Xaos are executing simultaneously on symmetric multiprocessing (SMP) Linux on APU subsystem.
- Demonstrates automated Power Advantage Tool to monitor the run time power consumption of Zynq UltraScale+ MPSoC running different applications.
| Figure 1: Zynq UltraScale+ MPSoC Block Diagram with blocks highlighted used in this design |
The following Zynq® UltraScale+™ MPSoC PS components are used in this demonstration
- Quad-core ARM® Cortex™-A53 Application Processing Unit,
- Graphics Processing Unit
- DDR controller
- UART
- SD/eMMC interface
- Gigabit Ethernet
- USB 3.0
- DisplayPort
Software Stack used for this demonstration
- SMP Linux on APU subsystem.
- Ubuntu Desktop root file system.
- ARM-Mali, OpenGL ES2.0 and Qt libraries.
- Multiple telnet based games like Mandelbrot, Space Invaders, Matrix and 2048.
| Files Provided | |
| zynqus_pwr_zcu102_20171220.zip | Archived file contain the following files/folders:
|
Requirements:
- Xilinx ZCU102 evaluation kit with power supply.
- Class 10 SD card (16 GB or more).
- Ethernet Cable, if needed to connect to Internet and install packages using apt-get utility or want to try the Web server demo.
- Micro USB to Standard USB cable.
- 4K or 1080p Display Port Monitor and DisplayPort Cable.
- 4K or 1080p HDMI Monitor and HDMI Cable Note: XaoS Mandelbrot will not display on HDMI. Alternatively, use mbrot.sh script.
- USB 3.0 connector or USB 2.0 micro cable to standard USB female adapter, USB Hub to connect USB mouse and USB keyboard or connect USB keyboard with mouse integrated etc.
Setup:
Host Machine Setup for Power Advantage Tool:
1. Extract the downloaded zcu102_ubuntu_pwr_demo_<Timestamp>.zip file (e.g. zynqus_pwr_zcu102_20171220.zip) on to your host hard drive.
2. Copy the ZynqUS_Demos folder from the extracted zip file zynqus\pwr\ZynqUS_Demos to C: drive as shown below.
C:\ZynqUS_Demos
3. Install the required installation files for running the demo.
Note: The following is a one-time Installation for the host machine.
If Tera Term, Putty, AutoHotkey, and CP210x driver are already installed and configured, just ignore that step in ‘1’
The installers are located in the C:\ZynqUS_Demos\tools directory
- Install Tera Term terminal application by double clicking teraterm-4.87.exe
- Install the AutoHotkey application by double clicking AutoHotkey112203_Install.exe, which can also be found at - Autohotkey webpage.
- Install CP210x USB to UART bridge driver as follows: Navigate to C:\ZynqUS_ Demos\tools\CP210x_VCP_Windows directory and install CP210xVCPInstaller_x64.exe
Note: This might ask you to restart the machine. Perform the next step before restarting the machine
4. Modify your laptop Ethernet IP to "192.168.1.110" using the following steps
- In Windows 7 this is done from Control Panel > Network and Internet (on some systems you may be able to proceed without this step) > Network and Sharing Center > Change adapter settings (found on left side of page) > Right Click Local Area Connection > Properties > Yes.
| Windows LAN settings Page1 |
| Windows LAN settings Page2 |
- Internet Protocol Version 4 (TCP/IPv4) > Properties > Use the following IP address > IP address: 192.168.1.110 (Enter and use the default Subnet mask) > OK > Close
| Static IP address setting |
5. Restart the Host machine.
Preparing the SD card with pre-built Images:
1. Extract the <Timestamp>_zcu102_ubuntu.zip (e.g. zynqus_pwr_zcu102_20171220.zip) present in the "zynqus\pwr\sd" directory. It contians the <TimeStamp>_zcu102_ubuntu.img file which needs to be extracted to the SD card. The SD card can be burned with the .img file using the Win32DiskImager.exe tool on Windows PC or using Linux commands on a Linux PC.
2. Install Win32DiskImager.exe Tool
The tool can be downloaded and installed from https://sourceforge.net/projects/win32diskimager/
3. SD card image (<TimeStamp>_zcu102_ubuntu.img) which can be written to 16 GB card (bigger device if any issues with the size) by following method
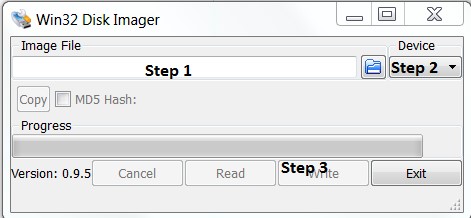
Burn this image using the Win32 disk Image writer,
Step 1: as highlighted below first browse the path to <TimeStamp>_zcu102_ubuntu.img file
Step 2: In Device select the SD card partition (This has to selected with utmost care as this tool is going to format the selected drive) and
Step 3: Select the option to write to SD card selected in Device option.
| Disk Image selections for writing img file to SD card |
4. On a Linux PC we can burn the .img image onto SD Card using the DD command
$ dd if=name.img of=/dev/sdb
Where ‘if’ is pointing to name.img file of the Ubuntu Desktop image and ‘of’ points to the SD card to which the image has to be extracted.
5. By doing this you should have the following directories and images on your SD card.
- boot.bin - Booting image
- Image.ub - Kernel image and Device Tree
- GPU Driver
ZCU102 Board Setup:
1. Connect the Micro USB cable into the ZCU102 Board Micro USB port J83, and the other end into an open USB port on the host PC. This cable will be used for UART over USB communication.2. Connect one end of Ethernet cable into the ZCU102 connector J73, and other end connect to the Ethernet socket of the host machine.
3. Insert SD card into the SD card slot J100.
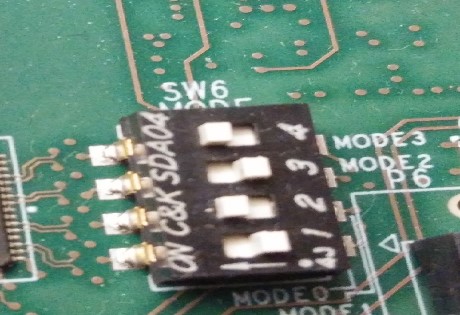
4. Set the SW6 switches as shown. This configures the boot settings to boot from SD:
| Switch selection for SD boot mode |
5. Connect 12V Power to the ZCU102 6-Pin Molex connector.
6. Connect the Display Port or HDMI monitor using DisplayPort or HDMI cable to U50 or HDMI TX connector respectively.
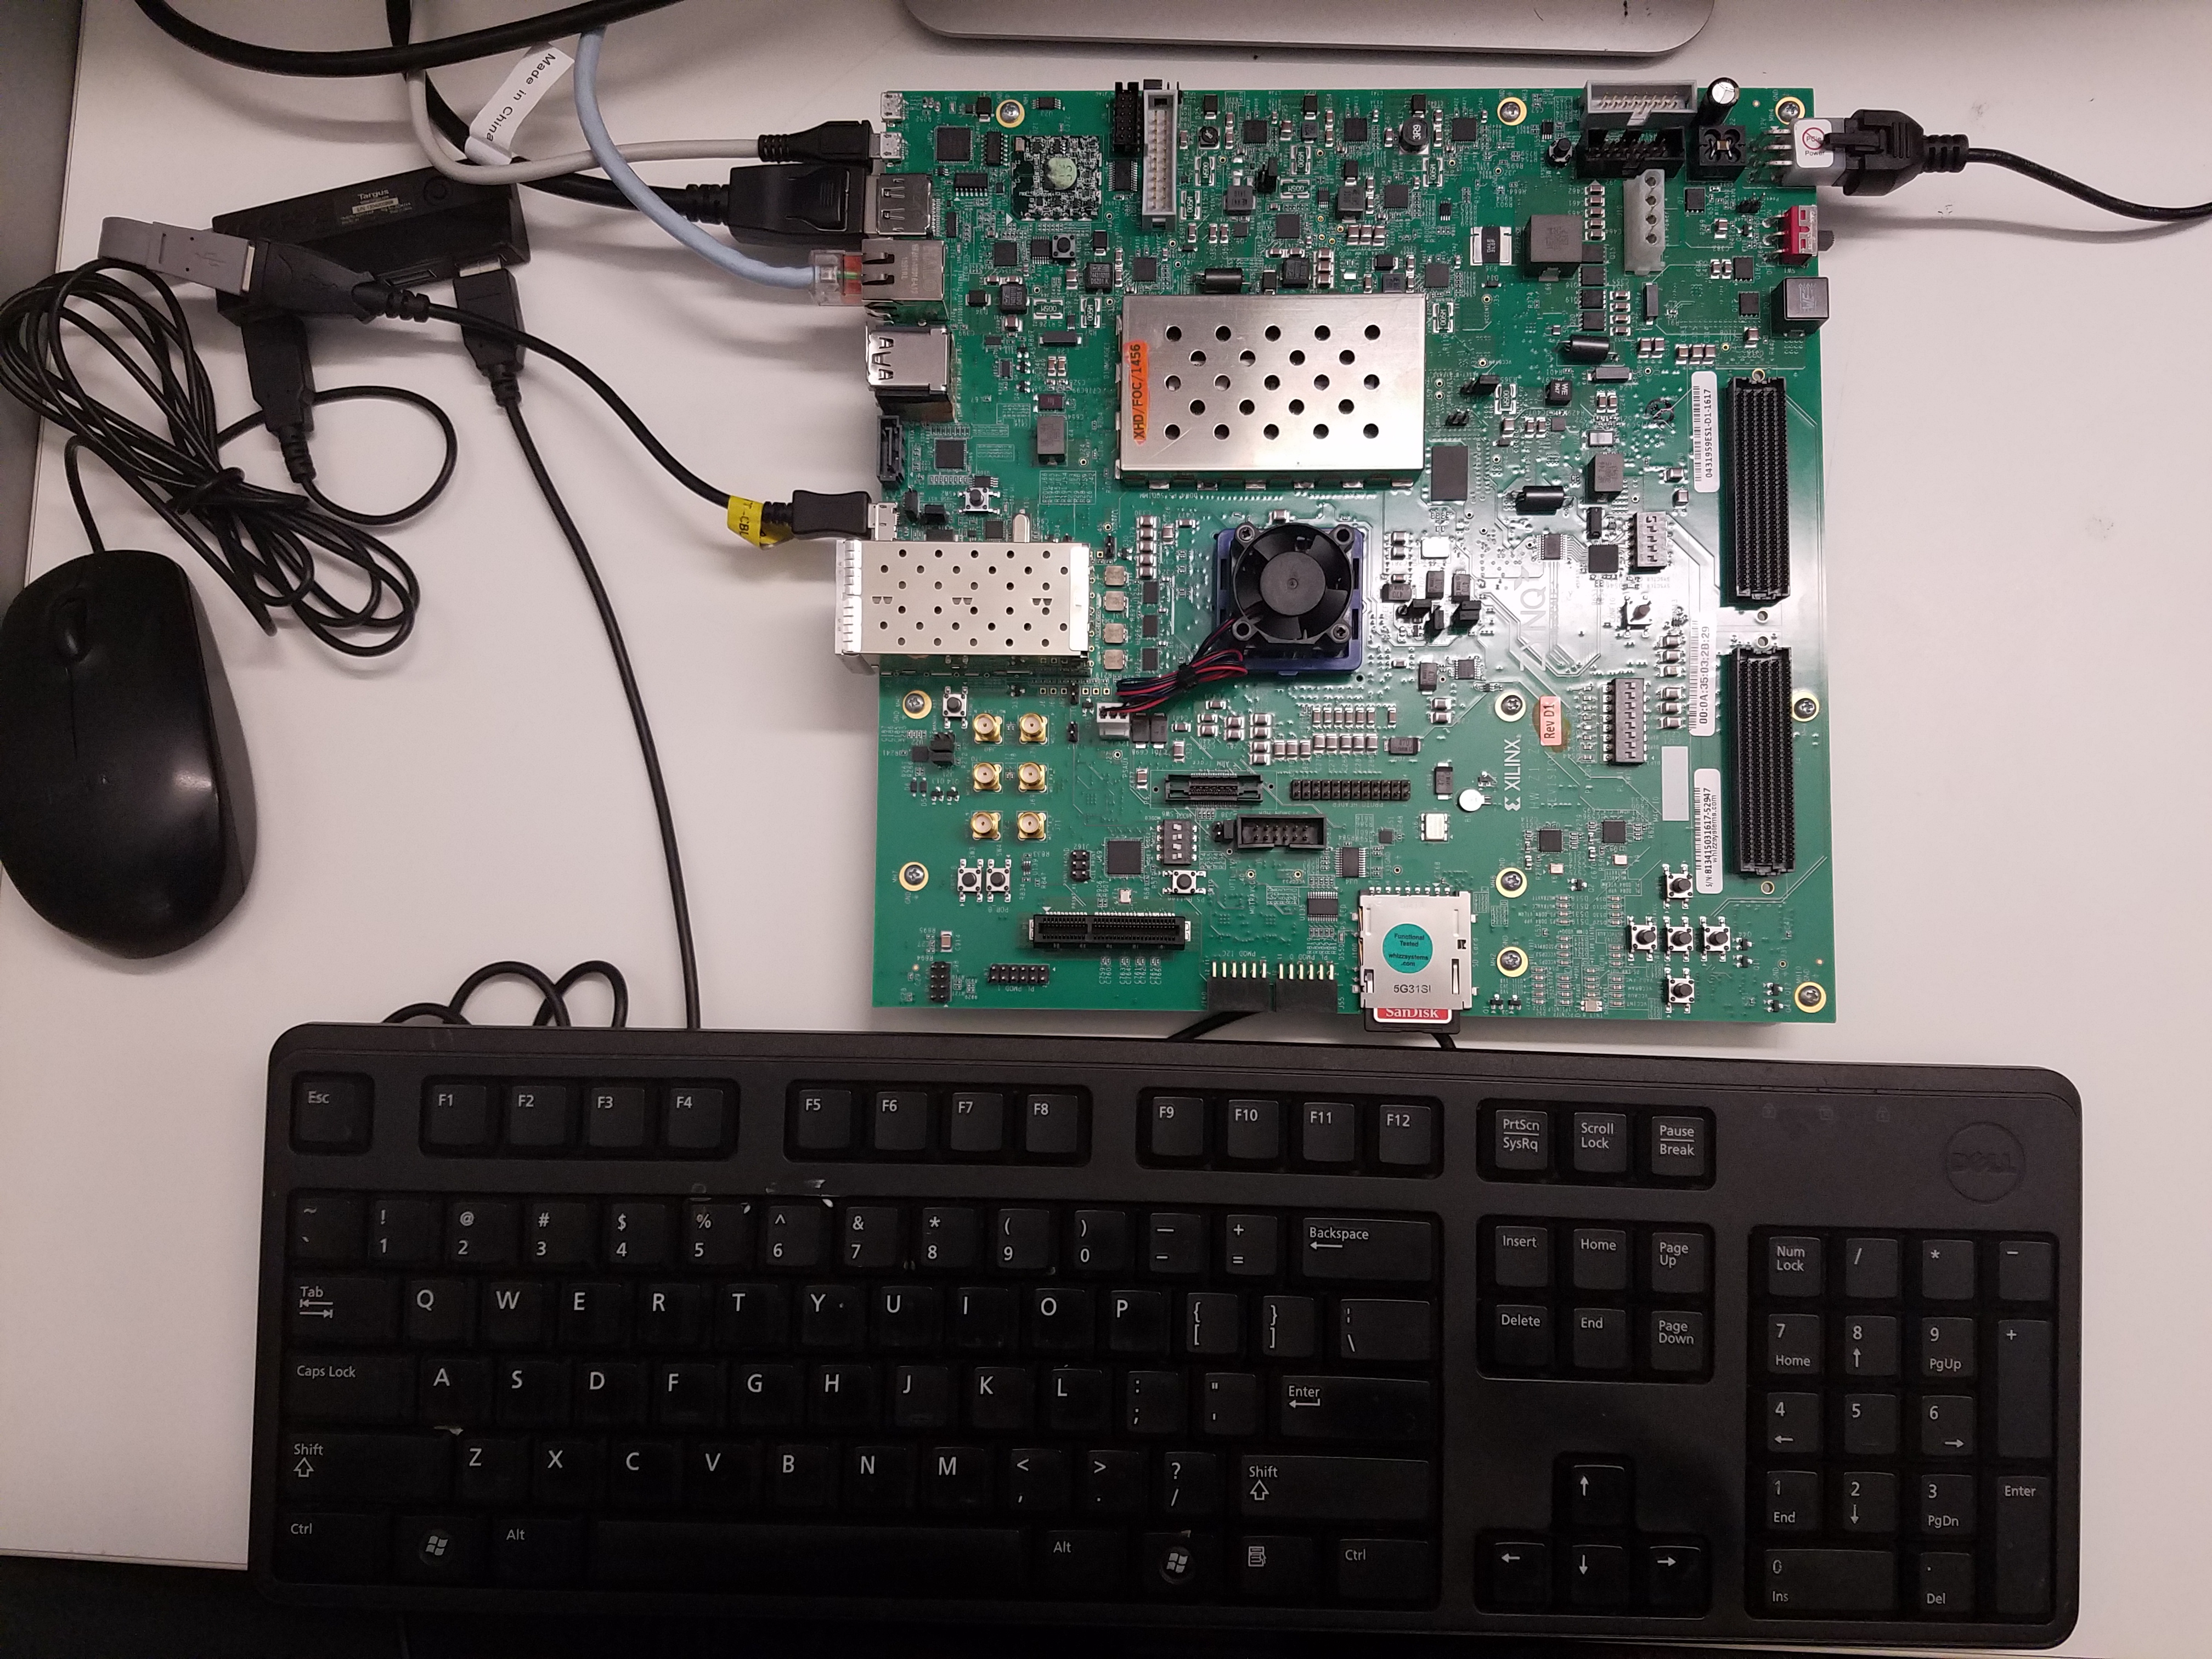
7.The following figure shows the connections made to the ZCU102 board.
| ZCU102 Board Connections |
8. Flashing MSP430:
If you have received new demo software for an existing ZCU102 board, you may need to flash the onboard MSP430 to enable new features. To flash the MSP430, refer to Appendix A.
Execution
1. Switch on the ZCU102 Board at SW1 (red switch).
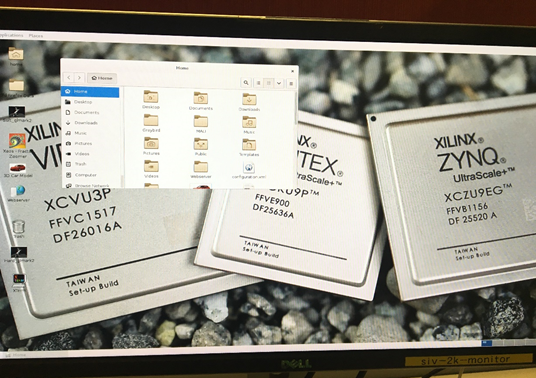
2. In few seconds the Ubuntu Desktop will boot as shown in the following figure.
| ZCU102 Ubuntu Welcome Screen |
3. As shown in the following figure there are few icons tailor made like Qt cube demo, 3D Car Model, Soft glMark2 etc. to execute the Zynq UltraScale+ MPSoC specific applications.
4. Right click and open the applications, following steps explains the each of the above icons.
5. Check if the Ethernet port is up by using the “ifconfig” command. With 2016.2 tool version images The ZC102 Ethernet port is default configured to eth4 interface.
Use the following command in the terminal to assign a static IP to the board.
$ “ifconfig eth4 192.168.1.112 up”
If there is no eth4 interface, then try assigning IP Address to other interfaces from eth0 to eth6 to bring up the Ethernet interface.
Once the IP address successfully assigned launch the Web server application.
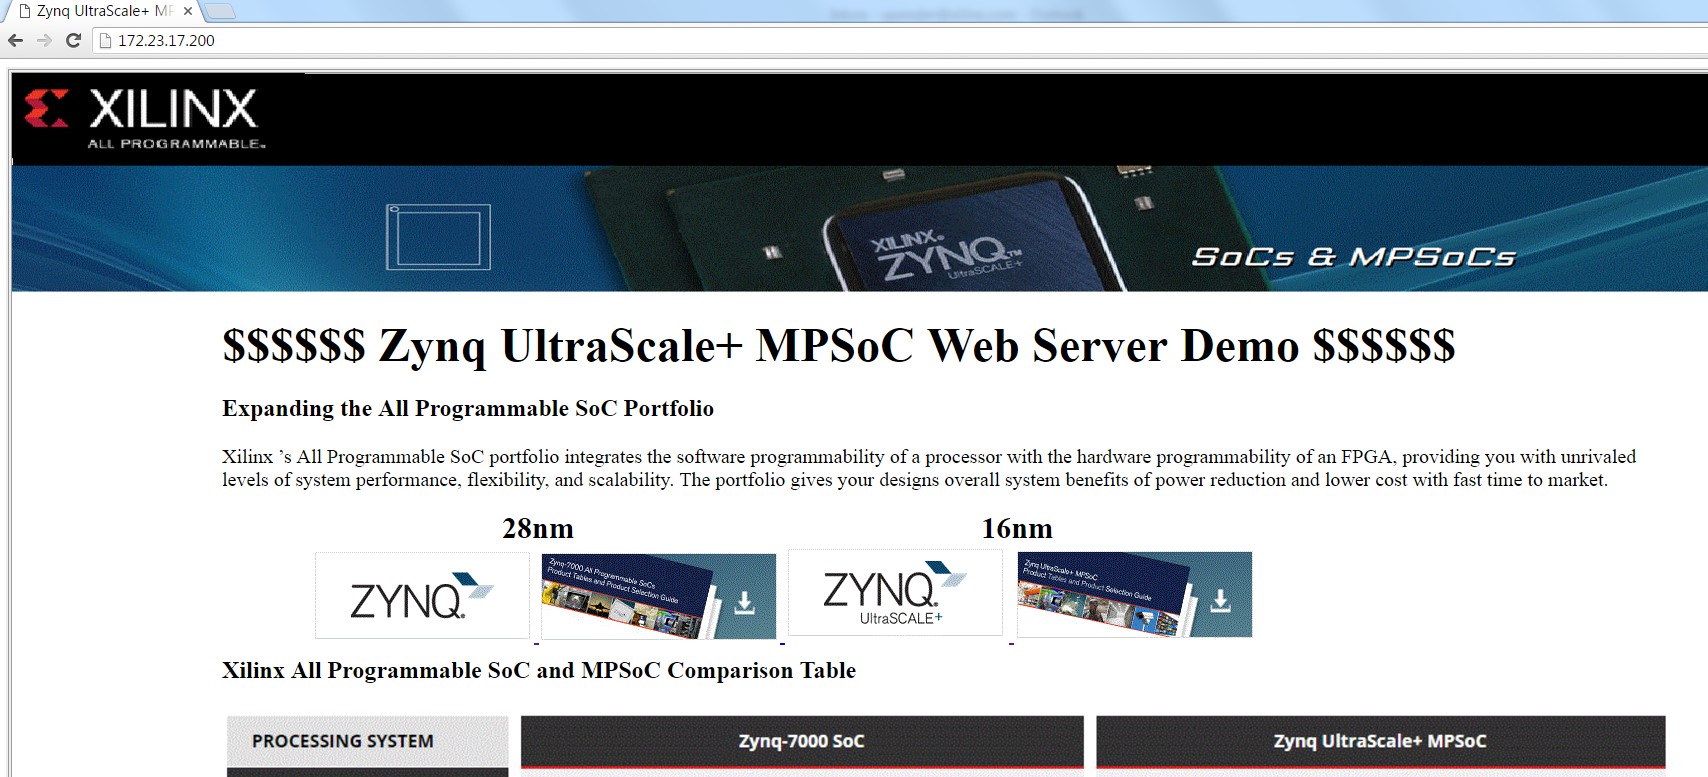
6. Double click on the Webserver icon on the desktop and following window will pop up. This window shows the IP address of the ZCU102, so use this IP address in the web client of you PC/laptop.
| WebClient Launch Info dialog |
7. In Host PC or Laptop launch any web browser like Chrome or Internet Explorer and type the following in the Address bar of the Web Browser.
http://192.168.1.112
| Web server application |
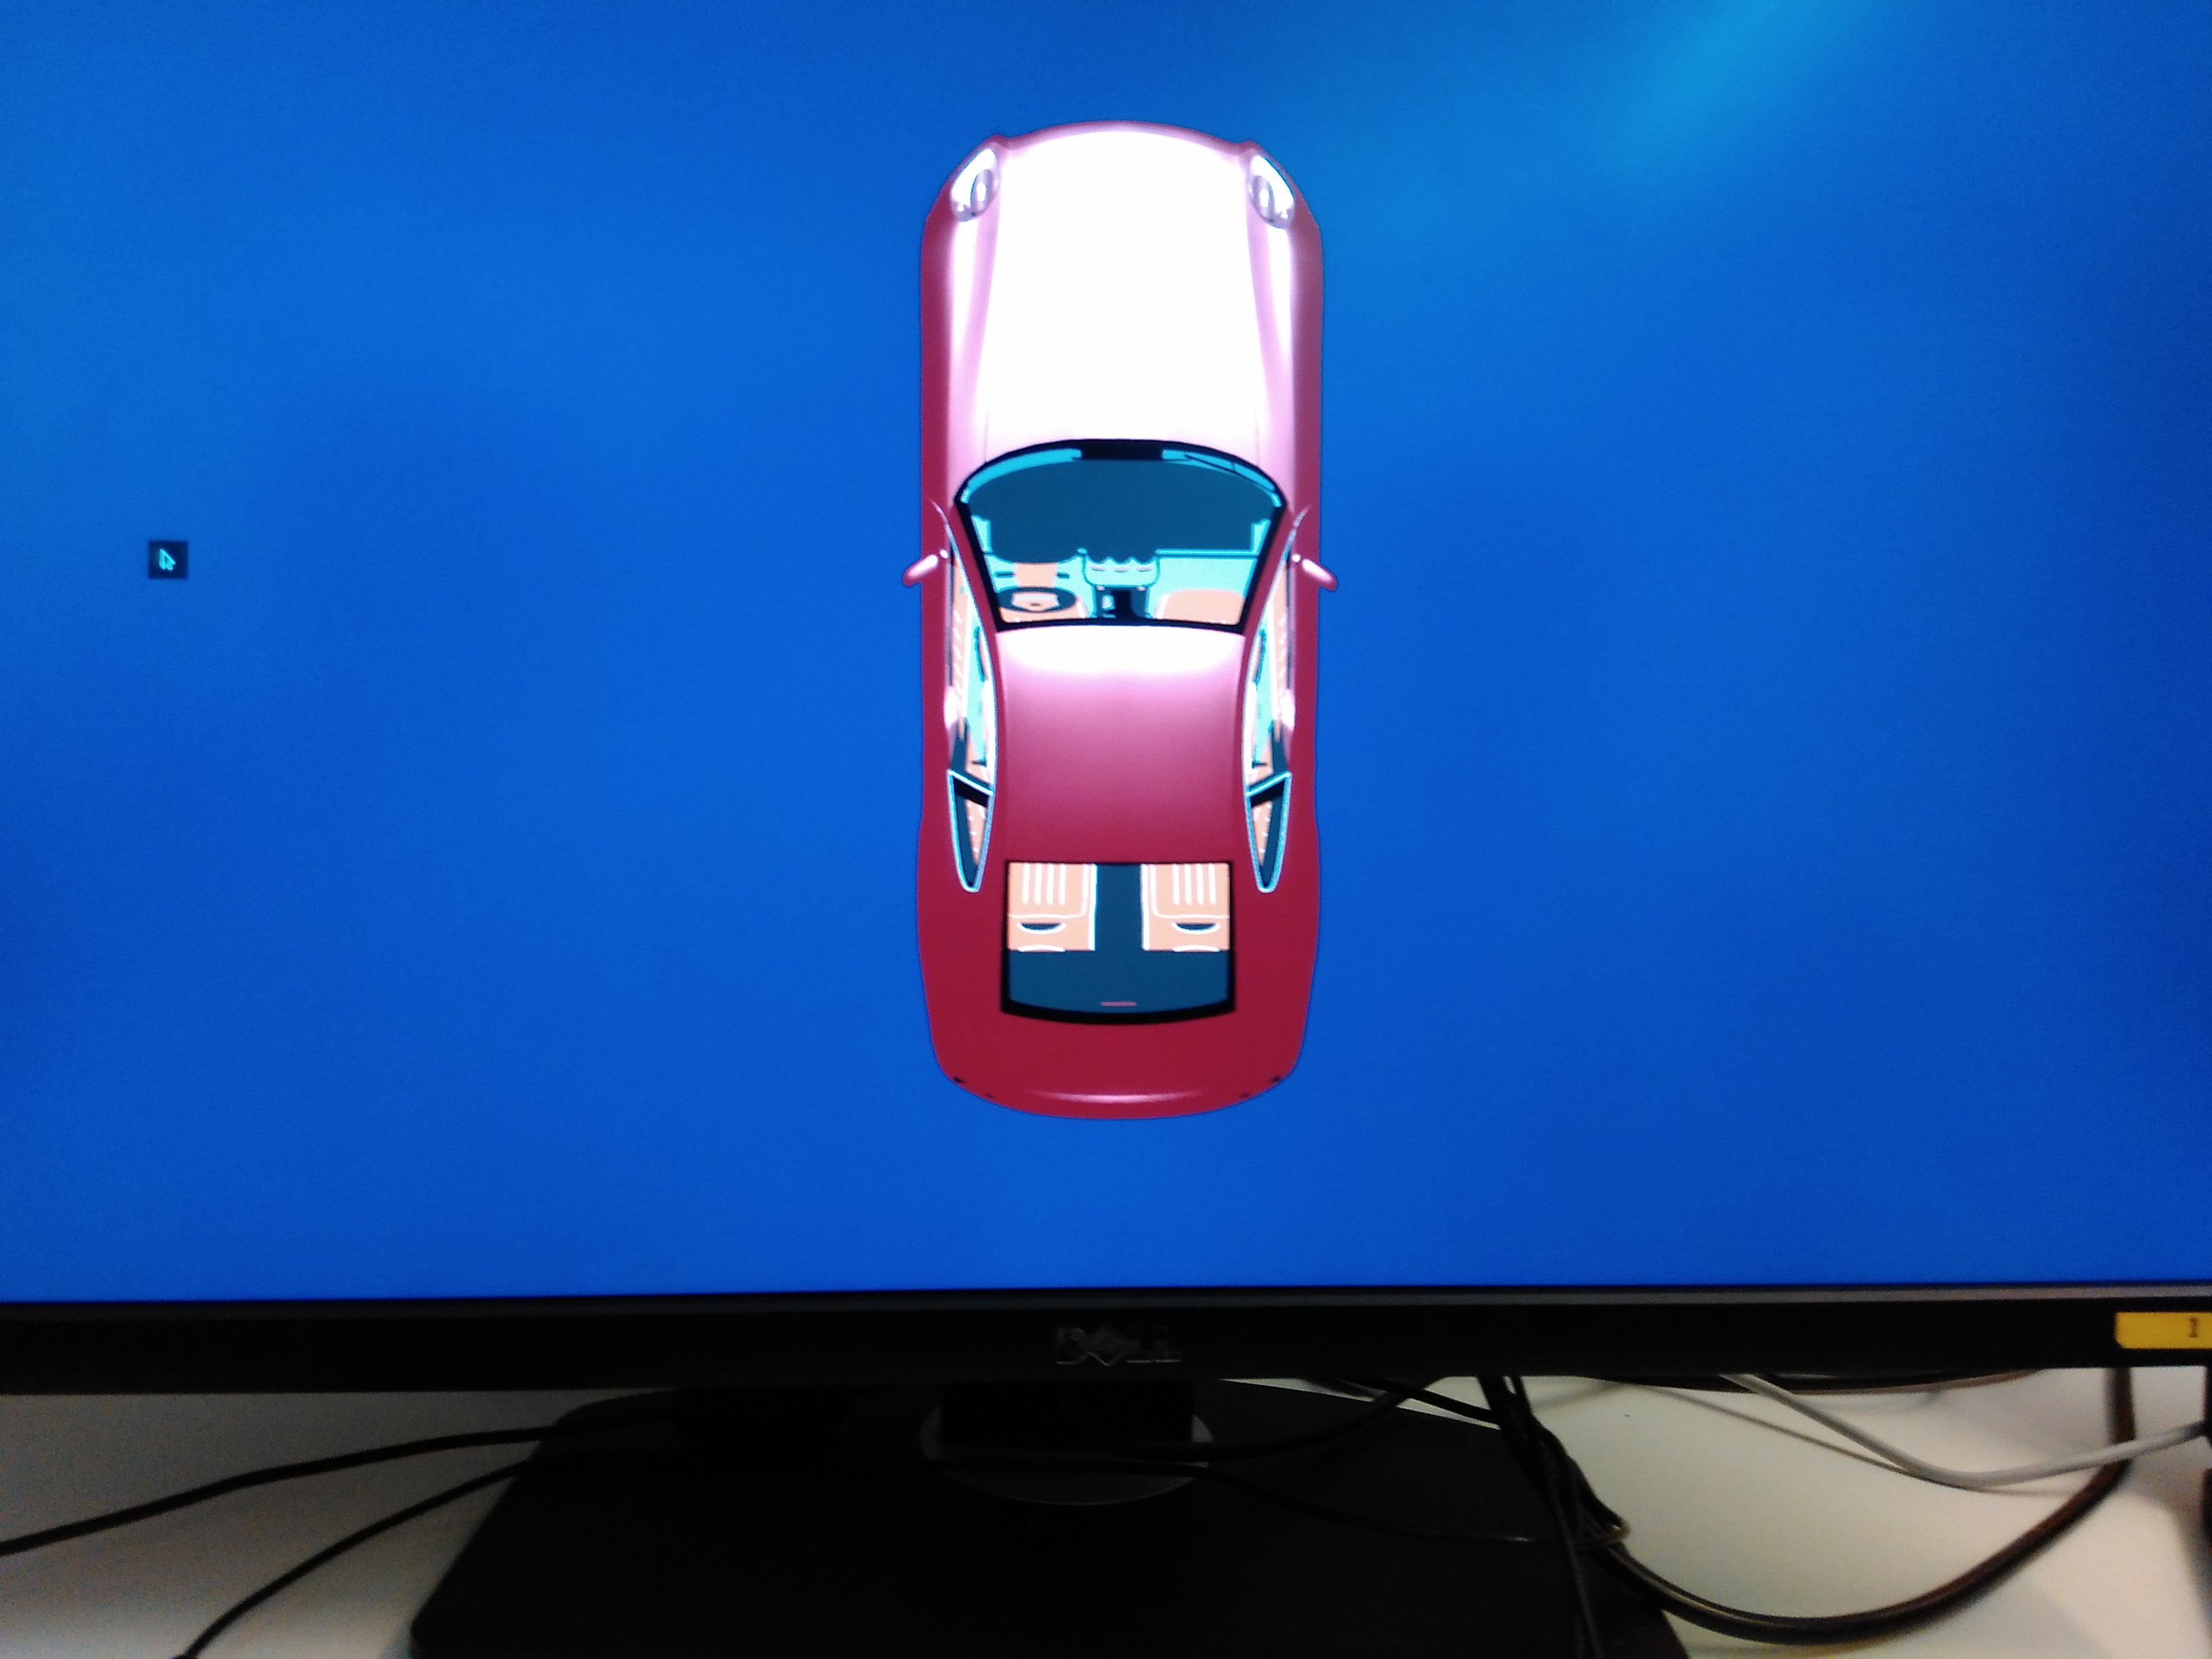
8 . To launch the OSG car demo, Select the “OSG Car Model” icon. This will launch the Car Demo as shown below.
The OSG Car Graphics is rendered by the GPU.
9. Drag the Car to any direction by holding the Mouse left button.
You should see the Car rotating on the window.
10. To minimize this window select the keys: ‘Ctrl+Alt+D’.
11. Running the Power Demo (Laptop Terminals without recommended DP Monitor):
- If you are running Power demo directly without the above demo steps then please make sure your have completed the step 5 in the above list to make sure IP address is assigned to Ethernet port. All the terminal application used in power demo are based on telnet so it is mandatory to check Ethernet port is up, assigned IP address and functional.
- Navigate to C:\ZynqUS_Demos.
- Launch the ZynqusPowerTool.exe and it will as shown below.
| Power Advantage Tool GUI |
- Note: Do not use the mouse or keyboard when the following scripts are running
At this point follow instructions from Zynq UltraScale+ MPSoC Power Advantage Tool 2017.1 to run different applications and observe Power readings on the Power Advantage tool.
What you will observe
- SMP Linux Boots up with Ubuntu Desktop on APU.
- OpenGL ES 2.0 based Qt application is launched by Linux on APU and graphics rendering is done by GPU
- OSG Application
- Multimedia Application
- Manually launch programs from the Ubuntu desktop: Soft glmark2, etc. All are Ubuntu style graphical programs.
- A fifth window shows Linux Top running. Observe that all CPU cores are being utilized. One Soft glmark2 will consume 100% of one core. This is displayed as 25% of the total system (four cores) utilization.
Power Advantage Tool Demo
- The programs launched like Xaos Fractal Zoomer are mainly useful to visualize the power consumption and setup where display port or HDMI monitor is not available and demonstrate the power advantage tool
- Other programs like Mandelbrot, Space Invaders, Matrix, and 2048. which are terminal style graphical programs can be useful to demonstare the power consumption and setup where display port monitor is not available and demonstrate the power advantage tool
- A fifth window shows Linux Top running. Observe that all CPU cores are being utilized. Mandelbrot is consuming 100% of one core. This is displayed as 25% of the total system (four cores) utilization
| Telnet based games where display is not available and what to check the Power consumption for complex games |
Appendix A: Flashing the MSP430
MSP430 Flashing: If you have received new demo software for an existing ZCU102 board, you may need to flash the onboard MSP430 to enable new features
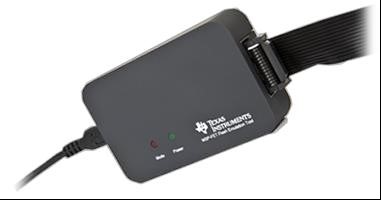
Attach the MSP-FET Flash Emulation Tool to USB and ZCU102 J92 (Near the power switch).
| MSP430 Programmer |
- Install C:\ZynqUS_Demos\tools\MSP430Drivers-1_00_00_01-windows-installer.exe (needed once).
- Run C:\ZynqUS_Demos\tools\FlashMSP430.bat with the board powered on
- Note: The version of MSP430 code can be viewed by the ZynqusPowerTool.exe app Select > About.
Appendix B : Steps to build Linux Images
Download Linux Project
Download Reference Design Zip Files ZCU102 rev 1.0 or rev D2 / production silicon from Zynq UltraScale MPSoC Base TRD 2017.1, to your local Linux machine and follow below steps:Configure PetaLinux Project
- Unzip the Targeted reference design files to get rdf0421-zcu102-base-trd-2017-1 directory.
- Change directory to PetaLinux project.
$ cd rdf0421-zcu102-base-trd-2017-1/apu/petalinux_bsp
- Install 2017.1 PetaLinux and source the Petalinux settings.sh script (see PetaLinux installation guide)
- Configure the Petalinux project with hardware built for Power Advantage Tool project 2017.1.
- The HDF file can be found in –
- Copy pl_lib_wrapper.hdf to Linux machine.
- Configure PetaLinux with this HDF.
- When petalinux-config window opens set the Root filesystem type to SD image
Image Packaging Configuration > Root filesystem type (SD card) > SD card
- Save and exit petalinux-config
Device Tree Settings
Set the device-tree file by using the same device tree setting from design module 6 reference design$ cd project-spec/meta-user/recipes-bsp/device-tree/files
$ cp zcu102-base-dm6.dtsi system-user.dtsi
- Add root partition to device tree
- Open system-conf-override.dtsi file and append options “root=/dev/mmcblk0p2 rw rootwait” to bootargs as given below
Kernel Configuration
- Change directory to PetaLinux project.
$ cd rdf0421-zcu102-base-trd-2017-1/apu/petalinux_bsp
- Open PetaLinux Kernel menu config to configure kernel
$ petalinux-config -c kernel
- Set System PM (Power Management) settings from Zynq UltraScale+ MPSoC Power Management - Linux Kernel
- Disable initramfs in kernel configuration, to load Ubuntu RootFS from SD partition.
General setup > Initial RAM file system and RAM disk (initramfs/initrd) support
- Other settings required for Input devices
Device Drivers->Input device support->Event interface
Device Drivers->Input device support->Keyboards
Device Drivers->Input device support->Mouse interface
Device Drivers->Multimedia support->Media USB Adapters->USB Video Class (UVC)
Device Drivers->Multimedia support->Cameras/video grabbers support
Device Drivers->Multimedia support->V4L platform devices
Device Drivers->USB support and enable all required classes
Device Drivers->HID support->Generic HID driver
Device Drivers->HID support->USB HID support->USB HID transport layer
Disabling the PMBUS PMIC so that power demo can use them without any issues
Device Drivers->Hardware Monitoring support->PMBus support->Maxim MAX20751
Enable the PHY settings
Device Drivers->PHY Subsystem
Device Drivers->PHY Subsystem->Xilinx ZynqMP PHY driver
Disable the PCI settings
Bus Support->PCI support’ This needs to be disabled for this version
Enable the sound related settings
Device Drivers->Sound card support’
Device Drivers->Sound card support->Advanced Linux Sound Architecture’ enabling ALSA support
Kernel hacking > Tracers > Kernel Function Tracer
- Save and exit the kernel configuration
Rootfs Configuration
- Configure the rootfs to build mali.ko for graphics applications to run on GPU. This module must be in boot partition to insert into kernel to support GPU apps
Filesystem Packages --->libs ---> libmali-xlnx
[*] libmali-xlnx
[*] libmali-xlnx-dbg
[*] libmali-xlnx-dev
- Save and exit the configuration
Build Image
- Build PetaLinux project to generate Linux and other related images
- Wait until the project builds.
- After successful build, the project images can be found in -
- Create BOOT.bin (with above created binaries)
- Copy the RPU based R5 application executable r5.elf from Power Advantage tool files (C:\zynqus\pwr\sw\r5_\Debug\r5.elf)
- Create a BIF named boot_image.bif with following contents in petalinux_bsp/images/linux
{
[pmufw_image] pmufw.elf
[destination_cpu=a53-0, bootloader] zynqmp_fsbl.elf
[destination_device=pl] pl_lib_wrapper.bit
[destination_cpu=a53-0, exception_level=el-3, trustzone] bl31.elf
[destination_cpu=r5-lockstep] r5.elf
[destination_cpu=a53-0, exception_level=el-2] u-boot.elf
}
- Create a boot image.
$ petalinux-package --boot --bif=boot_image.bif --force
- This will create image BOOT.BIN in images/Linux/
- At this point BOOT.BIN and Image.ub files can be copied to boot partition of SD card.
- Ubuntu will still remain same from the root or EXT partition of the SD Card created using prebuilt images.
© Copyright 2019 - 2022 Xilinx Inc. Privacy Policy

