TCL script to auto-generate a jtag boot script based on HDF file for Zynq Ultrascale
In this brief demo, we will show how to use the HSI to extract info from a HDF file, and how this can be used to create a XSCT file that can be used to boot over JTAG. This is ideal for when users want to preform a board bringup,
and might have to make some updates to the HDF and test on HW.
HSI introduction:
Users can see the wiki here, for an introduction into how to use the HSI to create applications from command line. Users should conult the XSCT user guide for a complete list
of API
Using HSI to create JTAG Boot script:
There is a TCL script added here (xsct_script.tcl) that will preform the following tasks based on the HDF file passed to it:
- extract board info
- extract device family
- cross check applications on target device
- create / compile applications if not already existing
- Users can add a -force
- create a jtag boot script based on the applications created
- If there is no fsbl application then the script will use the psu_init.tcl
limitations
The script has only been tested on Zynq Ultrascale, on zynqmp fsbl, pmufw, hello_world, and DRAM tests. Users would need to updated the script to add other applications
Creating the JTAG Boot script:
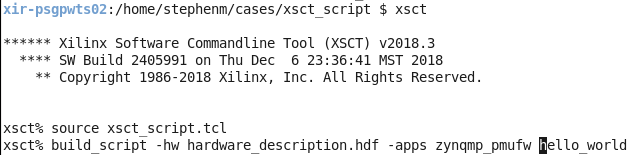
To test, download the script above, and source in XSCT 2018.3
To build:
source xsct_script.tcl
build_script -hw <path to HDF> -apps <list of apps to be built>
Users, can also pass a -force to force the script to overwrite any existing applications. For example:
build_script -hw <path to HDF> -apps <list of apps to be built> -force
If users want to easily share, or store all the file used here, then there use the package option:
build_script -hw <path to HDF> -apps <list of apps to be built> -package
This will create a folder called packaged_files, and will populate this folder with all the files used in the generated boot script.
This will create the jtag_boot.tcl file, similar to below:
# Set up connection

#if this is a remote connection. Then use something like:
#connect -url TCP:XIRSTEPHENM32:3121
#or, if local, then just use
connect

# Add the Microblaze PMU to target
targets -set -nocase -filter {name =~ "PSU"}
mwr 0xFFCA0038 0x1FF
# Download PMUFW to PMU
target -set -filter {name =~ "MicroBlaze PMU"}
dow zynqmp_pmufw/executable.elf
con

# Configuring PSU
targets -set -nocase -filter {name =~ "PSU"}
source psu_init.tcl
psu_init
after 500
psu_post_config
after 500
psu_ps_pl_reset_config
after 500
psu_ps_pl_isolation_removal
after 500

# write bootloop and release A53-0 reset
targets -set -nocase -filter {name =~ "PSU"}
mwr 0xffff0000 0x14000000
mwr 0xFD1A0104 0x380E

# Download Hello World to A53 #0
targets -set -filter {name =~ "Cortex-A53 #0"}
dow hello_world/executable.elf
con
after 500
stop
Testing the JTAG Boot script:
Follow the steps below to run the generated script here:
- Set boot mode to JTAG mode. See page 232
- Power on the Board
- Source the jtag_boot.tcl from the same directory it was created in
Creating a BOOT.BIN file:
This script also supports the creation of a BOOT.BIN file from the auto-generated boot images.
source xsct_script.tcl
build_hw -hw <path to HDF> -apps <insert apps here> -boot
For example:
source xsct_script.tcl
build_hw -hw design_1_wrapper -apps zynqmp_fsbl zynqmp_pmufw -boot
This will automatically generate an fsbl, pmufw. Then a BIF file will be generated, and bootgen will be called to create the BOOT.BIN file.
© Copyright 2019 - 2022 Xilinx Inc. Privacy Policy