Zynq UltraScale+ MPSoC Base TRD 2020.1 - Design Module 1
Table of Contents
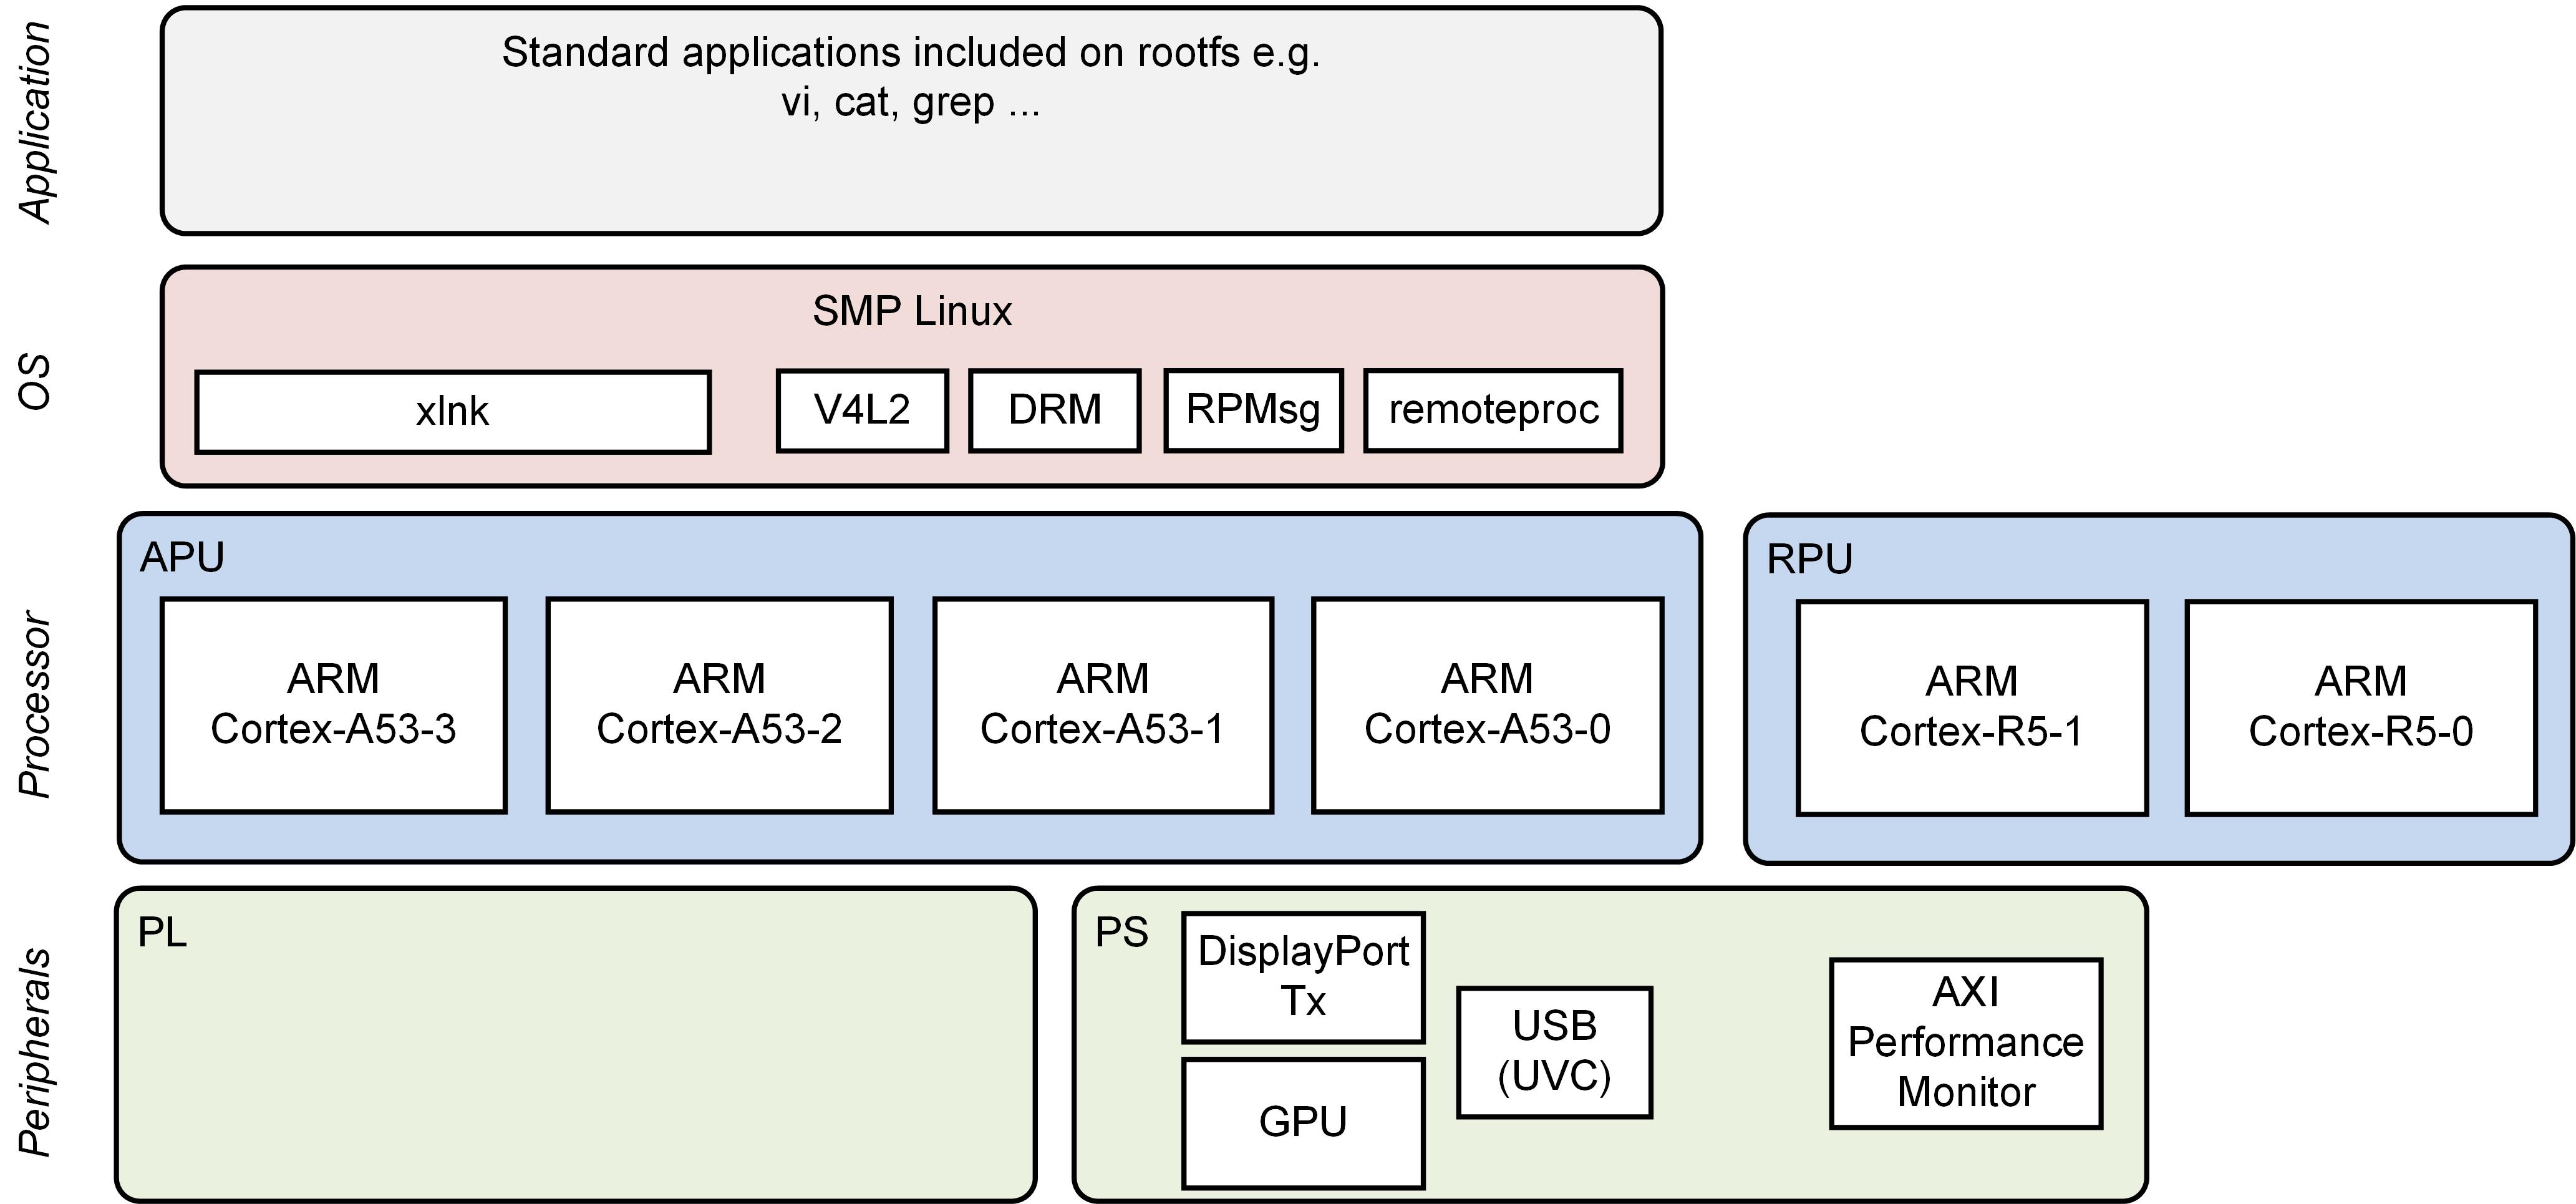
Design Overview
This design module showcases the following:
- Boot APU only
- FSBL, ATF, U-boot, PMU-FW
- APU OS: SMP Linux
- Ethernet via FTP/SCP
- Serial console via UART0
- File system via SD, USB or SATA
- Standard Linux applications on rootfs
Design Components
- petalinux_bsp
- petalinux_sdk
Build Flow Tutorials
PetaLinux SDK
This tutorial shows how to use the PetaLinux build tool to generate and install an SDK for application development in Vitis
Execute the sdk.sh script to build the sdk
% $TRD_HOME/petalinux/sdk.sh -y -d $TRD_HOME/petalinux/sdk
Petalinux BSP
This tutorial shows how to build the Linux image and boot image using the PetaLinux build tool.Create and configure the PetaLinux project.
% cd $TRD_HOME/petalinux
% petalinux-create -t project -s zcu102-prod-base-dm10.bsp -n bsp
% cd bsp
% petalinux-config --silentconfig
Select the device-tree matching design module 1 and build all Linux image components
% cd $TRD_HOME/petalinux/bsp/project-spec/meta-user/recipes-bsp/device-tree/files/
% rm system-user.dtsi
% cp zcu102-base-dm1.dtsi system-user.dtsi
% petalinux-build
Create a boot image.
% cd $TRD_HOME/petalinux/bsp/images/linux
% petalinux-package --boot --bif=../../project-spec/boot/dm1.bif --force
Copy the generated boot image and Linux image to the dm1 SD card directory.
% mkdir -p $TRD_HOME/sd_card/dm1
% cp BOOT.BIN image.ub boot.scr $TRD_HOME/sd_card/dm1
Run Flow Tutorial
- See here for board setup instructions.
- Copy all the files from the
$TRD_HOME/sd_card/dm1SD card directory to a FAT formatted SD card. - Power on the board to boot the images; make sure all power rail LEDs are lit green (Note: DS1 / FPGA_INIT_B LED remains Red as there is no bit stream to configure the FPGA).
The user can now see Linux boot on the serial console:
Starting internet superserver: inetd.
Configuring packages on first boot....
 (This may take several minutes. Please do not power off the machine.)
Running postinst /etc/rpm-postinsts/100-xserver-nodm-init...
Running postinst /etc/rpm-postinsts/101-sysvinit-inittab...
update-rc.d: /etc/init.d/run-postinsts exists during rc.d purge (continuing)
INIT: Entering runlevel: 5
Configuring network interfaces...
udhcpc (v1.24.1) started
Sending select for 172.19.0.177...
Lease of 172.19.0.177 obtained, lease time 1800
/etc/udhcpc.d/50default: Adding DNS 172.19.128.1
/etc/udhcpc.d/50default: Adding DNS 172.19.129.1
/etc/udhcpc.d/50default: Adding DNS 172.19.128.3
done.
Starting system message bus: dbus.
Starting Dropbear SSH server: dropbear.
Starting bluetooth: bluetoothd.
Starting syslogd/klogd: done
 * Starting Avahi mDNS/DNS-SD Daemon: avahi-daemon                       [ ok ]
Starting Telephony daemon
Starting tcf-agent: OK
Setting console loglevel to 0 ...
root@xilinx:~#
References
- How to mount a USB3.0 or SATA hard drive:
http://www.wiki.xilinx.com/SATA
http://www.wiki.xilinx.com/Zynq+Ultrascale+MPSOC+Linux+USB+device+driver (under host mode)
Next Steps
- Continue with Design Module 2.
- Return to the Design Tutorials Overview.
© Copyright 2019 - 2022 Xilinx Inc. Privacy Policy