Zynq UltraScale MPSoC Base TRD 2016.3 - Design Module 4
Zynq UltraScale MPSoC Base TRD 2016.3 - Design Module 4
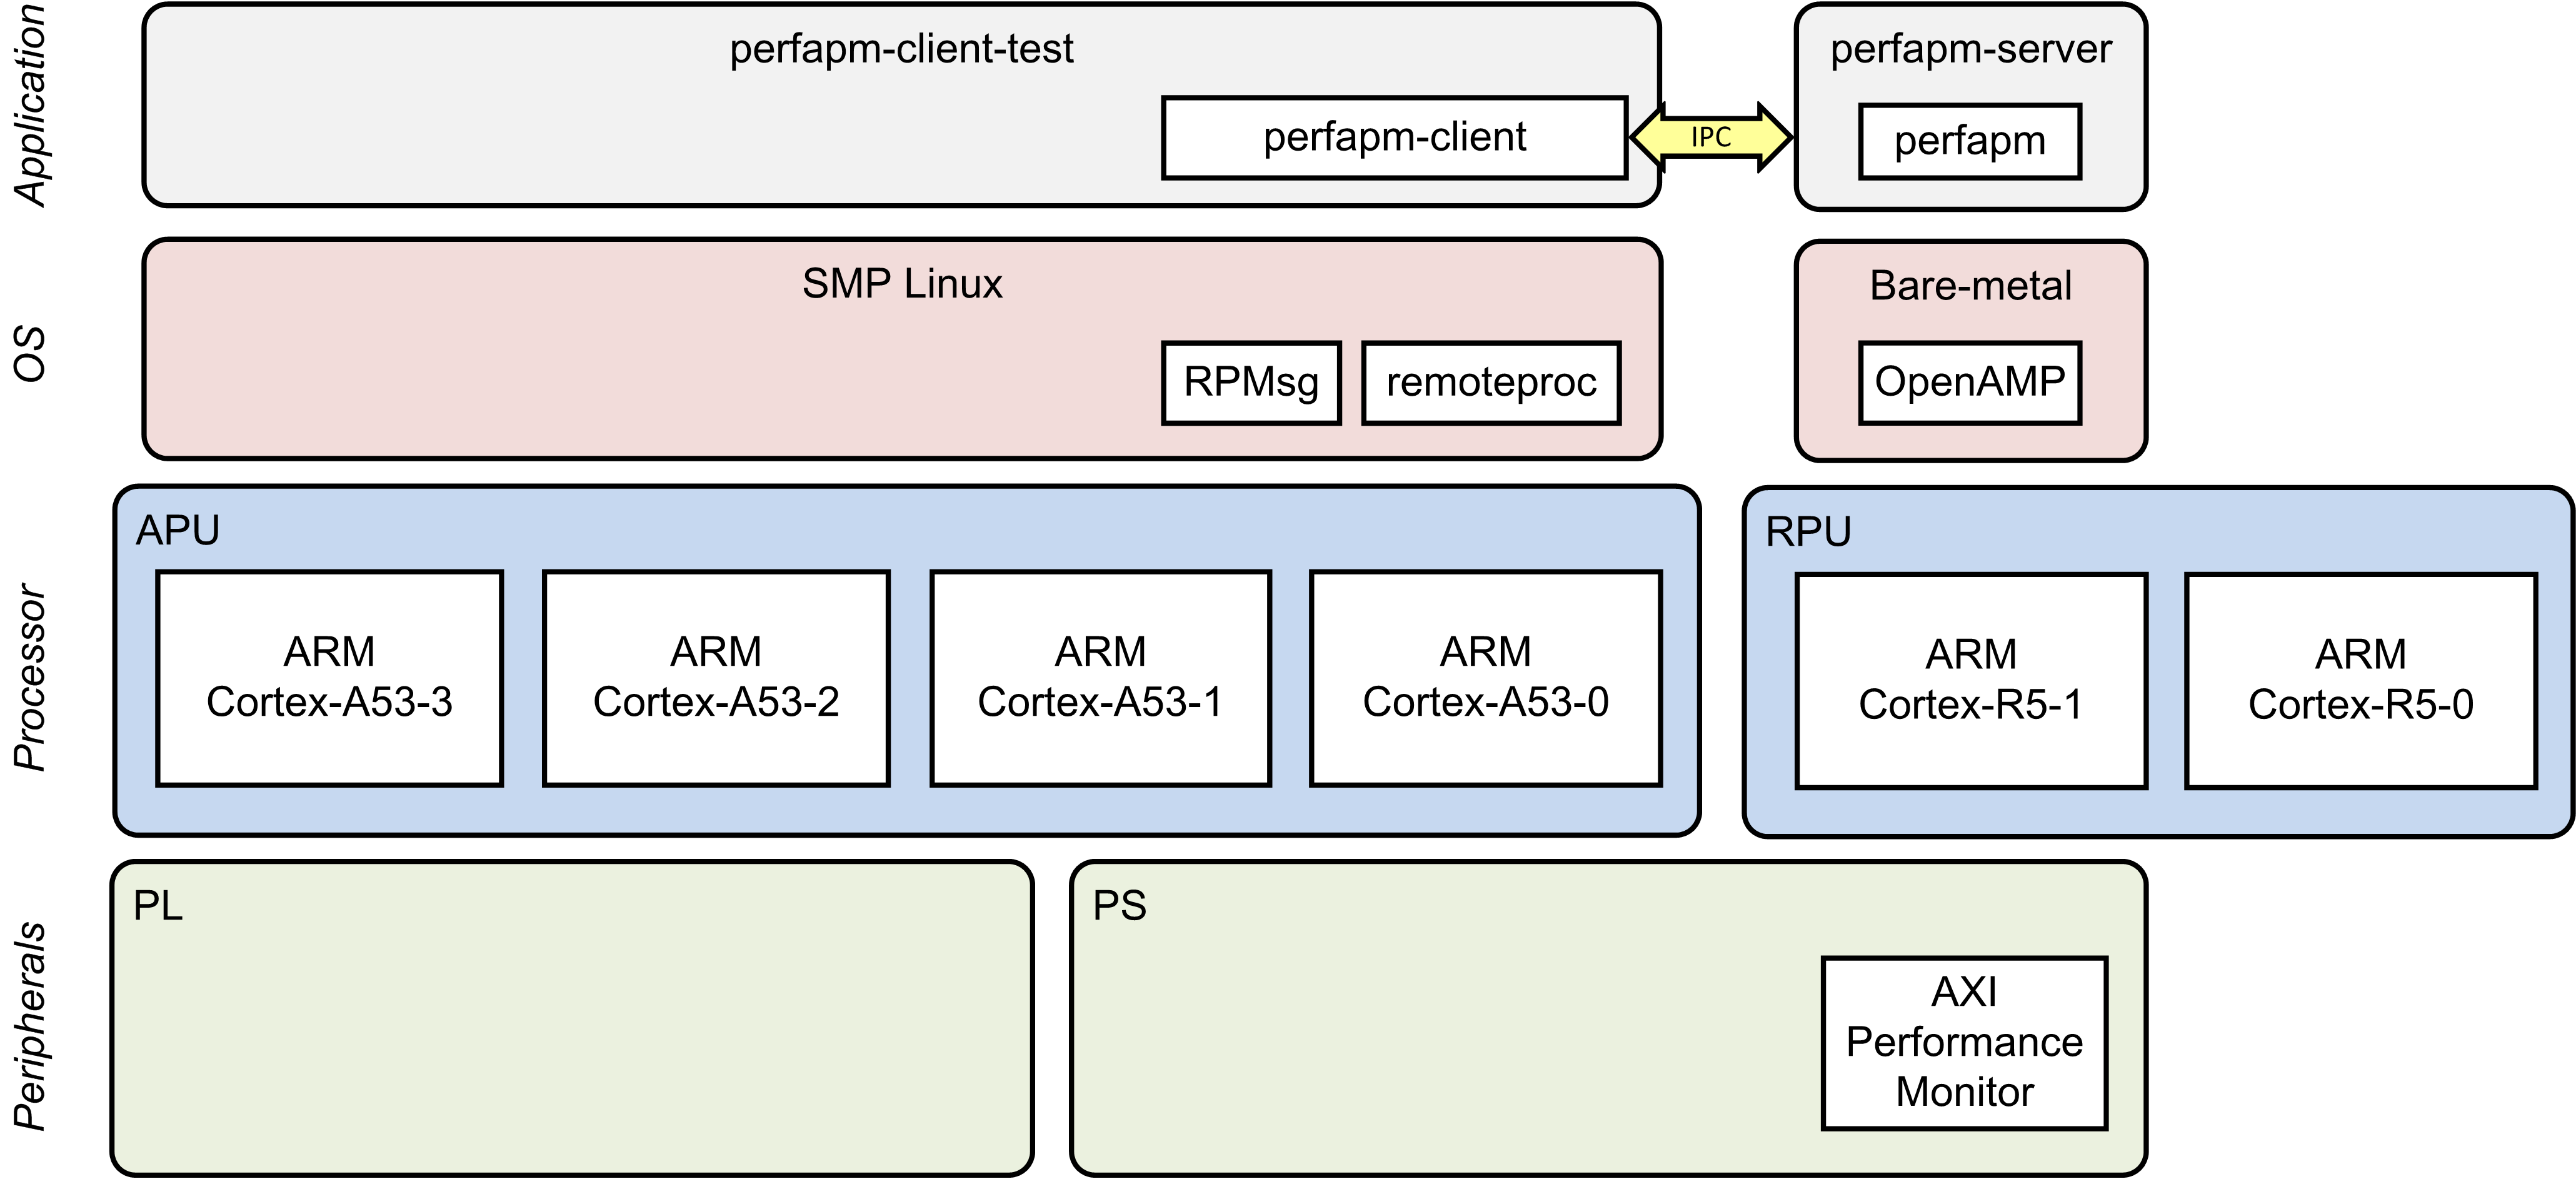
Design Overview
This module demonstrates:
- Boot RPU1 from APU master via remoteproc
- Inter Process Communication (IPC)
- APU master: RPMsg
- RPU1 remote: OpenAMP
- RPU1 Bare-metal application (server)
- Reads performance counters and sends to APU
- APU Linux application (client)
- Receives performance counters from RPU1 and prints to UART0
Design Components
This module requires the following components:
- pmu_fw
- petalinux_bsp
- zynqmp_fsbl
- bl31
- u-boot
- kernel
- device tree
- rootfs
- perfapm-server + perfapm
- perfapm-client-test + perfapm-client
Build Flow Tutorials
PMU Firmware
Please refer to design module 1 - PMU firmware for instructions or skip this step if you have built the PMU firmware in a previous module.
Perfapm-server Application
The performance monitor server application perfapm-server is a bare-metal application that executes on RPU-1. The firmware binary is loaded by the APU master at the end of the Linux boot process. RPU-1 and APU establish a communication channel using the OpenAMP framework. RPU-1 gathers performance data like memory throughput from the PS AXI performance monitor (APM) units and sends it across to the APU where the data is received by the perfapm-client library and then visualized on a plotted graph.
Create a new XSDK workspace.
% cd $TRD_HOME/rpu1/perfapm-server
% xsdk -workspace . &&
- Click 'Import Project' from the welcome screen, browse to the current working directory and make sure the perfapm, perfapm-server, perfapm_bsp, and zcu102_base_trd_wrapper_hw_platform_0 projects are selected. Click 'Finish'.
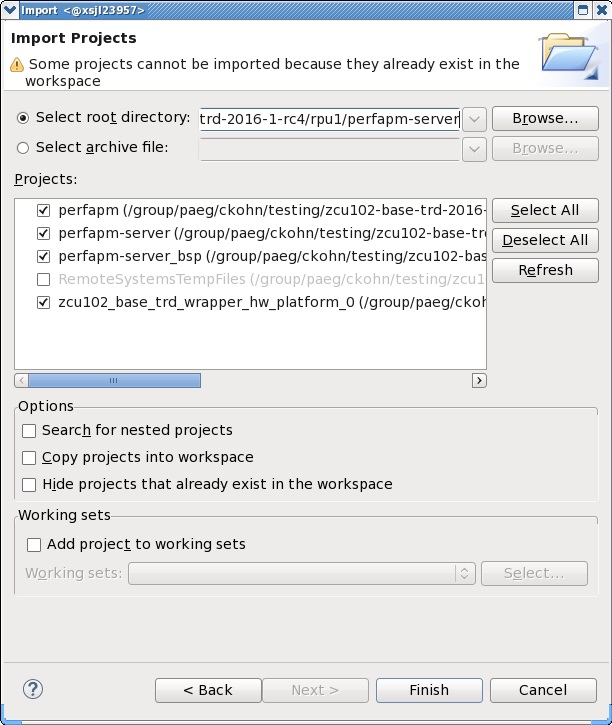
- Right-click on the perfapm-server project and select 'Build Project'.
Copy the generated perfapm-server executable into the PetaLinux BSP.
% cp perfapm-server/Debug/perfapm-server.elf $TRD_HOME/apu/petalinux_bsp/components/apps/perfapm_server/data/
PetaLinux BSP
This tutorial shows how to build the Linux image and boot image using the PetaLinux build tool.
The petalinux-config step can be skipped if this was already done in a previous module
% cd $TRD_HOME/apu/petalinux_bsp
% petalinux-config --get-hw-description=./hw-description --oldconfig
Select the device-tree matching design module 4 and build all Linux image components. If you have run petalinux-build in a previous module, the build step will be incremental.
% cd subsystems/linux/configs/device-tree
% cp system-dm4.dts system-top.dts
% petalinux-build
% cd -
Create a boot image
% cd images/linux
% petalinux-package --boot --bif=dm4.bif --force
Copy the generated images to the dm4 SD card directory
% mkdir -p $TRD_HOME/images/dm4
% cp BOOT.BIN image.ub $TRD_HOME/images/dm4/
Copy the file autostart.sh from the pre-built dm9 SD card directory.
% cp $TRD_HOME/images/dm9/autostart.sh $TRD_HOME/images/dm4
Perfapm-client-test Application
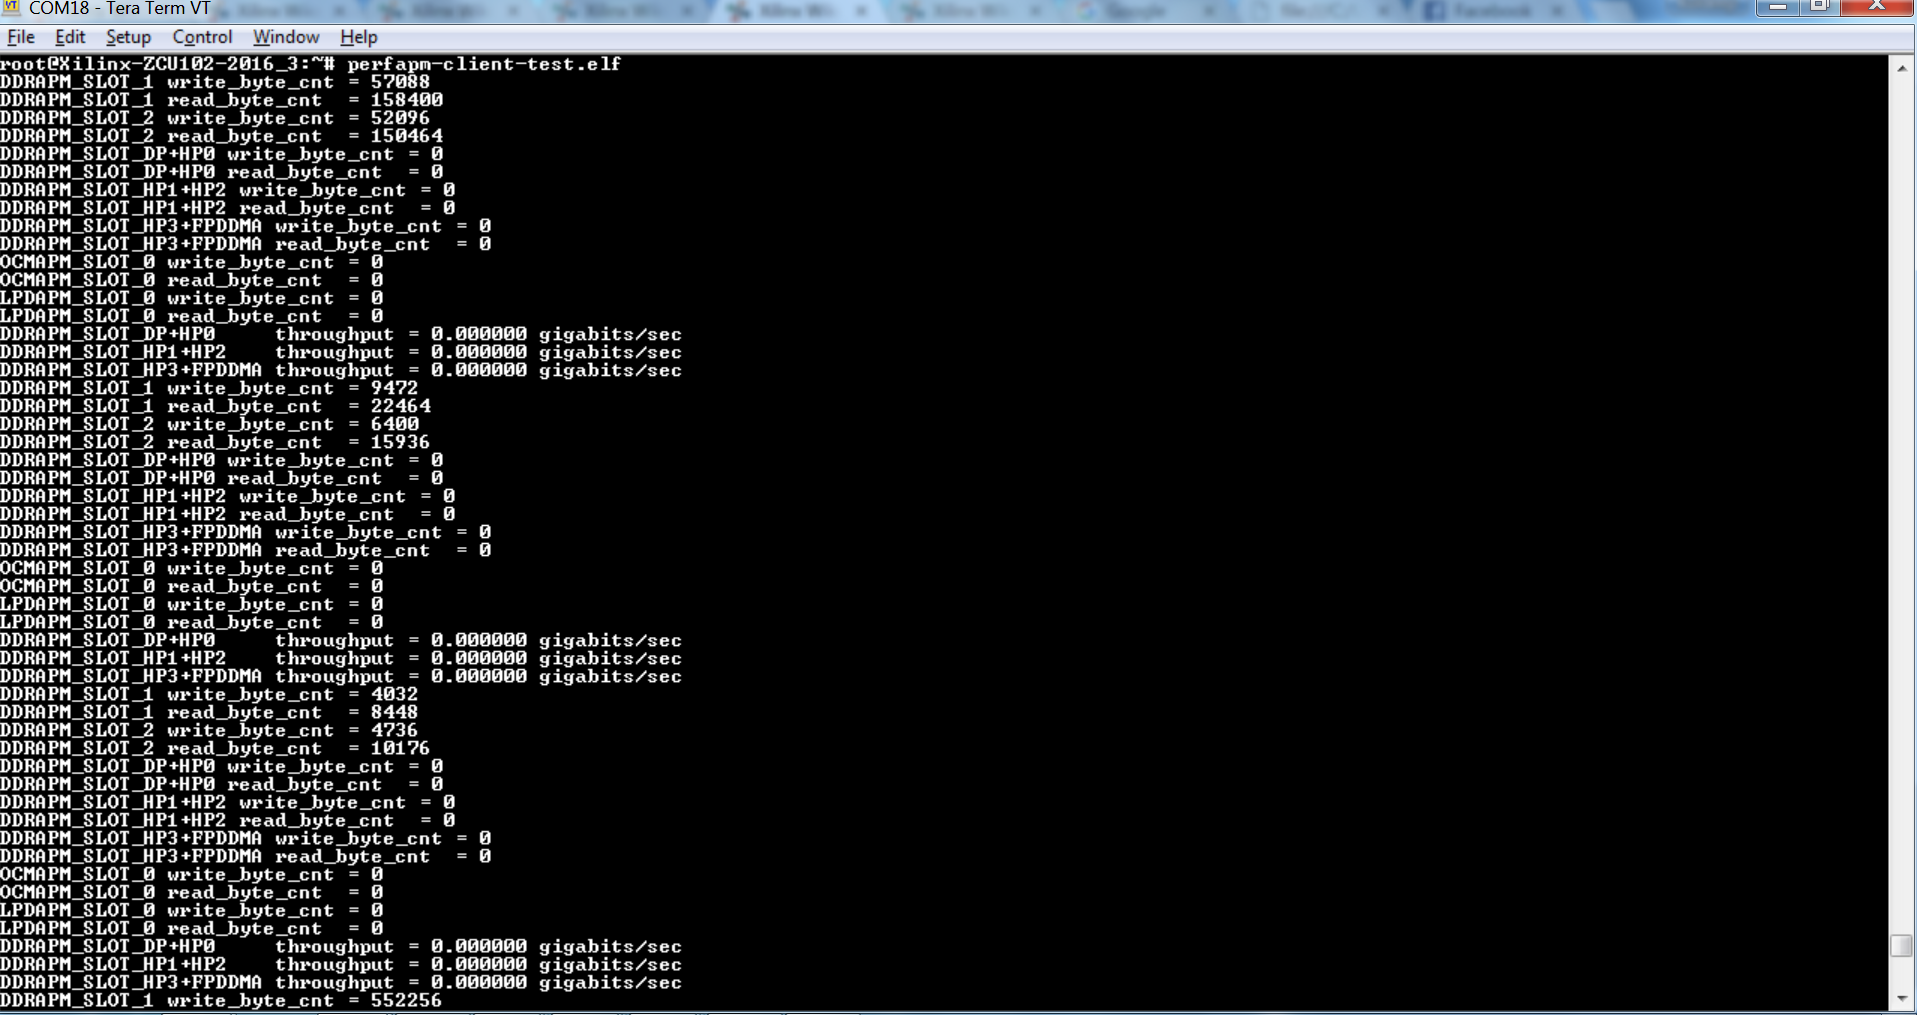
The application receives performance counter values from RPU-1 and prints them to UART-0.
Create a new XSDK workspace.
% cd $TRD_HOME/apu/perfapm-client
% xsdk -workspace . &&
- Click 'Import Project' from the welcome screen, browse to the current working directory and make sure the perfapm-client and perfapm-client-test projects are selected. Click 'Finish'.
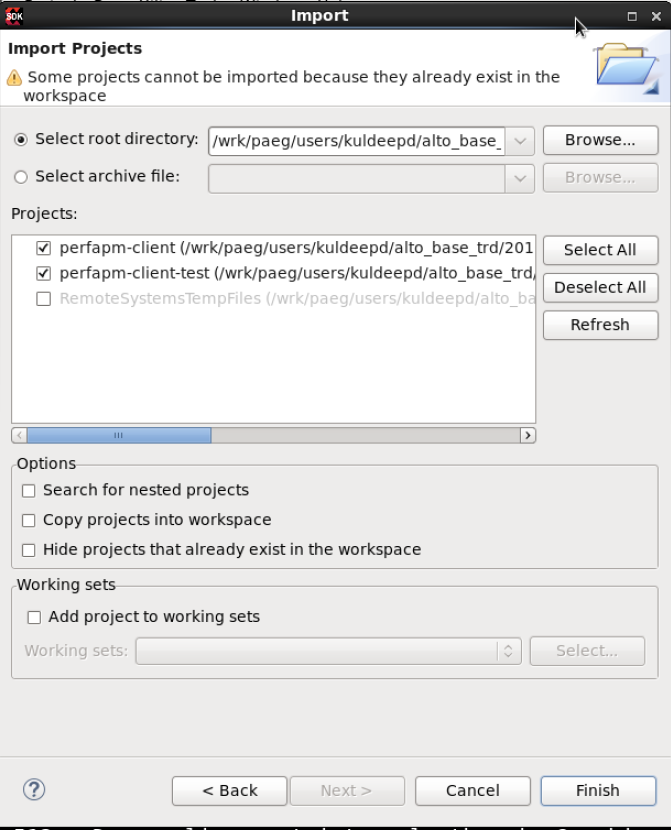
- Right-click on the perfapm-client-test project and select 'Build Project'.
Copy the generated perfapm-client-test executable to the dm4 SD card directory.
% mkdir -p $TRD_HOME/images/dm4/bin
% cp $TRD_HOME/apu/perfapm-client/perfapm-client-test/Debug/perfapm-client-test.elf $TRD_HOME/images/dm4/bin
Run Flow Tutorial
- See here for board setup instructions.
- Copy all the files from the $TRD_HOME/images/dm4 SD card directory to a FAT formatted SD card.
- Power on the board to boot the images; make sure all power rail LEDs are lit green.
- After Linux is booted, enter Username and Password as "root"
Run the perfapm-client-test application:
% perfapm-client-test.elf
- Below is a screenshot of the application output on the serial console:
© Copyright 2019 - 2022 Xilinx Inc. Privacy Policy