This tutorial explains procedure to measure transition times and respected power values when either PS or PL suspends or wake up. By following below procedure, user can see/measure the suspend/wake-up time and power. These procedures are for 2021.1 releases.
Table of Contents
Different power states and measure transition time
Workloads on each domain
PLD: Petalinux prebuilt design which does not contain any specific logic
FPD: APU is running Linux script which controls PLD on/off and handshakes RPU for self suspend/off/resume
LPD: RPU is running baremetal application which controls FPD domain on/off
Prebuilt binaries for reference
For ZynqMP
Petalinux 2020.2 generated images (including other intermediate files):
ZCU102 rev1.0: zcu102.tar
Linux log: zynqmp-linux-log.txt
rpu source: rpu_src.tar
For Versal
Petalinux 2020.2 generated images (including other intermediate files):
VCK190 Prod: vck190-prod.tar
Linux log: vck190-linux-log.txt
rpu source: rpu_src.tar
To generate binaries on your own please refer below steps for generating required images/binaries.
Generating required images/binaries
Steps to build Linux images
Create petalinux project
Run below commands from bash terminal to create petalinux project.
source <petalinux-install-dir>/settings.sh
petalinux-create -t project -s <xilinx zcu102/vck190 BSP location>
cd <petalinux_proj_dir>
Build petalinux
For Versal:
Configure petalinux to use custom XSA (provided in prebuilt section) and enable the custom user application
petalinux-config --silentconfig --get-hw-description=<path to xsa directory>
petalinux-create -t apps --template install --name myapp --enable
Use below command to apply patch for plm (patch file is provided in prebuilt section)
mkdir -p project-spec/meta-user/recipes-bsp/plm-firmware/files/
cp plm.patch project-spec/meta-user/recipes-bsp/plm-firmware/files/
vim project-spec/meta-user/recipes-bsp/plm-firmware/plm-firmware_%.bbappend
Add below content to plm-firmware_%.bbappend file
FILESEXTRAPATHS_prepend := "${THISDIR}/files:"

SRC_URI += "file://plm.patch \
            "
copy apu_script.shand another PL bitfiles (partial.pdi, partial.dtbo, greybox.pdi and greybox.dtbo) to myapp (All files provided in prebuilt section)
cd <petalinux_proj_dir>/project-spec/meta-user/recipes-apps/myapp/files/
cp <dow_dir>/apu_script.sh <dow_dir>/partial.pdi <dow_dir>/partial.dtbo <dow_dir>/greybox.pdi <dow_dir>/greybox.dtbo .
Update myapp.bb (located at project-spec/meta-user/recipes-apps/myapp) as shown below
#
# This file is the myapp recipe.
#

SUMMARY = "Simple myapp application"
SECTION = "PETALINUX/apps"
LICENSE = "MIT"
LIC_FILES_CHKSUM = "file://${COMMON_LICENSE_DIR}/MIT;md5=0835ade698e0bcf8506ecda2f7b4f302"
FILESEXTRAPATHS_prepend := "${THISDIR}/files:"

SRC_URI = "file://myapp \
        file://partial.pdi \
        file://partial.dtbo \
        file://greybox.pdi \
        file://greybox.dtbo \
        file://apu_script.sh \
        "

S = "${WORKDIR}"
CFLAGS_prepend = "-I ${S}/include"

do_install() {
        echo "D: ${D}"
        echo "S: ${S}"
        install -d ${D}${bindir}
        install -m 0755 ${S}/myapp ${D}${bindir}
        install -m 0755 ${S}/partial.pdi ${D}${bindir}
        install -m 0755 ${S}/partial.dtbo ${D}${bindir}
        install -m 0755 ${S}/greybox.pdi ${D}${bindir}
        install -m 0755 ${S}/greybox.dtbo ${D}${bindir}
        install -m 0755 ${S}/apu_script.sh ${D}${bindir}
}
Replace rootfs_configfile (provided in prebuilt section) with <petalinux-proj-dir>/project-spec/configs/rootfs_config file
Build the petalinux as shown below
petalinux-build
For ZynqMP:
Use below command to create and enable custom petalinux application
petalinux-config --silentconfig
petalinux-create -t apps --template install --name myapp --enable
Copy apu_script.sh (provided in prebuilt section) to myapp folder
cp <dow_dir>/apu_script.sh <petalinux_proj_dir>/project-spec/meta-user/recipes-apps/myapp/files/
Update myapp.bb (located at project-spec/meta-user/recipes-apps/myapp/) as shown below
#
# This file is the myapp recipe.
#

SUMMARY = "Simple myapp application"
SECTION = "PETALINUX/apps"
LICENSE = "MIT"
LIC_FILES_CHKSUM = "file://${COMMON_LICENSE_DIR}/MIT;md5=0835ade698e0bcf8506ecda2f7b4f302"
FILESEXTRAPATHS_prepend := "${THISDIR}/files:"

SRC_URI = "file://myapp \
        file://apu_script.sh \
        "

S = "${WORKDIR}"
CFLAGS_prepend = "-I ${S}/include"

do_install() {
        echo "D: ${D}"
        echo "S: ${S}"
        install -d ${D}${bindir}
        install -m 0755 ${S}/myapp ${D}${bindir}
        install -m 0755 ${S}/apu_script.sh ${D}${bindir}
}
Enable ECC in FSBL code:
Create directory <plnx-proj-root>/project-spec/meta-user/recipes-bsp/fsbl/files/ (if not present)
Copy patch file to <plnx-proj-root>/project-spec/meta-user/recipes-bsp/fsbl/files/ (Patch attached in prebuilt section)
Open file <plnx-proj-root>/project-spec/meta-user/recipes-bsp/fsbl/fsbl-firmware_%.bbappend (create if not present)
Add below lines in file:
FILESEXTRAPATHS_prepend := "${THISDIR}/files:"
SRC_URI += " file://ecc_fsbl.patch"
Now build petalinux using below command
petalinux-build
Steps to build RPU baremetal
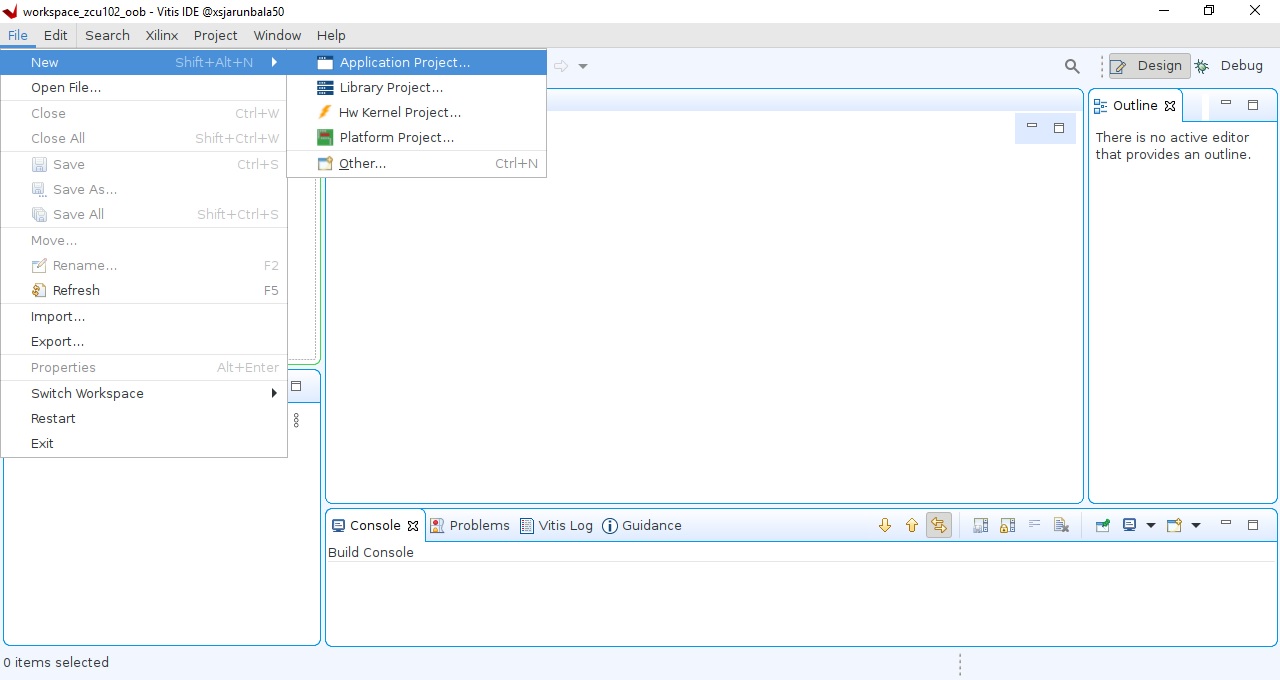
Open Vitis and start with empty application as shown below
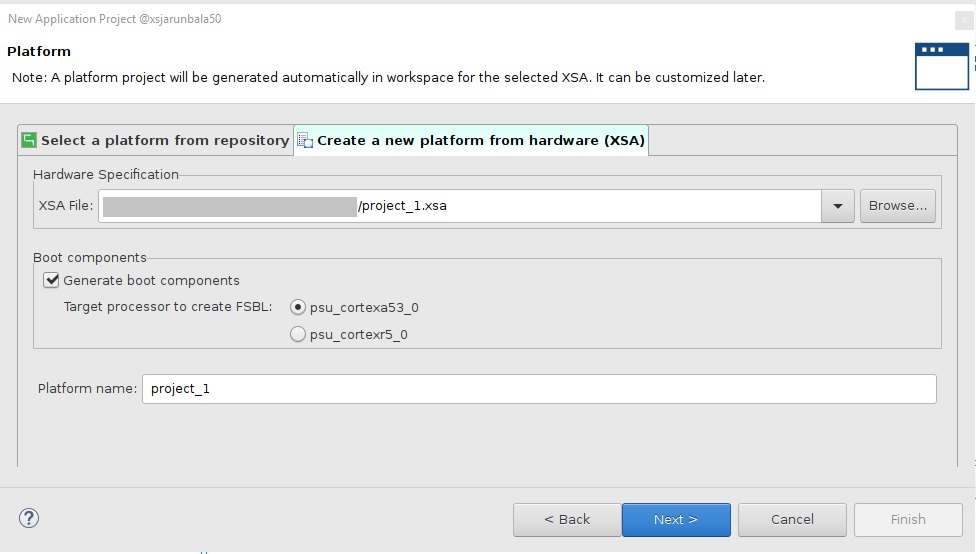
Select “create a new hardware platform“ and select petalinux prebuilt XSA file as shown below (uncheck generate boot components option in case of ZynqMP)
Select target processor as "psu_cortexr5_0" and give the application name (ex. rpu_app)
Click next and leave all options unchanged

Click next and select "Empty Application" from the template list
Click finish which will show the project window as shown below
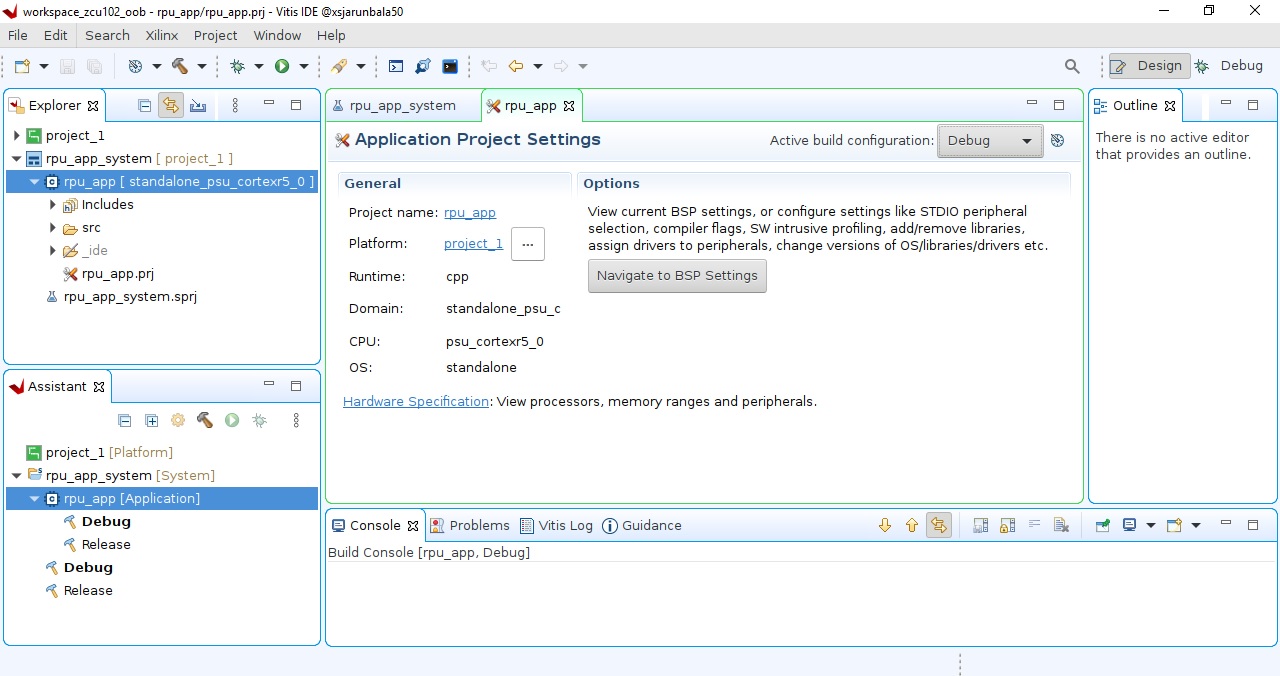
Now click on "Navigate to BSP" settings and click "Modify BSP settings"
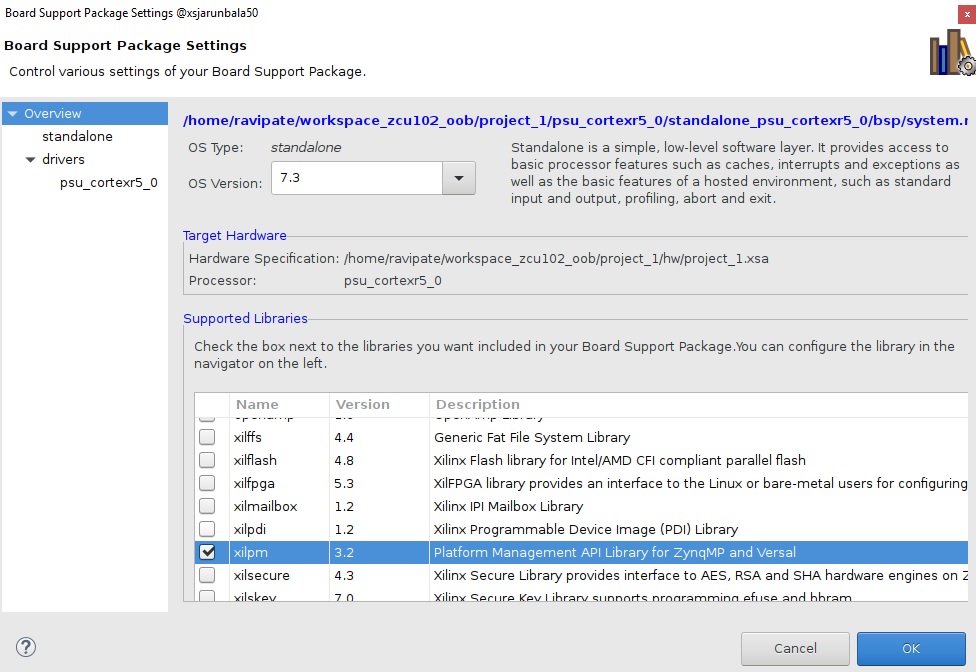
Now select the "xilpm" library option as shown below.
Select psu_cortexr5_0 and add “-DDEBUG_MODE“ in extra_compiler_flags as shown below and click ok.

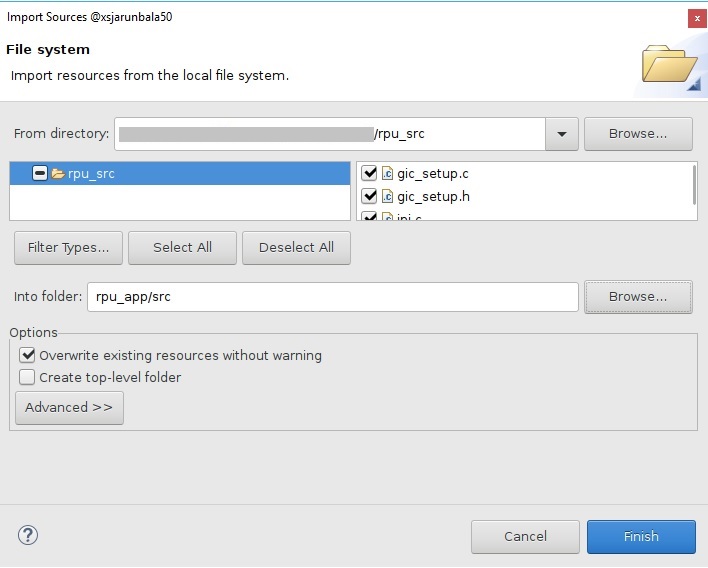
Right click on "rpu_app" from explorer and select "import sources" option
Download rpu_src.tar and extract it to local folder
Select the source and target path as shown below and click ok
Right click on "rpu_app" from explorer and select "build project"
Steps to build BOOT.BIN
For ZynqMP
Create a new folder and copy pmufw.elf, zynqmp_fsbl.elf, bl31.elf, u-boot.elf and system.bit from petalinux generated images (present at <plnx-proj-root>/images/linux/).
Create RPU_0 application rpu_app.elf from Vitis as described in above section and copy rpu_app.elf into same new folder.
Create boot.bif file in same folder as shown below.
the_ROM_image:
{
        [bootloader, destination_cpu=a53-0] zynqmp_fsbl.elf
        [pmufw_image] pmufw.elf
        [destination_device = pl] system.bit
        [destination_cpu=r5-0] rpu_app.elf
        [destination_cpu=a53-0,exception_level=el-3,trustzone] bl31.elf
        [destination_cpu=a53-0, load=0x00100000] system.dtb
        [destination_cpu=a53-0,exception_level=el-2] u-boot.elf
}
Create BOOT.BIN file using following command.
bootgen -arch zynqmp -image boot.bif -w -o BOOT.BIN
For Versal
Create a new folder and copy plm.elf, psmfw.elf, bl31.elf, u-boot.elf and system.dtb from petalinux generated images (present at <plnx-proj-root>/images/linux/).
Copy CDO files (pmc_data.cdo, lpd_data.cdo, fpd_data.cdo, top_wrapper.rnpi, topology_xcvc1902.v3.cdo, topology_board.cdo) present in prebuilt section to same new folder.
Create RPU_0 application rpu_app.elf from Vitis as described in above section and copy rpu_app.elf into same new folder.
Copy boot.bif (present in prebuilt section) to same folder and use below command to create BOOT.BIN
bootgen -arch versal -image boot.bif -w -o BOOT.BIN
Steps to run the images
Boot Linux with RPU
Create a boot partition in SD card and copy BOOT.BIN, Image, system.dtb and rootfs.cpio.gz.u-boot file (present at <plnx-proj-root>/images/linux/) to boot partition.
Boot the board (ZCU102 in case of ZynqMP and VCK190 in case of Versal) in SD boot mode.
Boot the linux from u-boot console using fatload command
fatload mmc 0 0x4000000 system.dtb; fatload mmc 0 0x80000 Image; fatload mmc 0 6000000 rootfs.cpio.gz.u-boot
booti 80000 6000000 4000000
Measure the power and transition times
Use Power Advantage tool for measuring power values.
Start the demo
Copy apu_script.sh file from /usr/bin/ and run the script as shown below (For Versal only: also copy partial.pdi, partial.dtbo, greybox.pdi and greybox.dtbo form /usr/bin/ to same folder)
root@xilinx-zcu102-2021_1:~# cp /usr/bin/apu_script.sh .
root@xilinx-zcu102-2021_1:~# ./apu_script.sh
Note: User can open the script and edit the below parameters as per his convenient before running script
DelayVal : Amount of delay between 2 power modes (should be between 10 to 255 seconds)
IterationCnt: Total looping count to measure different APU power states latency (should be between 0 to 5Triggering the script starts the demo and it will switch the transition from one state to next dimer state after specific amount of time (default 30 seconds)
User can measure the power readings using power advantage tool between intervals
Latency measurement values is shown as per below window
Request Suspend Latency of Linux in micro seconds: Min: 225031, Max: 225031, Avg: 225031
FPD OFF Latency in micro seconds: Min: 2799, Max: 2799, Avg: 2799
FPD ON Latency in micro seconds: Min: 123980, Max: 123980, Avg: 123980
Wakeup Latency of APU0 in micro seconds: Min: 4204, Max: 4204, Avg: 4204
Wakeup Latency of Linux in micro seconds: Min: 2442820, Max: 2442820, Avg: 2442820
Latency Measurement Done
Once system reaches to lowest power state, it will starts reverting back to original (normal) power state as shown below
******************* RPU Suspended, APU suspended with FPD OFF *******************
(1 seconds delay)
XPm_ReleaseNode(21, 0, 0, 0, 0, 0)
XPm_ClientSuspendFinalize: Disabling RPU L▒RPU0: Running in Split mode
XPm_RequestNode(21, 1, 0, 2, 0, 0)
RESUMED
RtcIrqHandler RTC interrupt received
Alarm generated.
*********************** RPU ON, APU suspended with FPD OFF **********************
XPm_RequestNode(1C, 1, 0, 2, 0, 0)
XPm_NotifyCb (10, 1, 1)
*********************** RPU ON, APU suspended with FPD ON ***********************
At the end, it will show below completion message (Full log is attached to pre-built images section)
*********************** APU, RPU full load, PL is OFF **********************
Delay 30 seconds

Latency to Power ON PL domain
Powering up PL
XPm_RequestNode(45, 1, 0, 2, 0, 0)
*********************** APU, RPU and PL in high power ***************************
Delay 30 seconds

PL ON Latency in micro seconds: 58751
Demo application is completed successfully!
User can re-trigger the apu_script.sh to re-run the demo again.