Zynq-7000 AP SoC USB Mass Storage Device Class Design Example Techtip
Document History
Date
|
Version
|
Author
|
Description of Revisions
|
4/15/2015
|
0.1
|
Rajesh Gugulothu & Upender Cherukupally
|
Release 1.0
|
|
|
|
|
Summary
The Zynq-7000 AP SoC has two USB2.0 On-The-Go (OTG) controllers in the Processing System. The OTG controllers can act as USB host or USB Device or dynamically changing roles between host and device. There are four primary types of communication defined by the USB protocol based on which any required application can be built without changing the firmware or underlying hardware for different applications. These transfers types are Control Transfer, Bulk Transfer, Isochronous transfer and Interrupt transfer. These transfers types are the key abstractions for different applications development on USB with same hardware. The OTG controllers in Zynq-7000 AP SoC supports all the four types of transfers. This techtip explains how to enable all the configuration options, step by step procedure to use the Zynq-7000 AP SoC OTG controller in device mode and make use of bulk transfer type for a mass storage device abstraction using the USB. For application specific commands there are specific commands defined in the form of USB classes. The mass storage device class commands are explained in the Mass storage Device Class reference.
For complete specifications of USB protocol and class specific specifications refer:
http://www.usb.org/developers/docs/
This design example covers:
- The USB mass storage class design example internals
- How to get and configure all the Zynq-7000 AP SoC Linux kernel and dependent files for the USB mass storage class reference
- Bare metal mass storage solution on Zynq-7000 AP SoC
- Demonstrating the Zynq-7000 AP SoC USB mass storage functionality with Windows as well as Linux host machine
Implementation
Implementation Details
|
Design Type
|
PS only
|
SW Type
|
Zynq-7000 AP SoC Linux & Zynq-7000 AP SoC Baremetal
|
CPUs
|
2 ARM Cortex-A9: SMP Linux and Baremetal configurations
|
PS Features
|
- DDR3
- Cache
- L1 and L2 Cache
- OCM
- Generic Interrupt Controller
- USB 2.0 OTG Controller
|
Boards/Tools
|
ZC702 kit
|
Xilinx Tools Version
|
SDK 2015.1 or latest
|
Other Details
|
-
|
Design Overview:
The design explained in the below steps shows how to develop a USB system and building corresponding executable files for configuring Zynq-7000 AP SoC USB 2.0 OTG controller as a mass storage class device. This design shows both bare metal software running on the Zynq-7000 target as well as Linux running on Zynq-7000 AP SoC target system. Windows/Linux PC/laptop USB host controller is used for all host functionality.
The following sections describes step by step procedure to configure, develop and build the USB mass storage example design using the baremetal and Linux SW running on Zynq 7000 AP SoC.
Below figure represents the design block diagram.
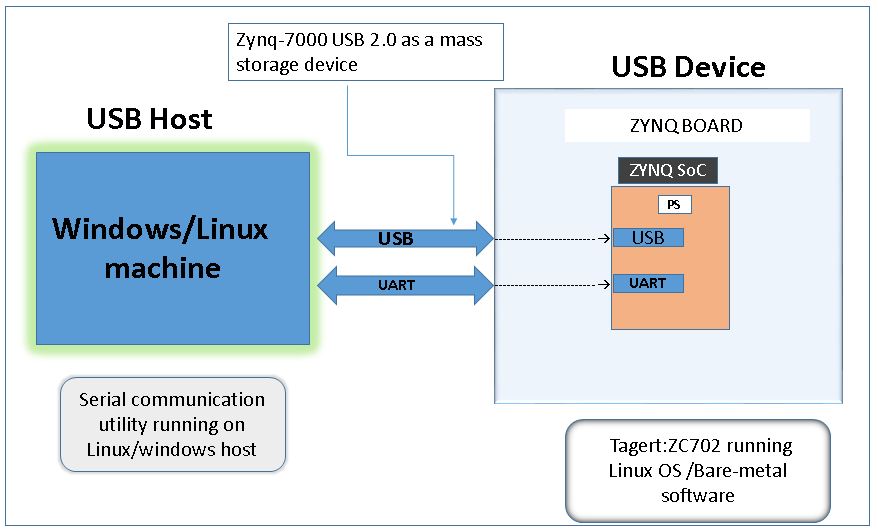 |
| Figure 1: Zynq-7000 AP SoC USB 2.0 Mass storage class reference design block diagram |
Linux: Zynq-7000 AP SoC USB 2.0 controller’s mass storage device class functionality
This section explains Linux gadget driver support for Zynq-7000 AP SoC USB 2.0 OTG controller and how to use these drivers for configuring the Zynq-7000 AP SoC USB 2.0 OTG controller as a mass storage device. This section also explains the steps in PetaLinux SDK usage and how to configure the Linux source tree, building Linux image and how to build the kernel modules using PetaLinux SDK.
- Follow the PetaLinux SDK installation user guide in this document. Execute the steps till the Setup PetaLinux Tools Working Environment section for installing PetaLinux SDK to your Linux machine.
Note: This tech tip is developed based on PetaLinux version 2014.4.It recommend to download the PetaLinux installer version 2014.4 from Xilinx website.
- After installing PetaLinux SDK create a project in the PetaLinux installed directory by executing below command
- $ petaLinux-create –t project –n <project_name>.
Above command will create a project with the user provided name under the PetaLinux installed directory. - Change the directory to project directory which is created above.
- Petalinux SDK will contain the Linux source .Configure the Linux source with default configuration by executing the PetaLinux command “$ petalinux-config -c kernel --defconfig”.
- Configure the Linux source to support USB mass storage gadget driver by executing PetaLinux command “$ petalinux-config -c kernel ” and ensure that parameters shown in the below figure are selected in the kernel source tree and save & exit the configuration file.
 |
| Figure 2: Linux kernel configurations to enable the mass storage specific code |
- Change the USB device tree node property “dr_mode“ in the device tree source code as “peripheral" which controls the mode of the device driver. Because this tech-tip is intends to configure the Zynq-7000 AP SoC USB 2.0 controller in device mode. The respective device tree file named as system-top.dts can be find under the path “<petalinux_installed_path>/<project_name>/subsystems/linux/configs/device-tree”.
 |
| Figure 3: Device tree entires to make the Zynq-7000 AP SoC USB OTG controller as device |
- With the above changes build the PetaLinux by executing the command “$ petalinux-build” which builds the image.ub executable and some other USB mass storage gadget support driver modules.
- Take the u-boot.elf and zynq-fsbl.elf executables from the directory “<petalinux_installed_directory>/<project_name>/images/linux/” and create BOOT.BIN using Xilinx SDK 2015.1 or later tool.
SD Card Images :
- copy the following the files on to the SD card
- BOOT.BIN which is created in the above section.
- libcomposite.ko file from following path “<petalinux_installed_directory>/<project_name>/build/linux/kernel/xlnx-3.17/drivers/usb/gadget”.
- g_mass_storage.ko file from following path “<petalinux_installed_directory>/<project_name>/build/linux/kernel/xlnx-3.17/drivers/usb/gadget/legacy”.
- usb_f_mass_storage.ko from following path “<petalinux_installed_directory>/<project_name>/build/linux/kernel/xlnx-3.17/drivers/usb/gadget/function”.
- Image.ub from “<petalinux_installed_directory>/<project_name>/images/linux”.
Note: For user convenience SD card images are provided along with this tech-tip under the path
Mass_storage_Design_files/sd_card_images/Linux. User can use these image for quick test.
ZC702 board setup:
Follow the below procedure to test the Zynq-7000 AP SoC USB 2.0 OTG controller functionality as a mass storage device when Linux is running on the target board and windows/Linux as a host PC.
- Connect the power supply to the ZC702 board. Do not switch the power on.
- Connect an USB Mini-B cable into the Mini USB port J17 labeled USB UART on the ZC702 board and the USB Type-A cable end into an open USB port on the host PC for UART communications.
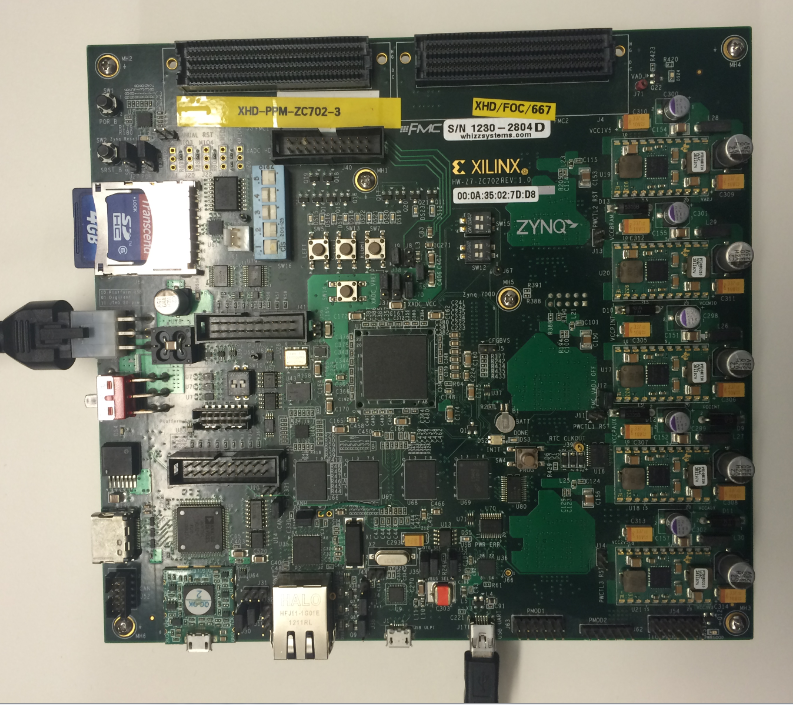 |
| Figure 4: ZC702 board setup |
- Make sure the switches are set as shown in figure below which allows the ZC702 board to boot from the SD-MMC card.
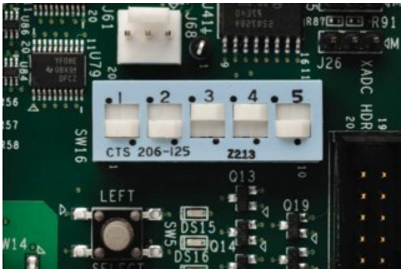 |
| Figure 5: SW16 configuration for SD boot |
Testing Zynq-7000 AP SoC USB 2.0 mass storage functionality:
- Switch on the power board power.
- Start the installed UART terminal program on your host PC (e.g.. Tera Term on a Windows PC).
- Use the following UART configuration: Baud rate = 115200, bits = 8, parity = none, and stop bits =1.
Note: This step is required to view debug information or to run the UART Menu-Based Demonstration application.
- Wait until ZC702 board is booted up with u-boot and stop the auto boot process by clicking enter key.
- Type the command "run sdboot" at the u-boot prompt and click enter. Board will start booting with Linux and after few seconds Linux prompt will be appeared on the UART terminal program running on your host PC.
- Petalinux console login details:-
User : root
Password : root - Type following commands on the Linux prompt.
- Mount SD card on by typing following command on the Linux terminal
- Insert the following modules in the Linux kernel which enables mass storage gadget support in the Linux and create disk image of 4MB by executing following commands as shown.
- Now connect the USB cable into the Micro-B USB connector on the ZC702 board to windows/ Linux (Ubuntu) host PC as show in the below figure
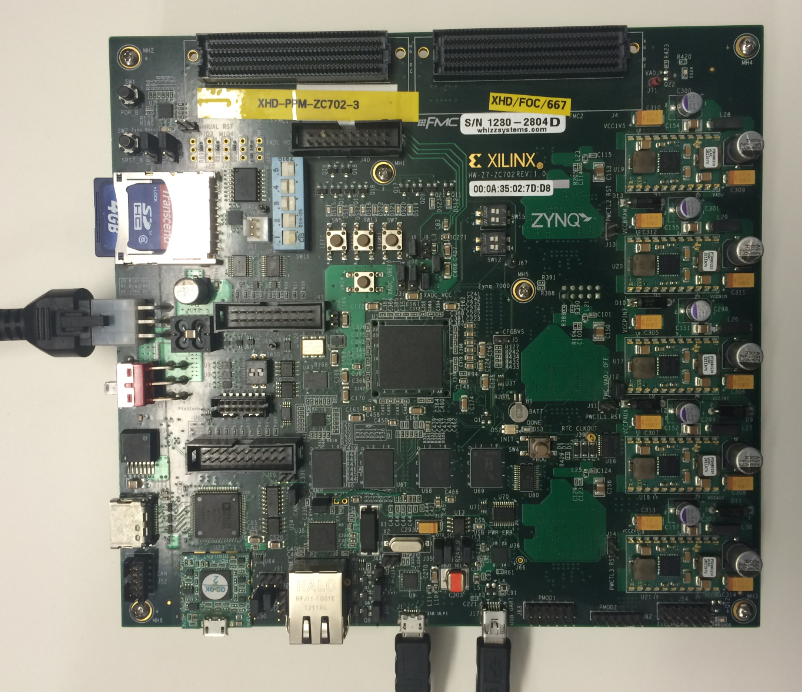 |
| Figure 5: ZC702 board setup with micro-USB cable connected |
Above inserted modules configures the Zynq-7000 AP SoC USB 2.0 as a mass storage device. When Zynq-7000 AP SoC USB 2.0 is detected as mass storage device, host PC will install all the required drivers on the host side. A 4MB size of disk image will be mounted on the host pc.
- In case of windows host PC a Microsoft windows disk formatting wizard gets popped up and click on format and start formatting the disk. After completion of formatting disk perform the read and write operations like file copy, update and open etc from host PC to disk pace created vice versa.
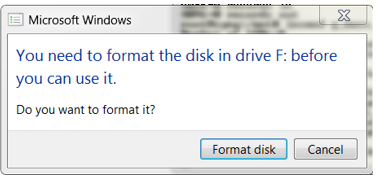 |
| Figure 6: Device notification on host windows system |
- In case of Linux (Ubuntu) host PC the Zynq-7000 AP SoC appears as a mass storage device of 4MB. Perform read and write operations from Linux PC to the disk space created vice versa.
This section describes how to build the baremetal application executable which configures the Zynq-7000 AP SoC USB 2.0 as a mass store class device. This example application creates a 4 Mega bytes of disk space on the target Zynq-7000 AP SoC DDR/OCM memory and appears as a mass storage device on the host machine.
Application software development
This section explains how to import and build the bare-metal application software using Xilinx SDK tool for configuring target Zynq-7000 AP SoC USB 2.0 device as a mass storage class device. By the end of this section binaries are created which are required to create Zynq-7000 AP SoC boot-able image
After SDK launch the projects can be imported to use the provided reference design files
- Select File->Import to open an import wizard.
- Select General > Existing Projects into Workspace in the import wizard.
- Select Achieve file and specify the location where the software applications are stored.
Note: Archive file can be found under the path Mass_storage_Design_files\Source\Bare-metal
- The import wizard displays a list of projects that are available to import. This list Includes
- fsbl
- fsbl_bsp
- mass_storage
- mass_storage_bsp
- ZC702_hw_platform
Select all these project and click finish.
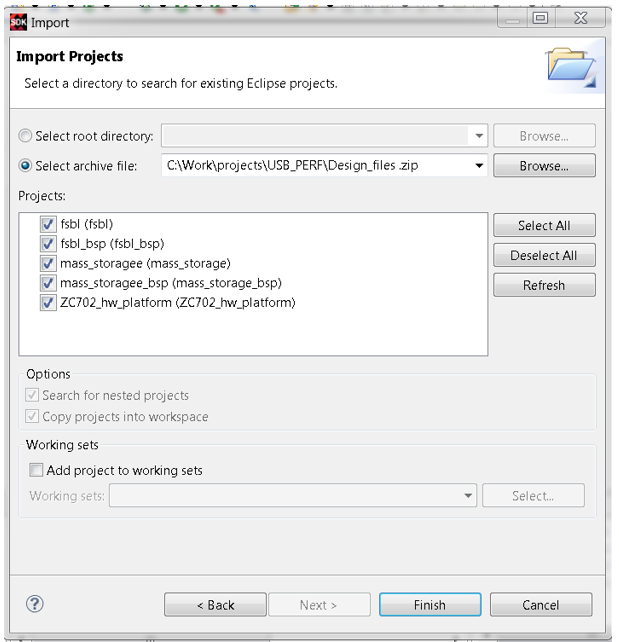 |
| Figure 7: Importing the software projects to SDK |
]
- Build the both fsbl and mass_storage projects by right click and selecting Build project option for each project.
Generating Boot file :
This tech-tip contains the mass_storage. elf and fsbl.elf binaries.
Following are the steps to create BOOT.bin file.
- Select Xilinx Tools > Create Zynq Boot Image. The Create Zynq Boot Image wizard opens.
- Provide the path in the Output BIF file path tab where output.bif file has to be created.
- Provide the fsbl.elf and mass_storage.elf files which are built in the above steps.
- fsbl.elf can be found under the path <SDK Workspace >\fsbl\Debug\fsbl.elf
- mass_storage.elf can be found under the path <SDK Workspace>\mass_storage\Debug\mass_storage.elf
- Provide the output folder path in the Output path tab.
- Click Create Image.
BOOT.bin file will be crated under the path specified in the output path tab.
Note: For quick testing user may use the BOOT.bin file which is provided along with this tech-tip present under the path Design_files\Mass_storage_Design_files\sd_card_images\Bare-metal\BOOT.bin
Application execution:
Follow the below procedure to test the Zynq-7000 USB 2.0 OTG controller mass storage functionality when a bare metal software is running on the target device and windows/Linux (Ubuntu) as a host PC.
- Copy the BOOT.bin file which is created in the Generating boot files section on to the SD card.
- Insert the SD on SD card slot of Zynq ZC702 development board.
- Connect the power supply to the ZC702 board. Do not switch power on.
- Connect the USB cable into the Micro-B USB connector on the ZC702 board to windows/Linux (Ubuntu) host PC as show in the figure
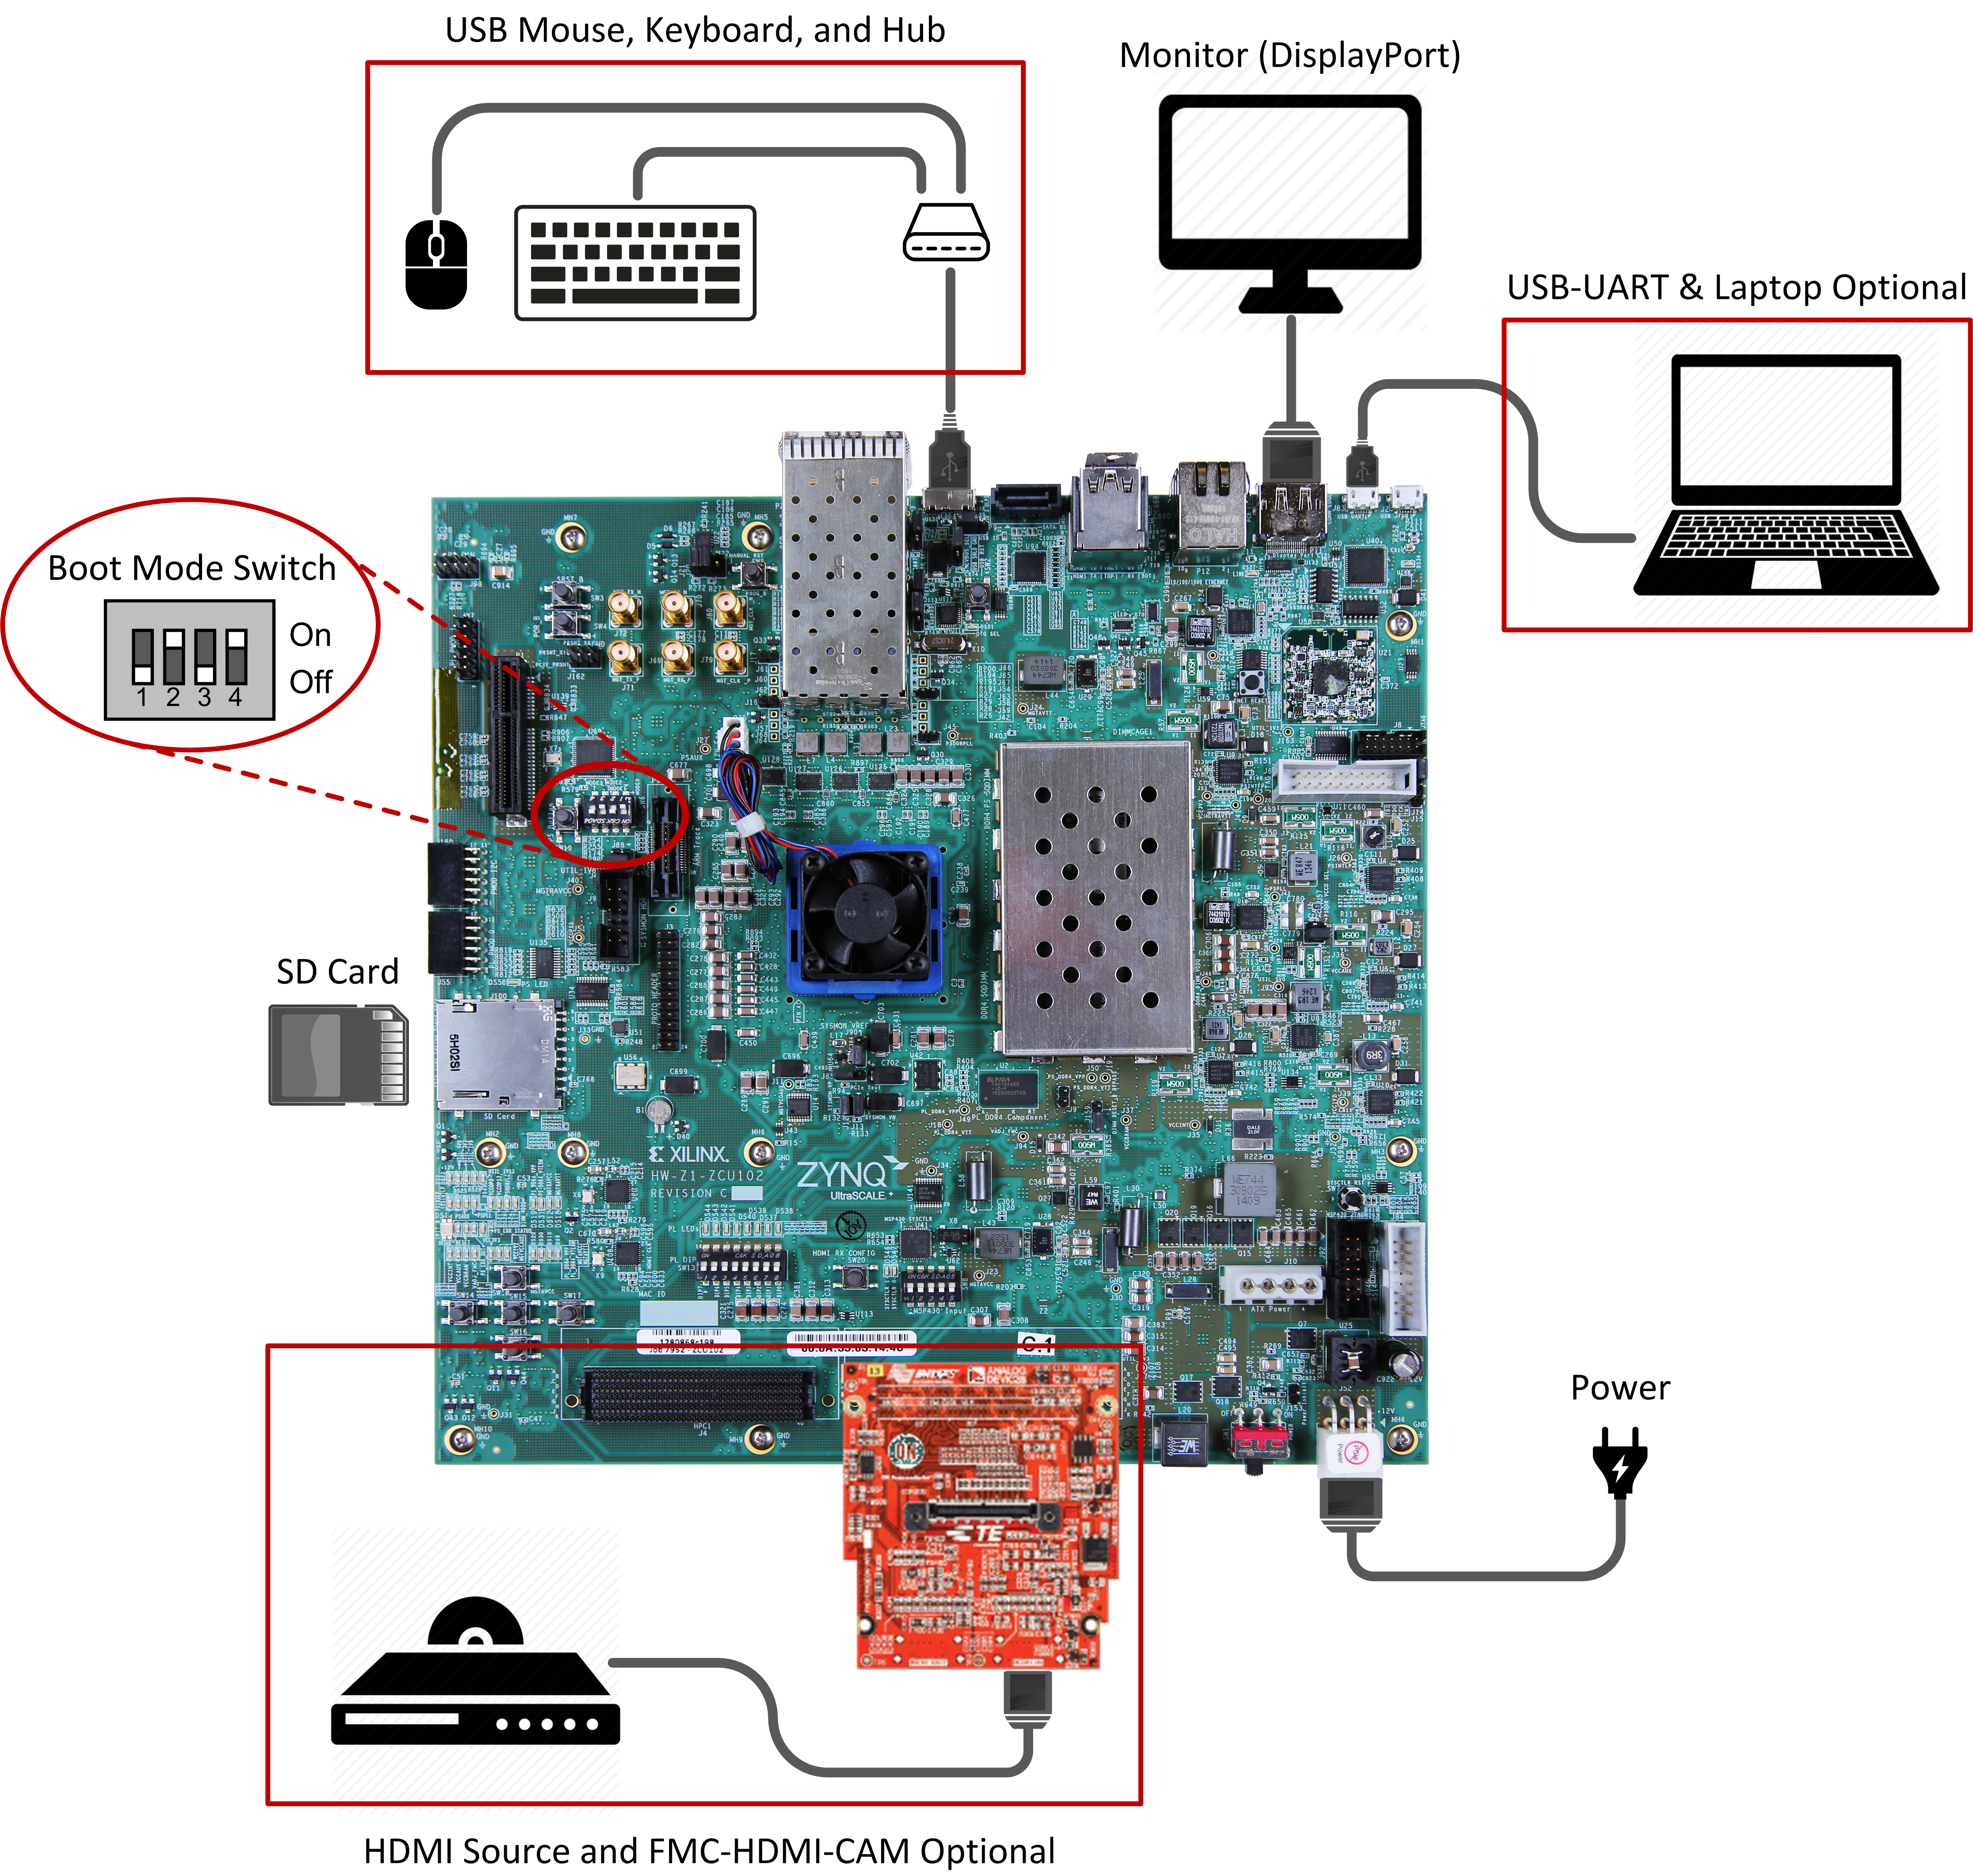 |
| Figure 8: ZC702 Board setup for this step |
- Make sure the switches are set as shown in figure below which allows the ZC702 board to boot from the SD-MMC card
 |
| Figure 8: SW16 configuration for the SD boot |
- Switch on the power board power.
After board is booted up with Zyn_fsbl, Standalone application which is running on the target board will configure the Zynq-7000 AP SoC USB as a mass storage device. The host PC enumerates the Zynq-7000 AP SoC as mass storage device through Zynq-7000 AP SoC USB 2.0 controller. This example bare metal application creates a 97MB of disk space on the DDR memory and it will appear in the host PC. - In case of windows host PC a Microsoft windows disk formatting wizard gets popped up and click on format and start formatting the disk. After completion of formatting disk perform the read and write operation from host PC to disk pace created vice versa.
 |
| Figure 9: Device notification |
- In case of Linux (Ubuntu) host PC Zynq-7000 AP SoC appears as a mass storage device of 97MB. Perform read and write operation from Linux PC to the disk space created vice versa.