ARTY Power Demo
Introduction:
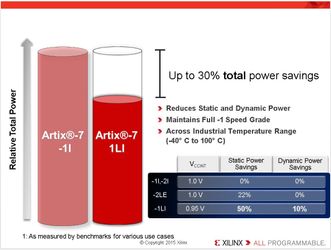
This Power Demo is designed is to measure the total FPGA internal power consumed by the Airtex-7 35T device on the Arty evaluation board.This Artix-7 -1LI power demo is a demonstrate of the low power Artix-7 FPGA operating at less than half a watt, running a real design,
complete with a soft processor, embedded memory, digital processing blocks, and much more.
The Demo is monitoring the voltage supplies, the internal temperature and the power utilization of a design implemented in the Artix-7 35T device,
which is roughly 35,000 logic cells.
The ARTY kit, which is the only evaluation board featuring a -1LI Artix-7 FPGA, allows you to scale down the voltage from 1V to .95V.
This give you a 50% lower static and 10% lower dynamic power compared to running at normal voltage, all while still retaining -1 speed grade performance.
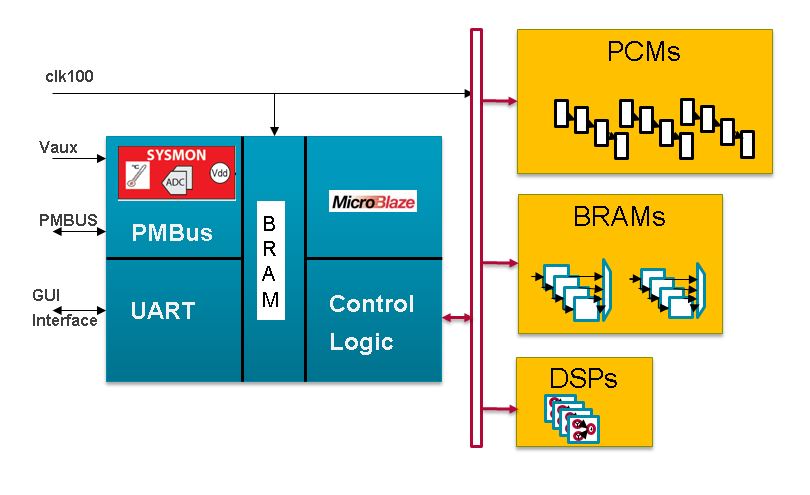
In order to calculate power, a MicroBlaze based design has been created, reading voltage and current values of all power rails from the on-board Linear power controllers via on-chip System Monitor.
The temperature is read using the on-chip Sysmon. These values are then communicated to a host PC via UART, again implemented by a MicroBlaze controller, and then displayed in a Java based GUI.
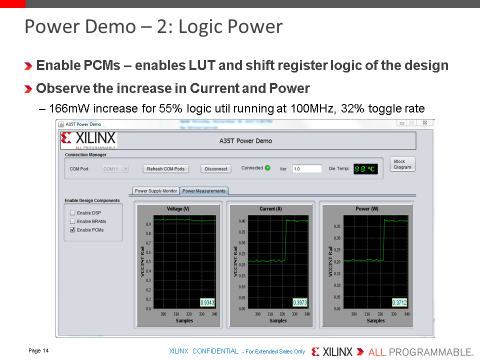
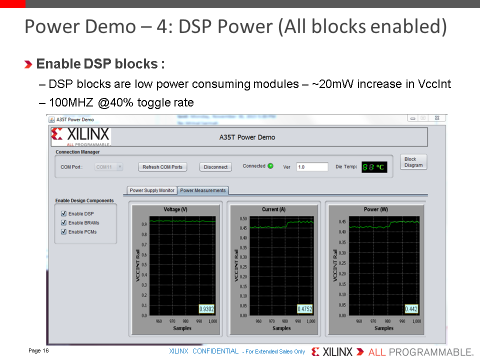
To dynamically in/decrease the consumed power, the chip has been filled with Power Consuming Modules (PCM) containing logic circuits – LUT-FF logic, BRAM & DSP.
These PCMs are purely logic based and their only purpose is to consume power. In our design, we can turn on and off PCMs, BRAMs and DSP independently to observe the resulting difference in power.
System Requirements:
Hardware:
- Artix-7 35T ARTY Evaluation Kit.
- Micro-USB cable to connect the ARTY USB COM port to host PC
- Host PC with Windows 7 64-bit Operating System
Software Tools:
Power Demo Archive:
| View file | ||
|---|---|---|
|
- Extract & remember where you save the file, you will use this location later on.
Downloading, Installing Demos & Java Application Files
Verify that Java JDK 7 (64bit) is installed
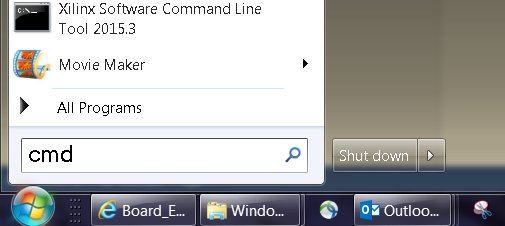
To run this Arty power demo, you will need the Java JDK 7. Verify if you have Java JDK 7 installed. In the Windows Start “run” type “cmd”This will open a command prompt window. In that command window type: java -version
If you have the correct version of java, it should display: java version “1.7.0.79”
Installing Java JDK 7 (64bit)
If Java is not installed, Install JDK 7 (64 bit) from: http://www.oracle.com/technetwork/java/javase/downloads/jdk7-downloads-1880260.htmlScroll down to the table for the Java SE Development Kit 7u79. Check the “Accept License Agreement” and select the jdk-7u79-windows-x64.exe
This will prompt you to save the download
When your browser has finished downloading the jdk-7u79-windows-x64.exe, double click and run this exe.
This will start the java install. Follow the instructions as you are prompted.
When java has been installed you can verify by opening a cmd window from the windows start menu and type: java –versio
Downloading and Unziping the Arty Power Demo files
Download the A35T_Power_demo_V1.2.zip. You may unzip this in a project directory like: C:/Xilinx/projects/When you unzip this archive you get the following directories created under C:/Xilinx/projects/A35T_Power_demo_V1.2
A35T_Power_demo_V1.2
- doc
- A35T_Arty_Power_Demo_guide.pptx
- gui
- lib
- A35T_Power_Demo_Gui.jar
- hardware
- a35t_power_demo.bit
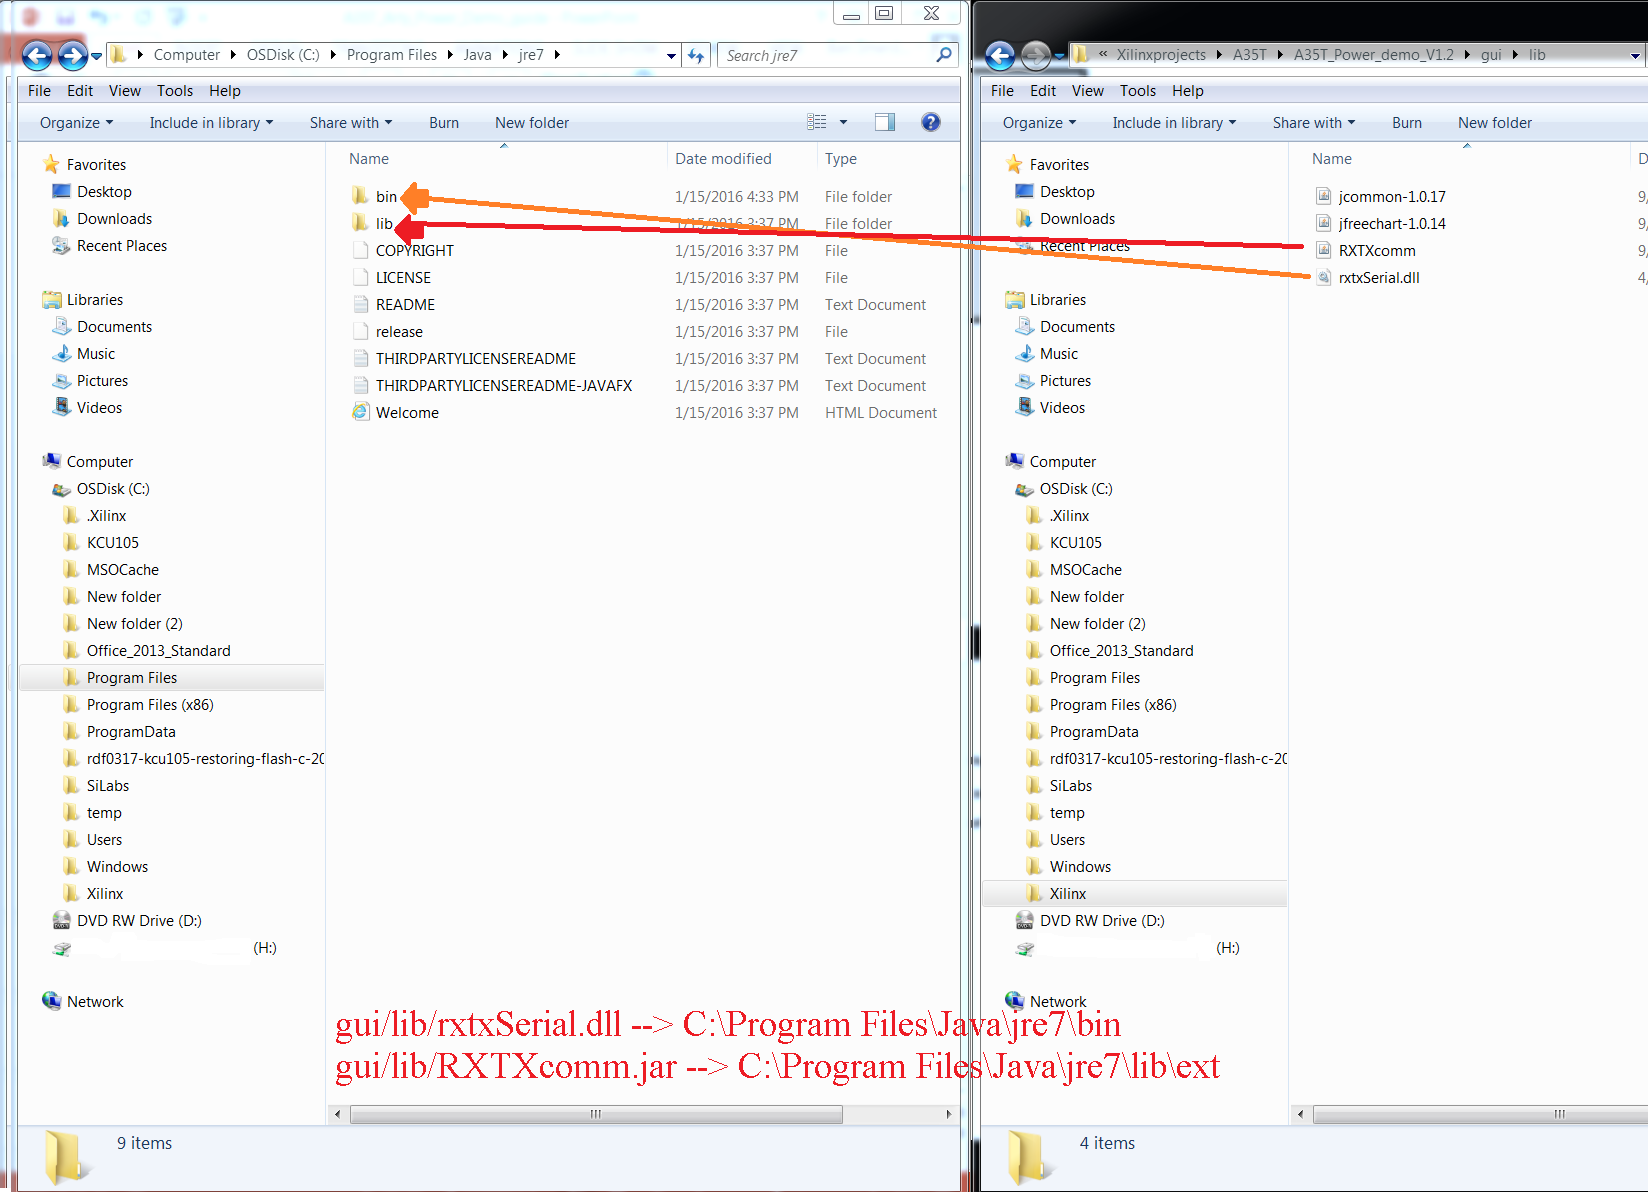
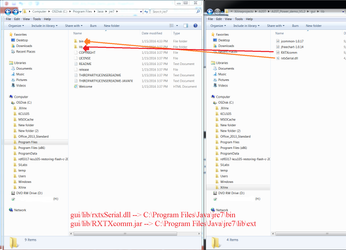
Copy the following files: (Ctrl + Scroll to Zoom in & out)
- gui/lib/rxtxSerial.dll --> C:\Program Files\Java\jre7\bin
- gui/lib/RXTXcomm.jar --> C:\Program Files\Java\jre7\lib\ext
Connection & Powering on the Arty evaluation board
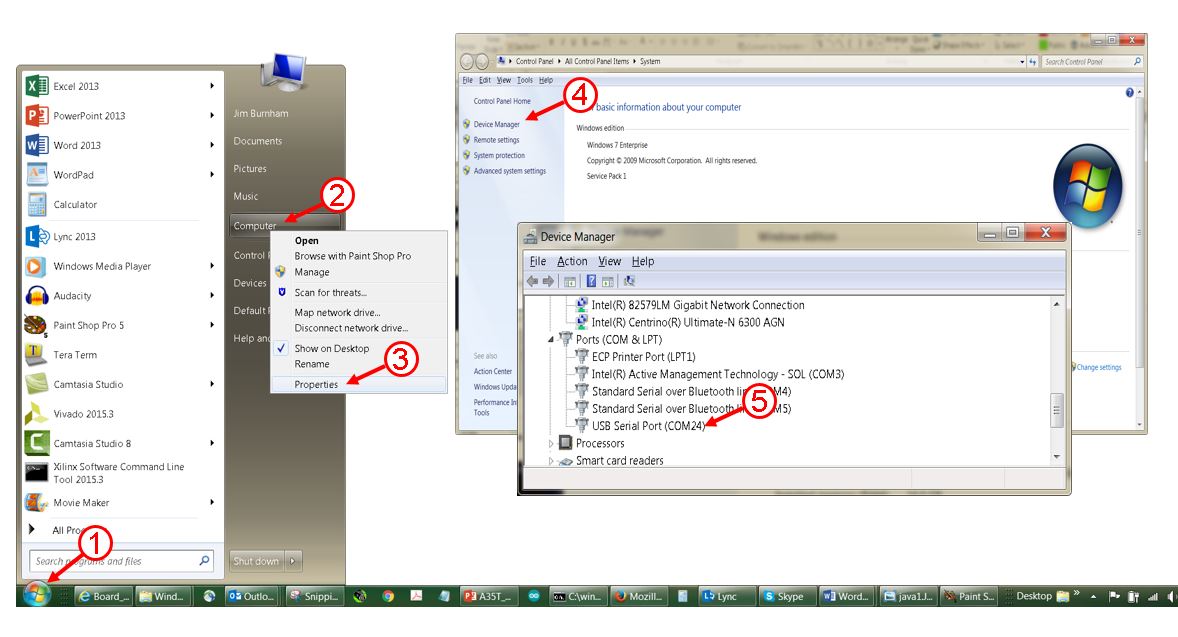
Using a USB A to MicroB cable, connect the USB A side to your PC and the MicroB side to the Arty board.Verifying the USB COM port that has been assigned by the PC.
1) Open the START menu2) Select my computer
3) Right mouse and select Properties
4) Select Device Manager
5) See that the ARTY board is connected to the USB Serial Port (COM 24). In my case it is COM 24.
Yours will probably be different. Note the COM port number, as you will need it when setting up the java GUI
Launching Vivado and Programing Arty
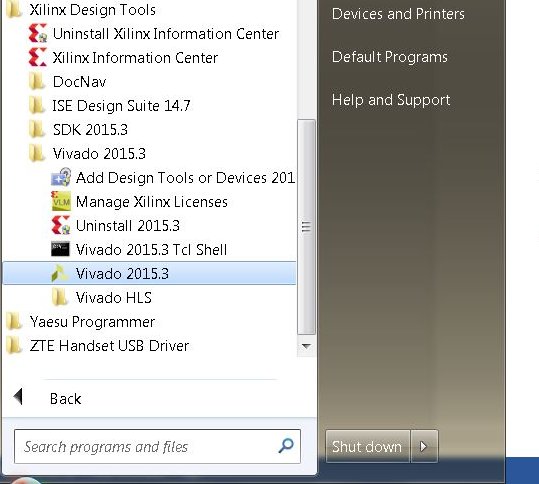
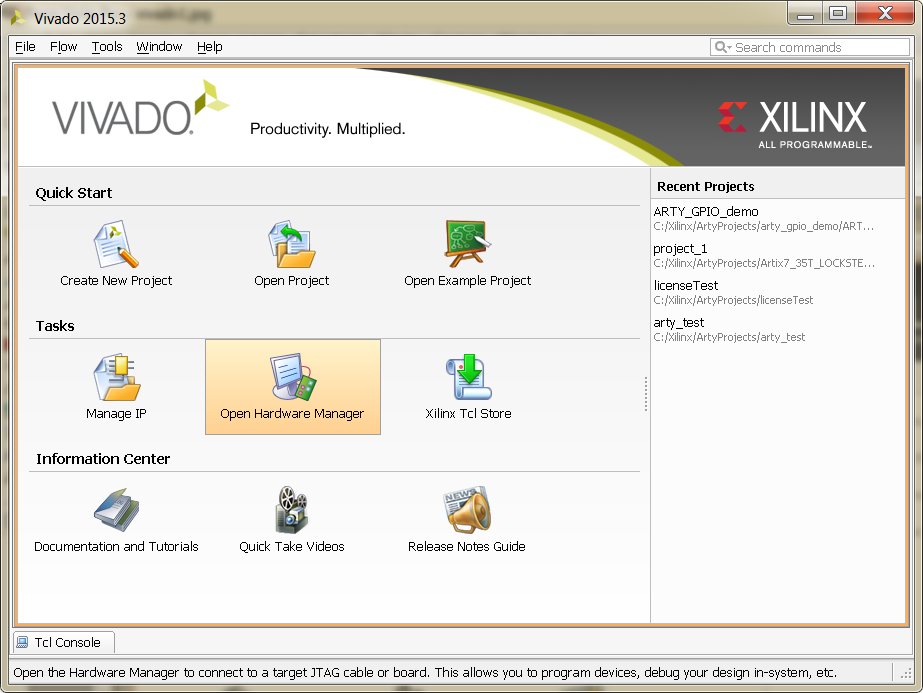
Go to the Windows START menu and open the Vivado 2015.3 (or later) Design ManagerWhen the Vivado Design Manager opens, select: Open Hardware Manager
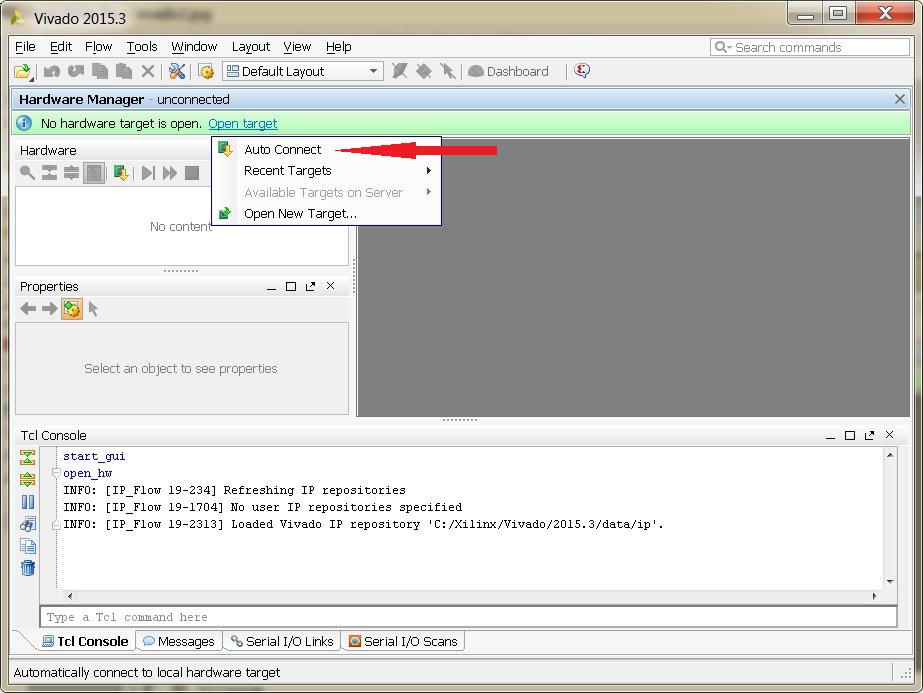
This will open a Vivado Hardware manager project. Click on the Open Target link, then click on Auto Connect
This will connect to the download server and verify the connection to the Arty board in preparation to download a bitstream.
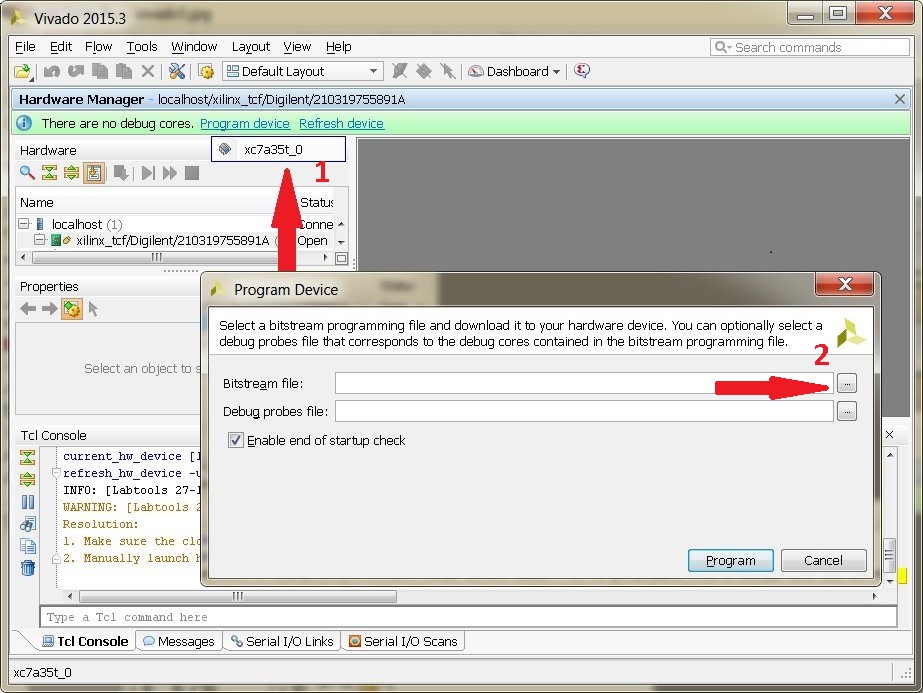
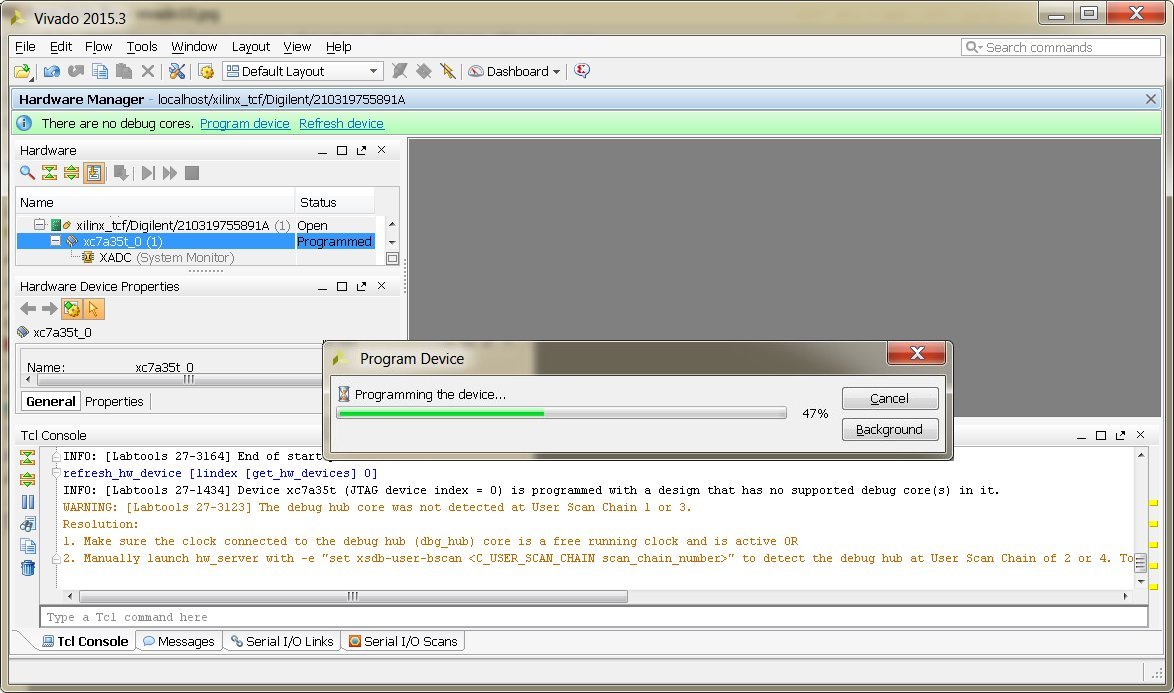
Click on the Program device link, and then click on the xc7a35t_0 device.
This will bring up a dialog box, where you can select the power demo project..
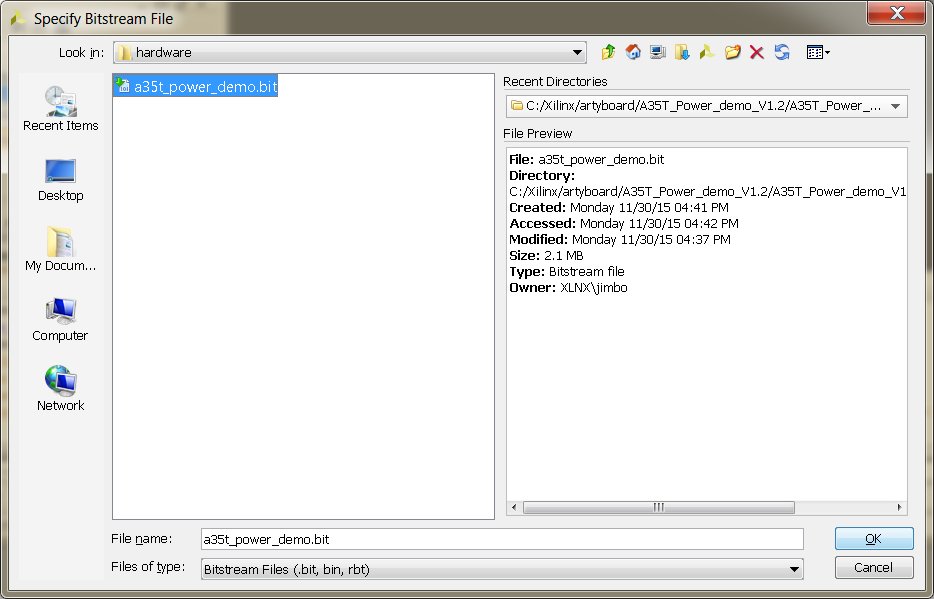
Navigate to where you unzipped the power demo archive and select the a35t_power_demo.bit
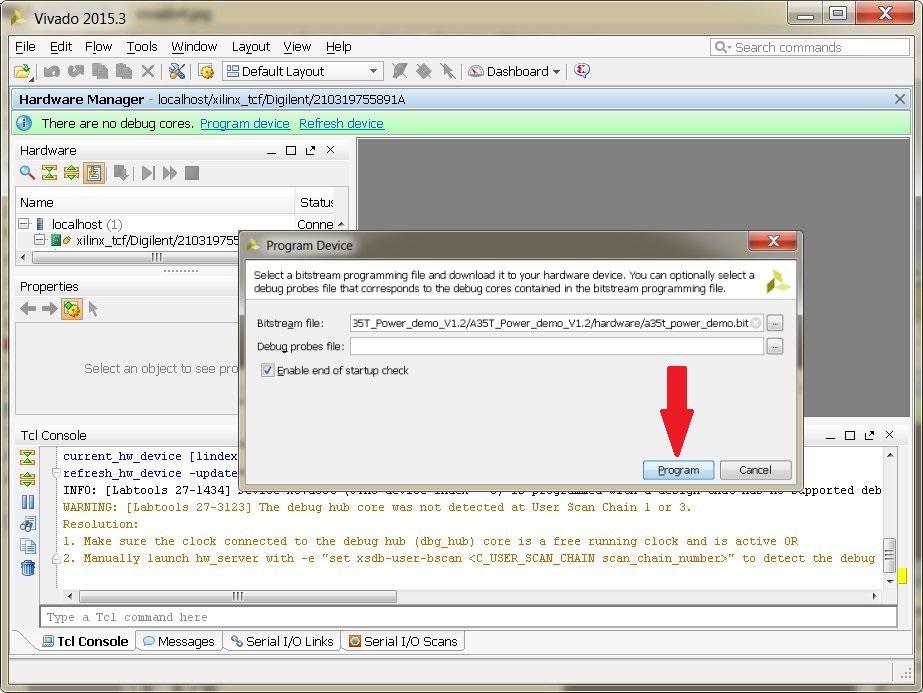
This will then show the dialog with the a35t_power_demo.bit file selected. Click the Program button
This will download the a35t_power_demo.bit file to the Arty board
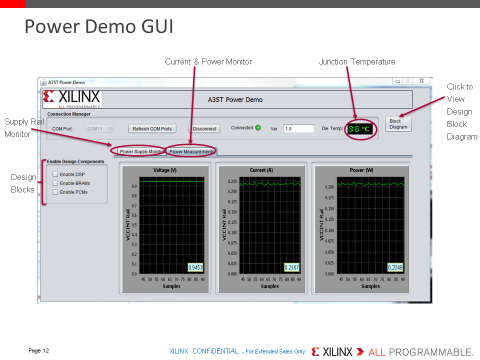
Starting the Arty Power Demo java GUI
Open the interface: (Ctrl + Scroll to zoom in & out)Experiment with the interface:
Finished!

