Contents
| Anchor | ||||
|---|---|---|---|---|
|
Test environment
SD Card
Cables
Router
ZCU102 hardware configuration
Laptop configuration
Hardware
Software
Connect Cables
Insert SD Card In Card Reader
Locate COM port
Prepare SD Card Image
Launch Application
Setup Remote Systems Explorer in XSDK
Setup Debug Configuration
References
...
| Anchor | ||||
|---|---|---|---|---|
|
- Open 'Device Manager' via Windows -> Control Panel, and open the 'Ports (COM & LPT)' section
- The line that reads 'Interface 0' has the COM port number (in this case, COM46):
- It is possible that you may need to power up the ZCU102 for this information to be visible. If so, power it down after obtaining the above information.
| Anchor | ||||
|---|---|---|---|---|
|
...
| Anchor | ||||
|---|---|---|---|---|
|
- Insert the SD card in the ZCU102 SD card slot
- Open an XSDK terminal for the COM port:
- You should see 'Connected to COM46 at 115200' if it succeeds.
- Apply power to the ZCU102.
- You should see boot messages from Linux. Wait for the prompt: xilinx-zcu102-2018_2 login:
- Login with user root and password root.
- Run this command: ifconfig eth0
- Note the value of 'inet addr'
- Mount the SD card to a known path: mount /dev/mmcblk0p1 /media
- Check the SD card contents, you should see hello.elf: ls /media
- Run the application: /media/hello.elf &
- It will run forever, sleeping 10 seconds and printing 'Hello World\n' each loop
| Anchor | ||||
|---|---|---|---|---|
|
- Select: Window -> Perspective -> Open Perspective -> Other…
- When the 'Open Perspective' window pops up, select 'Remote System Explorer' and click 'OK'
- In the 'Remote Systems' tab, click on 'Define a connection to remote system'
- In the 'New Connection' popup window, select 'Linux' and click 'Next'
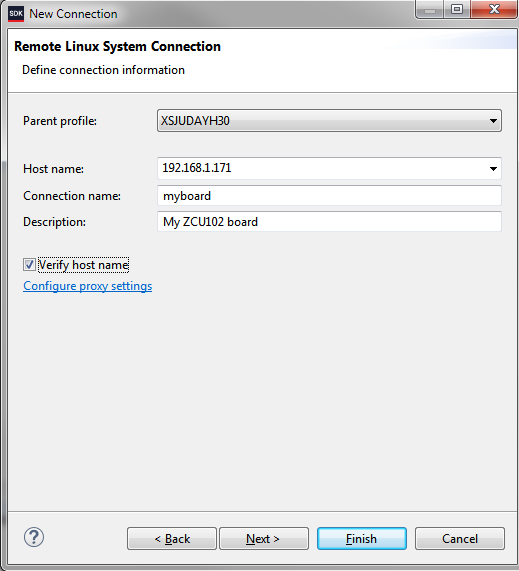
- Fill in connection information as appropriate and click 'Next'
- Choose 'ssh.files' for the subsystem as shown, and click 'Next'
- Define process subsystem information as shown, and click 'Next'
- Define shell information, and click 'Next'
- Define 'ssh terminals' and click 'Finish':
- You should now see 'myboard' in the 'Remote Systems' tab
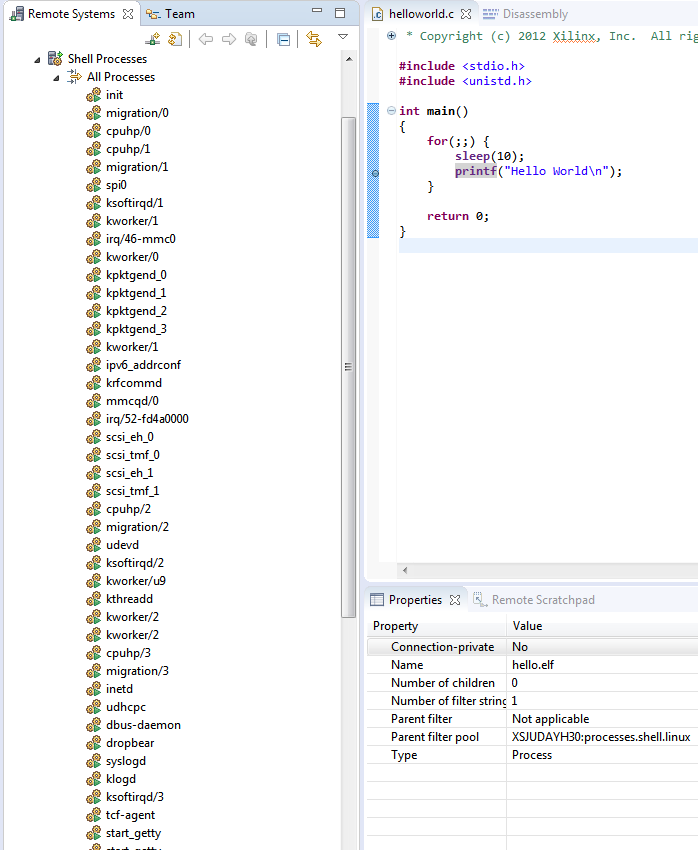
- Try to open myboard -> Shell Processes -> All Processes, the following popup will show up. Fill in as shown, and click 'OK'
- You will see a list of all processes running on the target. Scroll down and confirm you can see 'hello.elf' running.
| Anchor | ||||
|---|---|---|---|---|
|
- Right click on the 'hello' application in the 'Project Explorer' tab, and select 'Debug As' -> 'Debug Configurations…'. The 'Debug Configurations' window pops up.
- Click on 'Filter Launch Configurations…'
- Unselect 'Filter Configuration Types'. You should now see this:
- Double click on the highlighted line above: "C/C++ Attach to Application" and fill in the 'Main' tab as follows. Some entries will be pre-filled. You can use the 'Browse' and 'Select Project…' buttons as needed. When all entries are filled, click 'Select other…' at the bottom
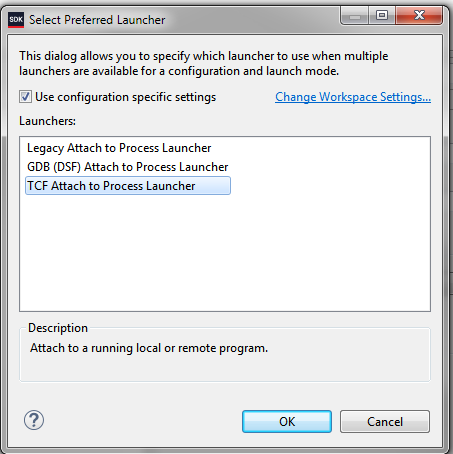
- A 'Select Preferred Launcher' window pops up. Modify it as shown below and select 'OK'.
- The 'Debug Confugurations' window should now show this:
- Click 'Debug' to launch a debug session
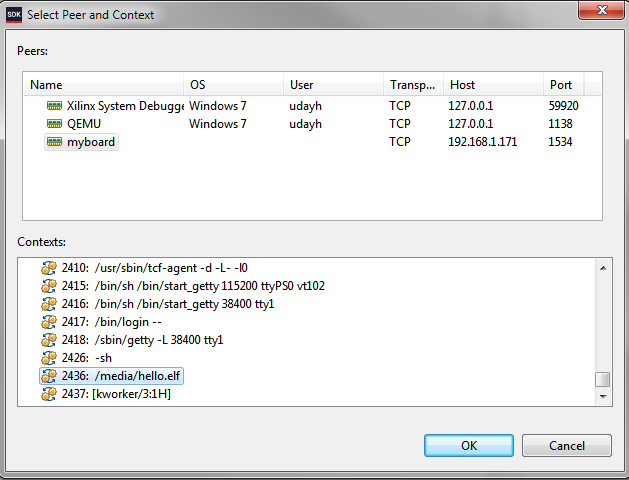
- A 'Select Peer and Context' window pops up, change selections as shown below and click 'OK'
- A confirmation window may pop up, click 'Yes' to switch to the Debug perspective
- The code spends most of the time in 'sleep()', whose source code is unavailable. Thus, very likely, when you click yes, you will be interrupting this call, and you will see assembly code:
- Left-click on the line for main() in the Debug tab, and you should see the source code line where it is stopped:
- You should now be able to continue with debug, setting breakpoints, stepping, etc.
| Anchor | ||||
|---|---|---|---|---|
|
...


