ZCU1275/ZCU1285 MTS Design Example
This page presents the MTS Design example for ZCU1275/ZCU1285 device.
Table of Contents
ZCU1275/ZCU1285 Build and Run Flow Tutorial
The below sections describe the build and run flow tutorial.
The design package for ZCU1275/ZCU1285 16X16 can be found at the following links:
Vivado Build Flow
Refer to the Vivado Design Suite User Guide: Using the Vivado IDE, UG893, for setting up Vivado environment.
To build the hardware design, execute the following steps
On Windows
- Open a Vivado Tool.
- Navigate to the package folder path and change the directory to ../pl/MTS-IQ folder for MTS IQ design.
- On the Tcl Console of the tool, type
source ./scripts/create_project.tcl
On Linux
Set $DCET_HOME environment variable as given below for linux environment.
% export DCET_HOME=</path/to/download/zipfile>/rdf0xxx-zc1275-RFdc-16x16-mts-design-2018-3
- Open a Linux terminal.
- Change directory to $DCET_HOME/pl/MTS-IQ folder for MTS IQ design.
- To create the Vivado IPI project and invoke the UI, run the following command.
% vivado -source scripts/create_project.tcl
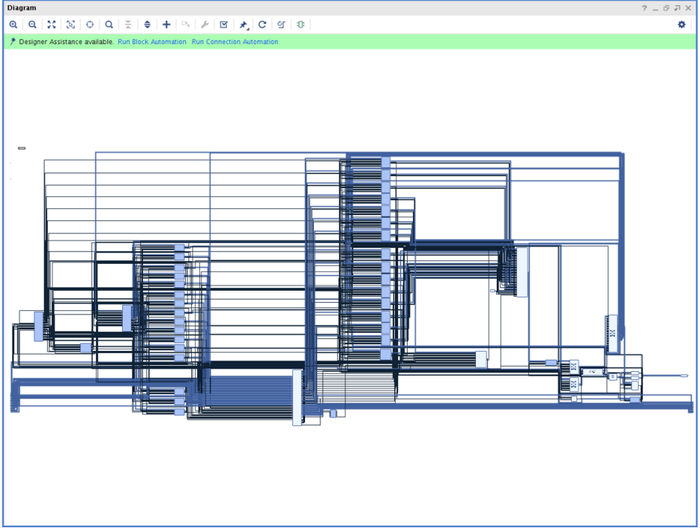
After executing the script on windows/linux systems, the vivado IPI block design comes up as shown in the following figure.
4. Click the "Generate Bitstream" on left hand side of Vivado Project Panel.
If the user gets any pop-up with "No implementation Results available". Click "Yes". Then, if any pop-up comes up with "Launch runs", Click "OK".
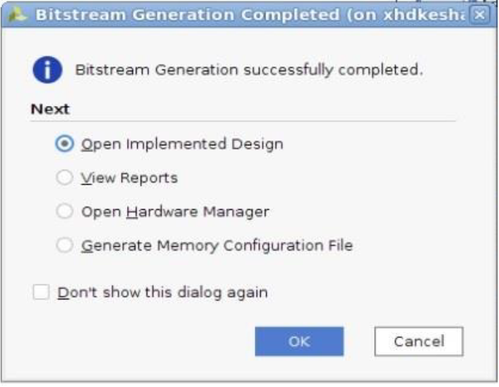
The design is implemented, and a pop-up window comes up saying "Open Implemented Design". Click "OK".
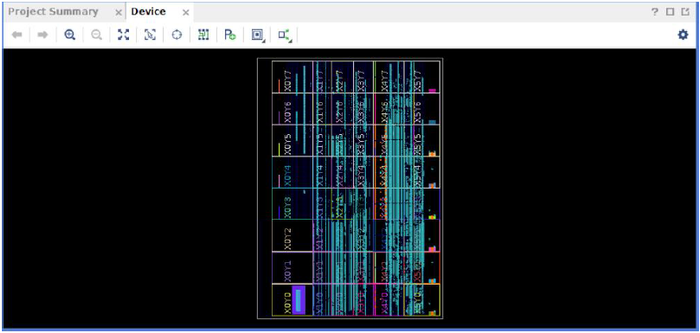
Below figure depicts the view of opened implemented design.
The actual results might graphically look different than the image shown.
5. Go to File > Export > Export Hardware
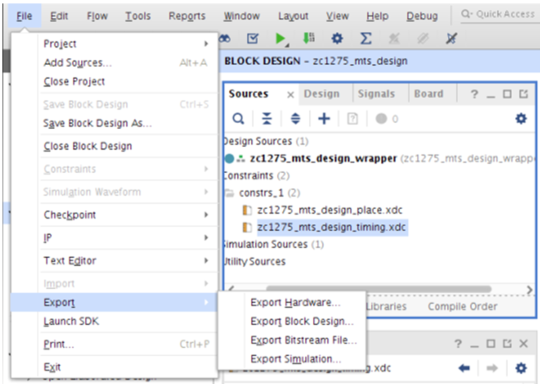 6. In the Export Hardware Platform for SDK window select "Include bitstream" and click "OK".

The HDF is created at $DCET_HOME/pl/MTS-IQ/project/zc1275_mts_design.sdk/zc1275_mts_design_wrapper.hdf for MTS IQ Design.
PetaLinux build Flow
This tutorial shows how to build the Linux image and boot image using the PetaLinux build tool.
Refer to the PetaLinux Tool Documentation (UG1144) for installation.
- Sourcing petalinux tool.
% source <path/to/petalinux-installer>/petalinux-v2018.3/petalinux-v2018.3-final/settings.sh
2. Post petalinux installation, $PETALINUX variable should be set, command to cross-check the variable.
echo $PETALINUX
3. Create project from .bsp file
% petalinux-create -t project -s rfsoc_mts_petalinux_bsp.bsp
% cd rfsoc_mts_petalinux_bsp
After creating project, please refer to Modifications on top of 2018.3 released BSP , ZCU1275/ZCU1285 MTS Design Example#Modifications on top of 2019.1 released BSP and Modifications on top of 2020.1 released BSP for detailed information on changes in this TRD on top of released 2018.3/2019.1/2020.1 petalinux BSP.
4. Configure the PetaLinux project using step “a” or “b”.
a) With the pre-built hdf located in folder ”pl/MTS-IQ/pre-built" for IQ Design.
% petalinux-config --get-hw-description=$DCET_HOME/pl/MTS-IQ/pre-built
b) If Vivado project is modified/design is changed, user is expected to configure the bsp with the modified .hdf file.
For IQ
% petalinux-config --get-hw-description=$DCET_HOME/pl/MTS-IQ/project/zc1275_mts_design.sdk/
- After executing “petalinux-config” command, a prompt will be displayed.
- No need to change anything, please select “Exit” and come out of window.
5. Build all Linux image components along with Evaluation Tool application.
% petalinux-build
6. Create a boot image (BOOT.BIN) including FSBL, ATF, PMUFW, bitstream and u-boot.
% cd images/linux
% petalinux-package --force --boot --fsbl zynqmp_fsbl.elf --fpga system.bit --pmufw pmufw.elf --u-boot u-boot.elf
7. Copy the BOOT.bin and image.ub to the sdcard.
% cp BOOT.BIN boot.scr Image system.dtb rootfs.cpio.gz.u-boot $DCET_HOME/images/rev-C
Modifications on top of 2018.3 released BSP
Below are the modification in this TRD for linux-kernel, rftool and rftool-mts applications, on top of 2018.3 petalinux released BSP.
For more details on patch information please refer to http://xkb/pages/71/71829.aspx .The High level description is given below.
- Kernel patch information
% vim project-spec/meta-user/recipes-kernel/linux/linux-xlnx_%.bbappend
SRC_URI_append = " \
     file://0001-power-supply-irps-Add-support-for-irps-supply.patch \
     file://0002-drivers-misc-add-support-for-DDR-memory-management.patch  \
     file://0003-dmaengine-xilinx_dma-In-SG-cyclic-mode-allow-multipl.patch \
     file://0004-drivers-misc-add-support-for-selecting-mem-type.patch \
     file://0005-i2c-cadence-Implement-timeout.patch \
     file://0006-i2c-muxes-update-Mux-register-always.patch \
     file://0007-drivers-misc-change-ADC-packet-size-as-per-FIFO-size.patch \
     file://0008-drivers-misc-add-16x16-dac-adc-support.patch \
- RFTOOL application patch
% vim project-spec/meta-user/recipes-apps/rftool/rftool.bb
- RFTOOL-MTS application patch
% vim project-spec/meta-user/recipes-apps/rftool-mts/rftool-mts.bb
Modifications on top of 2019.1 released BSP
Below are the modification in this TRD for linux-kernel, rftool and rftool-mts applications, on top of 2019.1 petalinux released BSP.
For more details on patch information please refer to http://xkb/Pages/72/72417.aspx.The High level description is given below:
Kernel patch information
% vim project-spec/meta-user/recipes-kernel/linux/linux-xlnx_%.bbappend
SRC_URI_append = " \
	file://0001-power-supply-irps-Add-support-for-irps-supply.patch \
    file://0002-drivers-misc-add-support-for-DDR-memory-management.patch \
    file://0003-dmaengine-xilinx_dma-In-SG-cyclic-mode-allow-multipl.patch \
    file://0004-drivers-misc-add-support-for-selecting-mem-type.patch \
    file://0005-i2c-cadence-Implement-timeout.patch \
    file://0006-i2c-muxes-update-Mux-register-always.patch \
    file://0007-drivers-misc-change-ADC-packet-size-as-per-FIFO-size.patch \
    file://0008-drivers-misc-change-parameters-for-of_dma_configure.patch \
    file://0009-plmem-clean-up-sysfs-node-and-character-device-nodes.patch \
    file://0010-dma-clean-the-BD-s-only-when-done-bit-is-set.patch \
    file://0011-drivers-misc-add-16x16-dac-adc-support.patch \
"
- RFTOOL application patch
% vim project-spec/meta-user/recipes-apps/rftool/rftool.bb
- RFTOOL-MTS application patch
% vim project-spec/meta-user/recipes-apps/rftool-mts/rftool-mts.bb
To get "project-spec/meta-user/" folder, please extract files from. bsp using step #3 from section PetaLinux build Flow .
Modifications on top of 2020.1 released BSP
Below are the modification in this TRD for linux-kernel, rftool and rftool-mts applications, on top of 2020.1 petalinux released BSP.
For more details on patch information please refer to http://xkb/Pages/72/72417.aspx.The High level description is given below:
- Kernel patch information
% vim project-spec/meta-user/recipes-kernel/linux/linux-xlnx_%.bbappend
SRC_URI_append = " \
	file://0001-power-supply-irps-Add-support-for-irps-supply.patch \
    file://0002-drivers-misc-add-support-for-DDR-memory-management.patch \
    file://0003-dmaengine-xilinx_dma-In-SG-cyclic-mode-allow-multipl.patch \
    file://0004-drivers-misc-add-support-for-selecting-mem-type.patch \
    file://0005-i2c-cadence-Implement-timeout.patch \
    file://0006-drivers-misc-change-ADC-packet-size-as-per-FIFO-size.patch \
    file://0007-drivers-misc-change-parameters-for-of_dma_configure.patch \
    file://0008-plmem-clean-up-sysfs-node-and-character-device-nodes.patch \
    file://0009-dma-clean-the-BD-s-only-when-done-bit-is-set.patch \
    file://0010-misc-plmem-replace-dma_declare_memory-with-reserved-.patch \
    file://0011-drivers-misc-add-16x16-dac-adc-support.patch \
"
- RFTOOL application patch
% vim project-spec/meta-user/recipes-apps/rftool/rftool.bb
- RFTOOL-MTS application patch
% vim project-spec/meta-user/recipes-apps/rftool-mts/rftool-mts.bb
- TRD Autostart patch information
% vim project-spec/meta-user/recipes-apps/trd-autostart/trd-autostart.bb
- RFDC Self-test application changes
% vim project-spec/meta-user/recipes-bsp/rfdc-examples/rfdc-selftest_%.bbappend
SRC_URI_append = " \
file://0001-selftest_example-change-default-frequency.patch \"
- RFDC Read-Write application changes
% vim project-spec/meta-user/recipes-bsp/rfdc-examples/rfdc-read-write_%.bbappend
- Device Tree Changes
The changes required with respect to pl memory nodes in kernel version 5.4 have been updated in the following path.
% vim project-spec/meta-user/recipes-bsp/device-tree/files/pl-custom.dtsi
The changes required with respect to contiguous memory allocation (CMA size) are updated in the following path.
% vim project-spec/meta-user/recipes-bsp/device-tree/files/system_user.dtsi
To get "project-spec/meta-user/" folder, please extract files from. bsp using step #3 from section PetaLinux build Flow .
Modifications on top of 2021.1 released BSP
Below are the modification in this TRD for linux-kernel, rftool and rftool-mts applications, on top of 2021.1 petalinux released BSP.
For more details on patch information please refer to http://xkb/Pages/72/72417.aspx.The High level description is given below:
- Kernel patch information
% vim project-spec/meta-user/recipes-kernel/linux/linux-xlnx_%.bbappend
SRC_URI_append = " \
    file://0001-power-supply-irps-Add-support-for-irps-supply.patch \
    file://0002-drivers-misc-add-support-for-DDR-memory-management.patch \
    file://0003-dmaengine-xilinx_dma-In-SG-cyclic-mode-allow-multipl.patch \
    file://0004-drivers-misc-add-support-for-selecting-mem-type.patch \
    file://0005-i2c-cadence-Implement-timeout.patch \
    file://0006-drivers-misc-change-ADC-packet-size-as-per-FIFO-size.patch \
    file://0007-drivers-misc-change-parameters-for-of_dma_configure.patch \
    file://0008-plmem-clean-up-sysfs-node-and-character-device-nodes.patch \
    file://0009-dma-clean-the-BD-s-only-when-done-bit-is-set.patch \
    file://0010-misc-plmem-replace-dma_declare_memory-with-reserved-.patch \
    file://0011-drivers-misc-add-16x16-dac-adc-support.patch \
    file://0012-DMA-changes-as-per-kernel-v5_10.patch \ "
- RFTOOL application patch
% vim project-spec/meta-user/recipes-apps/rftool/rftool.bb
- RFTOOL-MTS application patch
% vim project-spec/meta-user/recipes-apps/rftool-mts/rftool-mts.bb
- TRD Autostart patch information
% vim project-spec/meta-user/recipes-apps/trd-autostart/trd-autostart.bb
- RFDC Self-test application changes
% vim project-spec/meta-user/recipes-bsp/rfdc-examples/rfdc-selftest_%.bbappend
SRC_URI_append = " \
file://0001-selftest_example-change-default-frequency.patch \"
- RFDC Read-Write application changes
% vim project-spec/meta-user/recipes-bsp/rfdc-examples/rfdc-read-write_%.bbappend
- Device Tree Changes
The changes required with respect to pl memory nodes in kernel version 5.10 have been updated in the following path.
% vim project-spec/meta-user/recipes-bsp/device-tree/files/pl-custom.dtsi
The changes required with respect to contiguous memory allocation (CMA size) are updated in the following path.
% vim project-spec/meta-user/recipes-bsp/device-tree/files/system_user.dtsi
To get "project-spec/meta-user/" folder, please extract files from. bsp using step #3 from section PetaLinux build Flow .
Run Flow
Clock Configuration for running the design
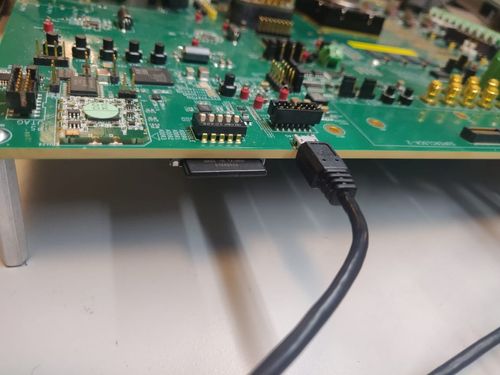
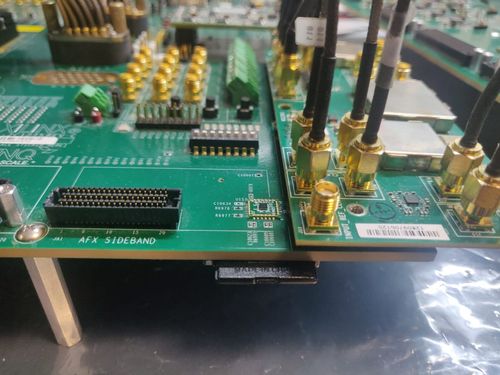
Please Unzip the “SD_card_clocks” folder and copy the contents to the SD card. Insert the SD card in the SD slot(near to SW13) as shown in below figure.
This Section Illustrates the steps to be followed for UART.
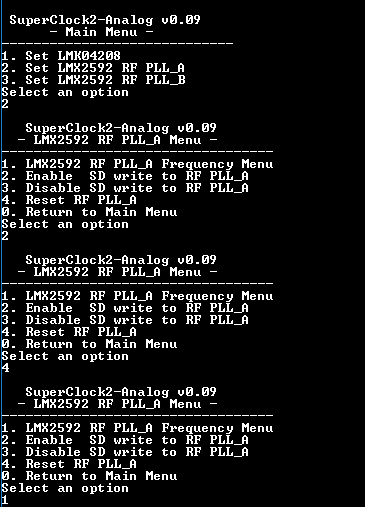
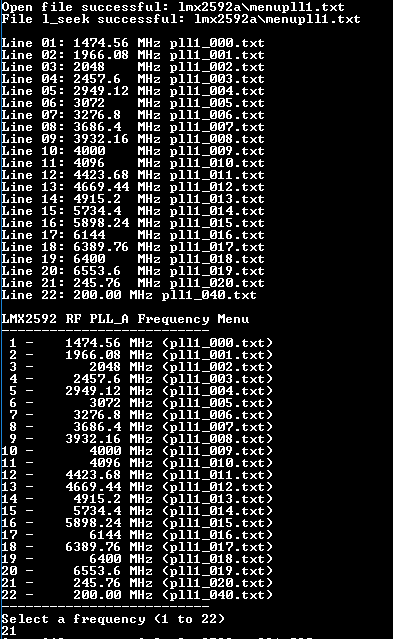
- To Configure RF PLL-A follow the steps described below to set 245.76 MHz clock.
2. To Configure FPGA REF_CLK follow the below steps to set 122.88 MHz clock.
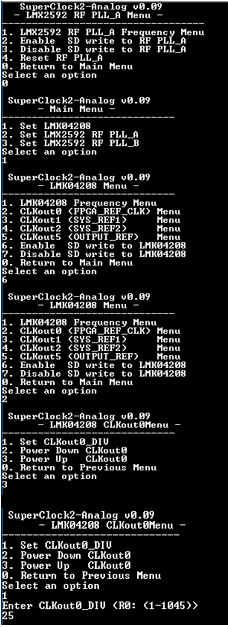
(The default PLL clock frequency is 3072MHz and 3072/25=122.88 MHz.)
3. To configure Analog SYS_REF follow the steps described below to set 7.68 MHz clock.
(The default PLL clock frequency is 3072MHz and 3072/400=7.68 MHz.)
4. To configure PL_SYS_REF follow the steps described below to set 7.68 MHz clock.
(The default PLL clock frequency is 3072MHz and 3072/400=7.68 MHz.)
Clock Configuration Using System Controller User Interface (SCUI)
- The user needs to follow the below mentioned steps to program the clocks on hw-clk-103
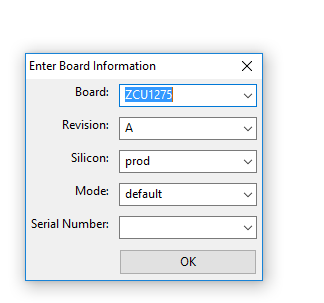
(a) Navigate to board UI folder in the SCUI package and open the board UI application.
The user needs to enter the board information accordingly as shown in the figure below.
(b) Go to File → "change the system controller port". The system controller port window opens as shown in the figure below.
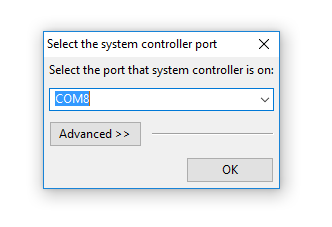
c) On the windows machine,Go to Start→ Device Manager.

In the system controller window choose the COM port corresponding to Silicon Labs Quad CP210x USB to UART Bridge: Interface 1.
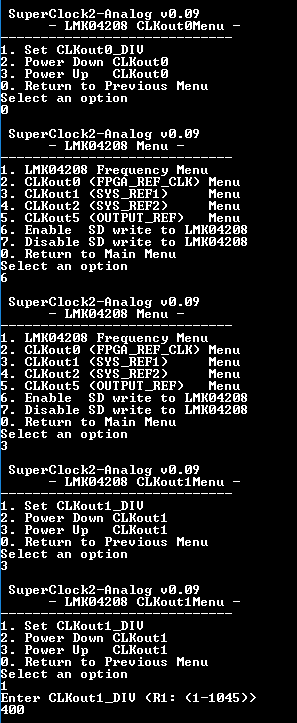
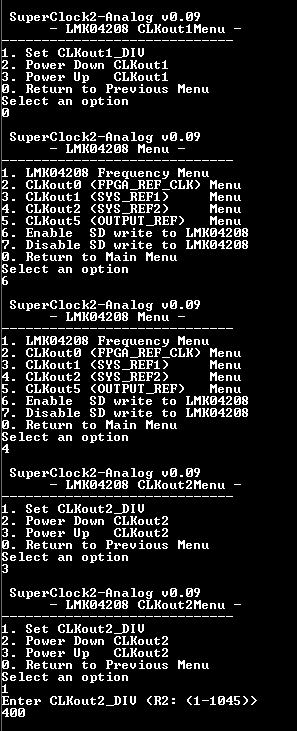
d) In the SCUI Go to CLK-103 section.
e) The user needs to set FPGA REF_CLOCK ,SYS_REF and PL_SYS_REF.
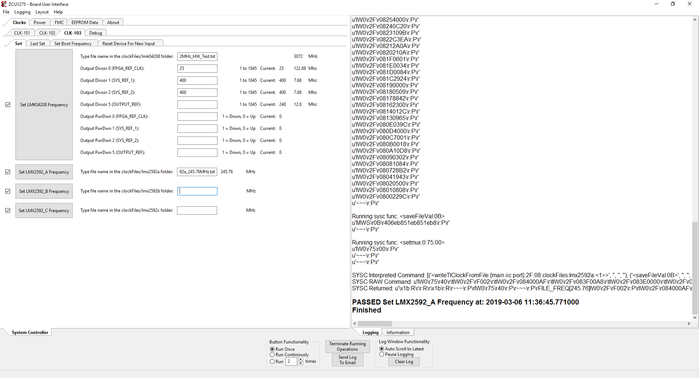
f) Choose the clock file "LMK04208_CKin112M8_3072MHz_HW_Test.txt" from the clockFiles folder in the SCUI package for LMK04208
and enter the division factors for FPGA REF_CLOCK , SYS_REF and PL_SYS_REF.
Enter the name of the clock file in the box provided,as shown in the figure below.

Press "Set LMK04208 Frequency". Once the frequencies are set the log is as shown in the above figure.
g) To configure "LMX2592_A" choose the clock file "LMX2592a_245.76MHz.txt" corresponding to 245.76MHz frequency
from the clockFiles folder in the SCUI package.
Enter the name of the file in the SCUI as shown below and press "Set LMX2592_A Frequency" .
Once the frequencies are set the log is as shown in the below figure.
h) To configure "LMX2592_B" choose the clock file "LMX2592b_245.76MHz.txt" corresponding to 245.76MHz frequency
from the clockFiles folder in the SCUI package.
Enter the name of the file in the SCUI as shown below and press "Set LMX2592_B Frequency".
Once the frequencies are set the log is as shown in the below figure.
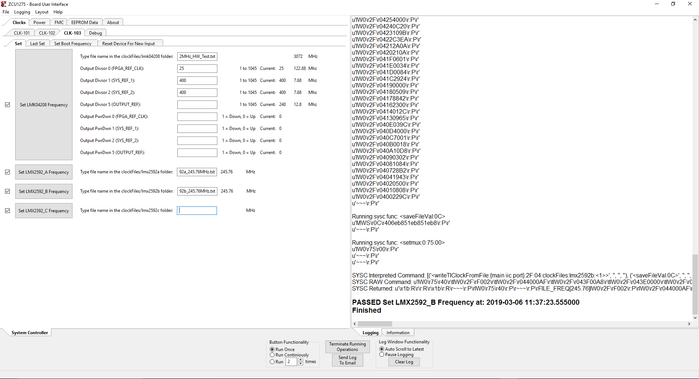
i) To configure "LMX2592_C" choose the clock file "LMX2592c_245.76MHz.txt"corresponding t o 245.76MHz frequency
from the clockFiles folder in the SCUI package.
Enter the name of the file in the SCUI as shown below and press "Set LMX2592_C Frequency".
Once the frequencies are set the log is as shown in the below figure.

Running the Test
Copy IQ images (BOOT.BIN, image.ub, autostart.sh and DAC_DATA.csv) to SD card. Insert SD card to SD slot(near to HW-CLK clock module) as shown in below figure.
- Once the targets boots, rftool application will be launched automatically.
Refer to below screenshot for boot logs.

2. From the shell prompt launch rftool-mts application by entering "rftool-mts"

3. Once the rtool-mts application starts it prompts for options, select the options according to the use-case.
Option 1 : To Generate and Acquire in mode 1
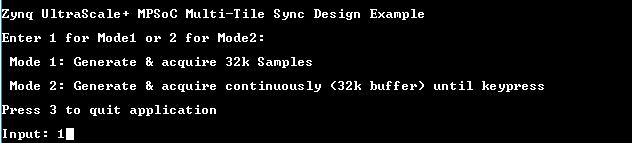
After user selects option, a prompt will appear as shown below.

Option 2: To Generate and Acquire in mode 2
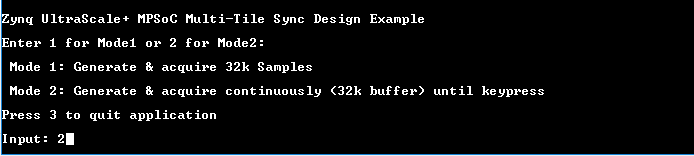
After user selects option, a prompt will appear to save ADC content to SD card.
Press "Enter" to copy ADC data to SD card.

Option 3: To exit the application
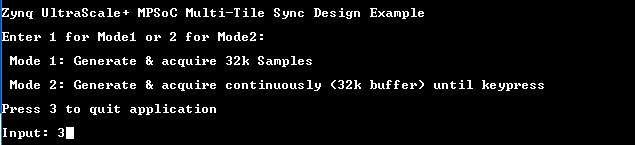
After exiting the application ADC_DATA.csv file is copied in the SD card.
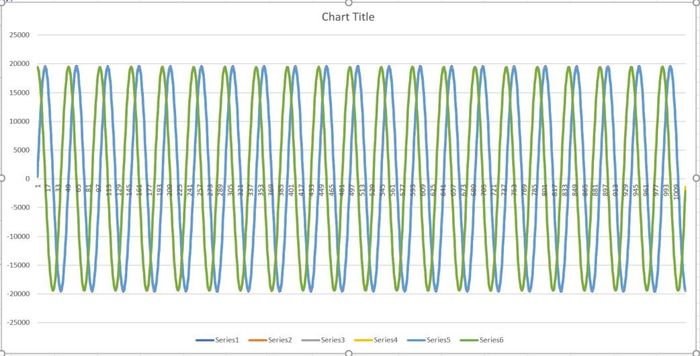
Remove the SDcard and plot the ADC content in Excel sheet.
Find below reference plot for IQ data capture. As can be seen in the plot all the signal sent through DACs and received through ADCs are aligned.
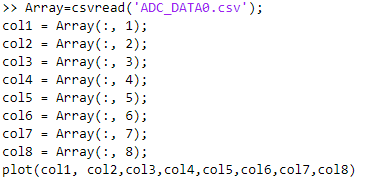
Excel can not plot waveforms for larger sample sizes. The examples given below are for 1K sample. Based on number of samples that can be plotted please select appropriate number of sample sizes (Excel rows) from .CSV file. For observing larger sample sizes please use .CSV compliant tools like Matlab or equivalent.
The below snapshot shows the code snippet to plot data in MATLAB using the .CSV file
IQ Data Capture (90 degree phase shift between I and Q components)
© Copyright 2019 - 2022 Xilinx Inc. Privacy Policy