Zynq UltraScale MPSoC Base TRD 2016.3 - Design Module 8
Zynq UltraScale MPSoC Base TRD 2016.3 - Design Module 8
Design Overview
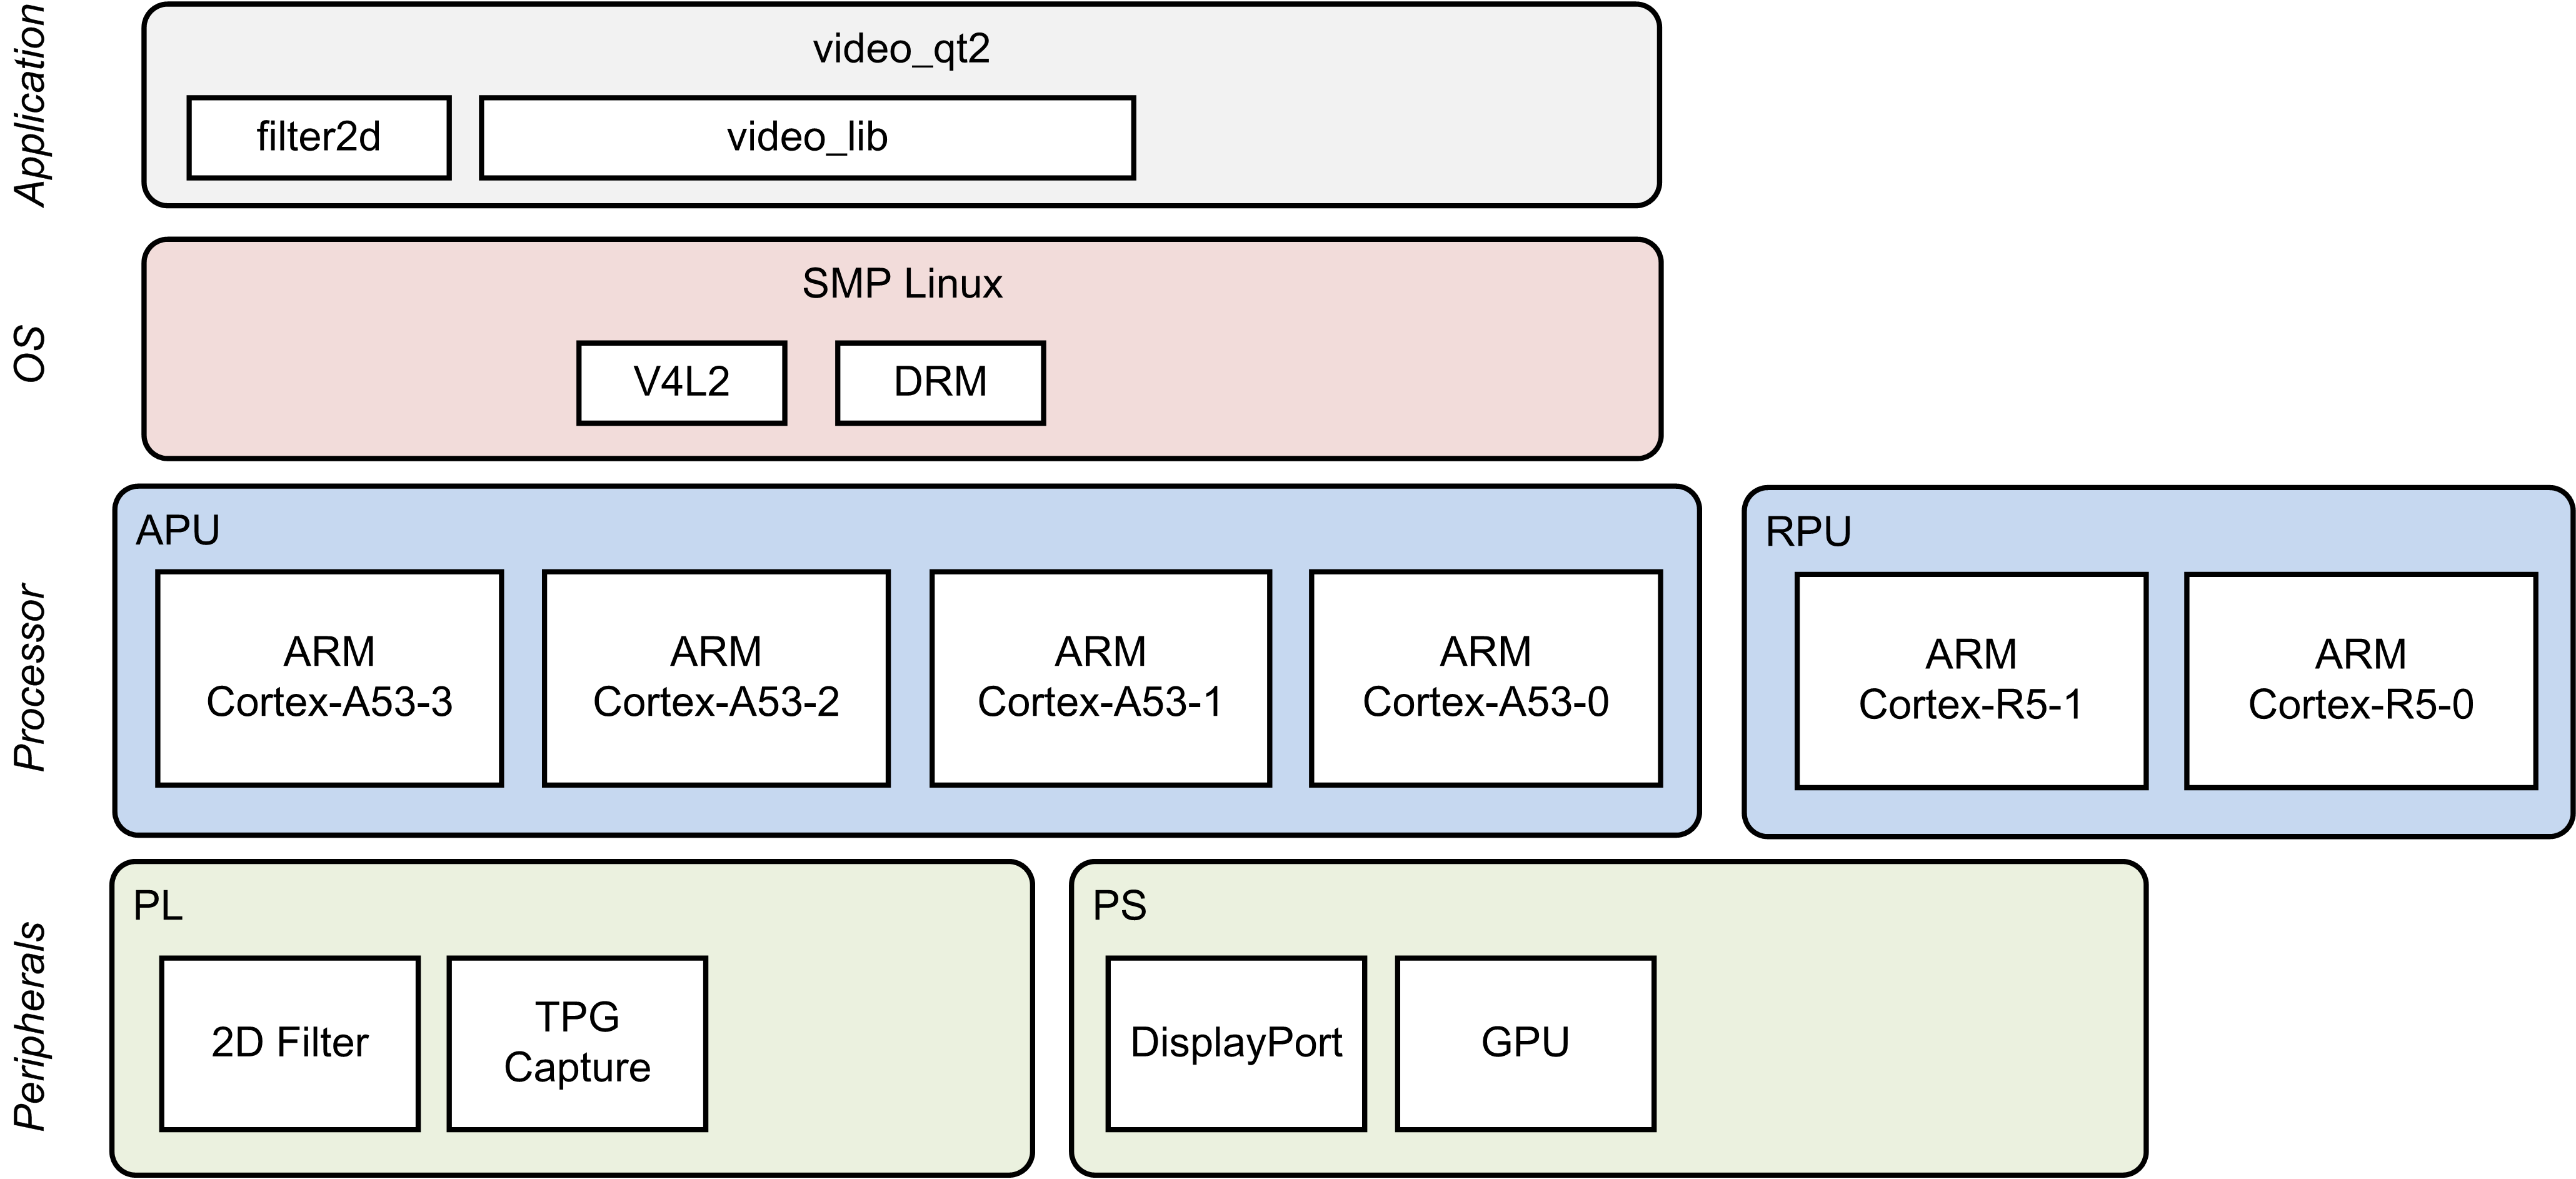
This module shows how to move the 2D convolution filter from software to hardware using the PL optimized hls_video library that provides an OpenCV equivalent function.
Design Components
This module requires the following components:
- zcu102_base_trd (SDSoC)
- pmu_fw
- petalinux_bsp
- zynqmp_fsbl
- bl31
- u-boot
- kernel
- device tree
- rootfs
- filter2d (HW)
- video_lib
- video_qt2
Build Flow Tutorials
2D Filter Sample
This tutorial shows how to build the hls_video version of the 2D filter sample based on the Base TRD SDSoC platform.Open the existing SDx workspace from design module 7 using the SDx tool.
% cd $TRD_HOME/apu/video_app
% sdx -workspace . &&
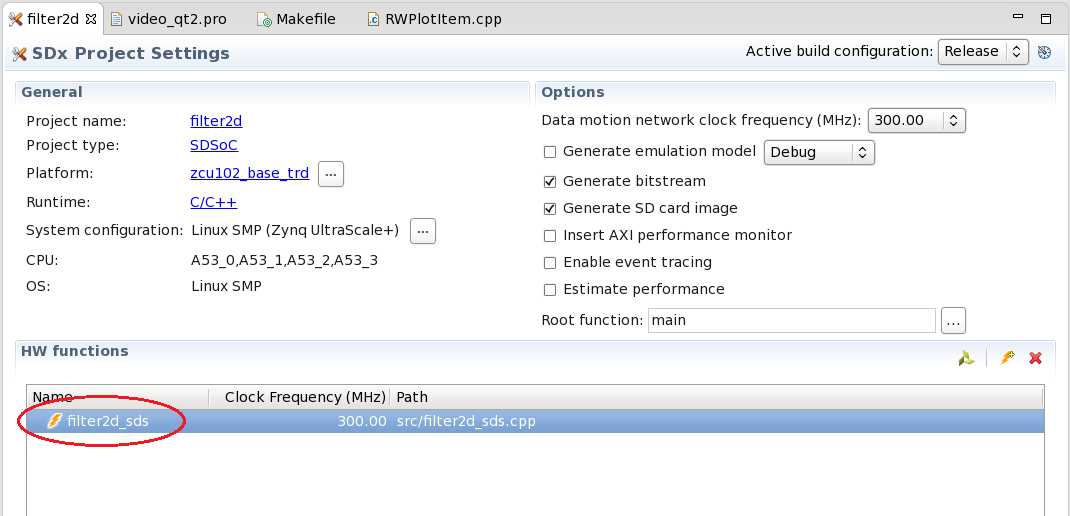
- Expand the filter2d project and sources in the project explorer, select the filter2d_sds function and click 'Toggle HW/SW' to select this function for hardware acceleration.

- Verify the function was added to the HW functions in the project settings panel and the clock frequency is set to 300MHz
- Right-click the filter2d project and select 'Build Project'.

Copy the content of the generated sd_card folder to the dm8 SD card directory
% cp -rf filter2d/Release/sd_card $TRD_HOME/images/dm8
Video Qt Application
There is no need to rebuild the video_qt2 application if you have already built it in module 7, otherwise follow the instructions from module 7.Copy the generated video_qt2 executable to the dm8 SD card directory or alternatively use the pre-built version bundled with the SDSoC platform.
% cp -f video_qt2/video_qt2 $TRD_HOME/images/dm8/bin/
Run Flow Tutorial
- See here for board setup instructions.
- Copy all the files from the $TRD_HOME/images/dm8 SD card directory to a FAT formatted SD card.
- Power on the board to boot the images; make sure INIT_B, done and all power rail LEDs are lit green.
- After ~30 seconds, the display will turn on and the application will start automatically, targeting the max supported resolution of the monitor (one of 3840x2160 or 1920x1080 or 1280x720).
Upon application exit, use the below login and password to log into the framebuffer or serial console:
root@Xilinx-ZCU102-2016_3 login: root
password: root
- The SD card file system is mounted at /media/card
- To re-start the TRD application type run_video.sh
- The user can now control the application from the GUI's control bar (bottom) displayed on the monitor.
- By default, application launches with VIVID as a video-source, user can also select TPG from the "Video-source selection" button present on the GUI's control-bar.
- Virtual Video Device (VIVID): emulates a USB webcam purely in software
- USB Webcam (UVC): using the universal video class driver
- Test Pattern Generator (TPG); implemented in the PL
- A 2D convolution filter can be turned on and different filter presets can be selected; the following filter modes are available:
- OFF - accelerator is disabled/bypassed
- SW - accelerator is run on A53 using OpenCV algorithm
- HW - accelerator is run on PL generated from HLS algorithm

- The video info panel (top left) shows essential settings/statistics.
- The CPU utilization graph (top right) shows CPU load for each of the four A53 cores.
© Copyright 2019 - 2022 Xilinx Inc. Privacy Policy