Table of Contents

Requirements

  1. ZCU102 development board (This design example has been tested on silicon 3.0 revD board).
  2. SDK (2017.1 or later release)
  3. Petalinux (2017.1 or later release)

Introduction

The RPU can be configured to service regular real-time events while the APU remains suspended most of the time. A typical example would be an automotive engine management unit, where the RPU would perform typical engine management functions at regular interval of 2 seconds. The APU would only wake up for passenger entertainment functions, software upgrade and to service other non-realtime events.

Basic Flow


  1. Linux/baremetal application boots on the APU.
  2. Real-time application runs on the RPU.
  3. RPU requests the APU to suspend.
  4. APU suspends itself.
  5. RPU sets the RTC to expire in 2 second, in auto-rearm mode.
  6. RPU sets the RTC as the wake-up source.
  7. RPU suspends itself.
  8. RPU wakes up and perform real-time service. In this example, the RPU toggles the DS50 LED.
  9. RPU suspends itself, and the same repeats.

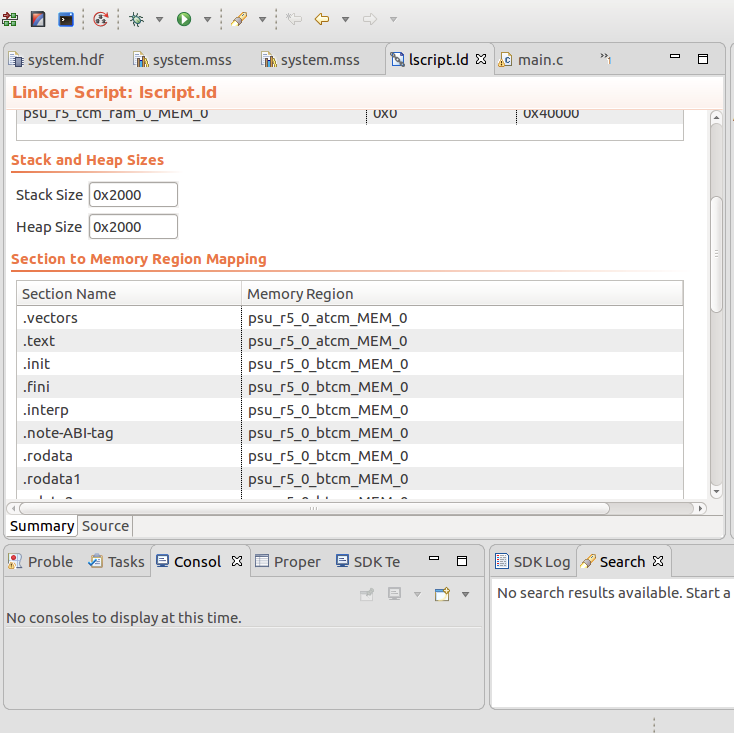
Steps to build demo example standalone applications


Steps to run demo example (APU running Linux) using SD boot mode


  1. Create RPU application rpu.elf from SDK as described in above section.
  2. Create a new folder and copy pmufw.elf, zynqmp_fsbl.elf, bl31.elf and u-boot.elf from Petalinux pre-built images. Also copy rpu.elf into same folder.
  3. Create demo-example.bif file in same folder as shown below.

    the_ROM_image:
    {
         [fsbl_config] a53_x64
         [pmufw_image] pmufw.elf
         [bootloader,destination_cpu=a53-0] zynqmp_fsbl.elf
         [bootloader,destination_cpu=r5-0] rpu.elf
         [destination_cpu=a53-0, exception_level=el-3,trustzone] bl31.elf
         [destination_cpu=a53-0, exception_level=el-2] u-boot.elf
    }


  4. Create BOOT.bin file using following command.

    bootgen -arch zynqmp -image demo-example.bif -w -o BOOT.bin


  5. Create a boot and root partition in SD card and copy BOOT.bin file to boot partition.
  6. Copy image.ub and system.dtb from Petalinux pre-built images to boot partition of the SD card.
  7. Boot the ZCU102 board in SD boot mode.
  8. After booting linux write following lines on linux console.
    (In petalinux prebuilt image by default RTC wakeup source is enabled. So you need to disable RTC wakeup source otherwise Linux can wakeup from RTC)(In petalinux prebuilt image by default split mode config object is present, So if RPU is running in split mode, RPU1 needs to be powered down, else PMU would consider it PM disabled PU and would not released all unused nodes causing FPD on during APU suspend)

    echo disabled > /sys/devices/platform/amba/ffa60000.rtc/power/wakeup
    echo request_wakeup 8 1 0 1 > /sys/kernel/debug/zynqmp_pm/power
    echo force_powerdown 8 >  /sys/kernel/debug/zynqmp_pm/power
    echo release_node 69 > /sys/kernel/debug/zynqmp_pm/power
    echo MMIO_WRITE 0xFFD80064 1 1 > /sys/kernel/debug/zynqmp_pm/power

    (For v2018.2)

    echo disabled > /sys/devices/platform/amba/ffa60000.rtc/power/wakeup
    echo pm_request_wakeup 8 1 0 1 > /sys/kernel/debug/zynqmp-firmware/pm
    echo pm_force_powerdown 8 >  /sys/kernel/debug/zynqmp-firmware/pm
    echo pm_release_node 69 > /sys/kernel/debug/zynqmp-firmware/pm
    echo 0 > /sys/module/printk/parameters/console_suspend
    echo 0x1 0x1 > /sys/firmware/zynqmp/pggs3

    (For v2018.3)

    echo disabled > /sys/devices/platform/amba/ffa60000.rtc/power/wakeup
    echo disabled > /sys/devices/platform/amba/ff000000.serial/power/wakeup
    echo disabled > /sys/devices/platform/amba/ff010000.serial/power/wakeup
    echo pm_release_node 69 > /sys/kernel/debug/zynqmp-firmware/pm
    echo 0 > /sys/module/printk/parameters/console_suspend
    echo 0x1 0x1 > /sys/firmware/zynqmp/pggs3

    (For v2019.1 - Later)

    echo disabled > /sys/devices/platform/amba/ffa60000.rtc/power/wakeup
    echo disabled > /sys/devices/platform/amba/ff000000.serial/power/wakeup
    echo disabled > /sys/devices/platform/amba/ff010000.serial/power/wakeup
    echo disabled > /sys/devices/platform/amba/ff0a0000.gpio/power/wakeup
    echo pm_release_node 69 > /sys/kernel/debug/zynqmp-firmware/pm
    echo 0 > /sys/module/printk/parameters/console_suspend
    echo 0x1 0x1 > /sys/firmware/zynqmp/pggs3


The DS50 LED will on for 2 seconds when RPU wakes up, after that RPU goes down to sleep for 2 seconds. RPU wakes up again and same cycle repeats every time. One can change LED on time (or do another task instead of LED on/off) and RPU sleep time according to requirement.

Steps to run demo example (APU running standalone application) using SD boot mode

  1. Create RPU and APU application from SDK as described in above section.
  2. Create a new folder and copy pmufw.elf, fsbl.elf from Petalinux pre-built images. Also copy apu.elf and rpu.elf into same folder.
  3. Create demo-example.bif file in same folder as shown below.

    the_ROM_image:
    {
         [fsbl_config] a53_x64
         [pmufw_image] pmufw.elf
         [bootloader,destination_cpu=a53-0] fsbl.elf
         [bootloader,destination_cpu=r5-0] rpu.elf
         [destination_cpu=a53-0] apu.elf
    }


  4. Create BOOT.bin file using following command.

    bootgen -arch zynqmp -image demo-example.bif -w -o BOOT.bin


  5. Copy BOOT.bin to boot partition of the SD card.
  6. Boot the ZCU102 board in SD boot mode.
The APU application will wait for RPU to boot and send request suspend. After receiving suspend callback APU will be suspended using self suspend. The DS50 LED will on for 2 seconds when RPU wakes up, after that RPU goes down to sleep for 2 seconds. RPU wakes up again and same cycle repeats every time. One can change LED on time (or do another task instead of LED on/off) and RPU sleep time according to requirement.

Binary files (2018.1):


Debug or run applications using system debugger


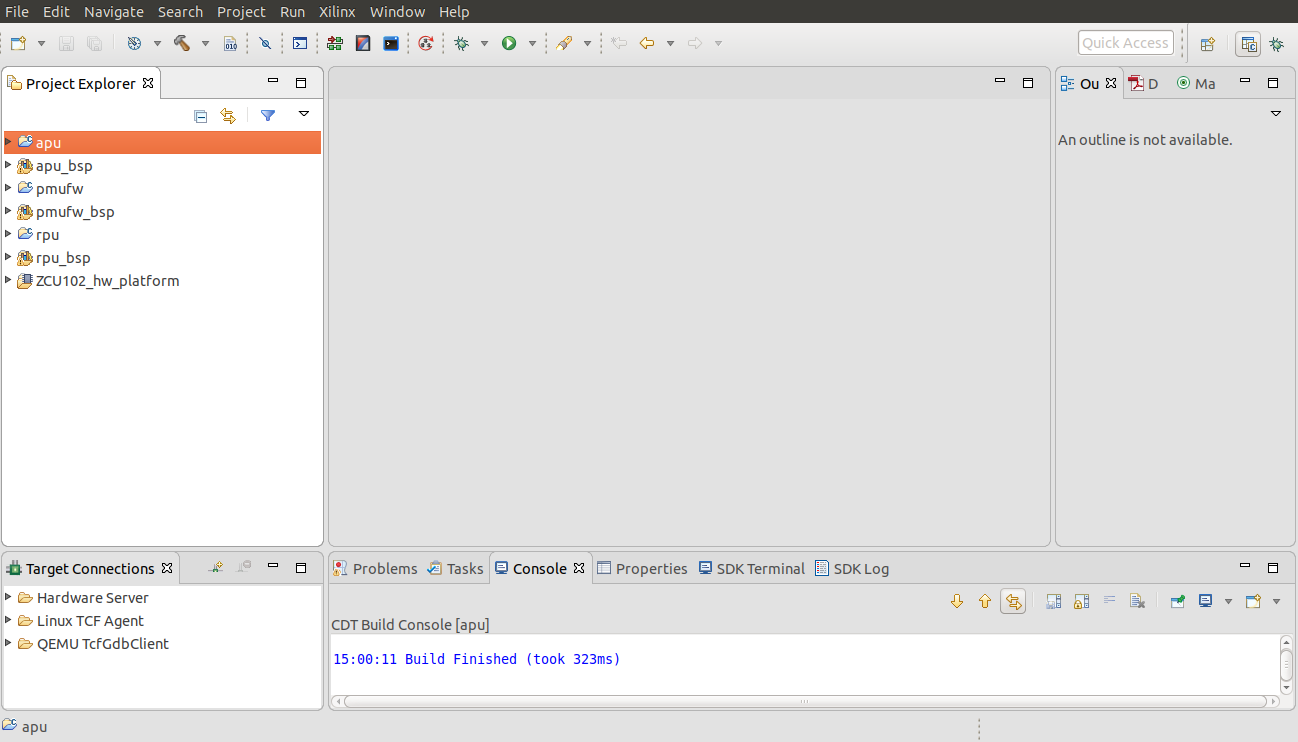
  1. Open Xilinx SDK (It is assumed that APU standalone application, RPU standalone application and PMU firmware are already built using SDK).


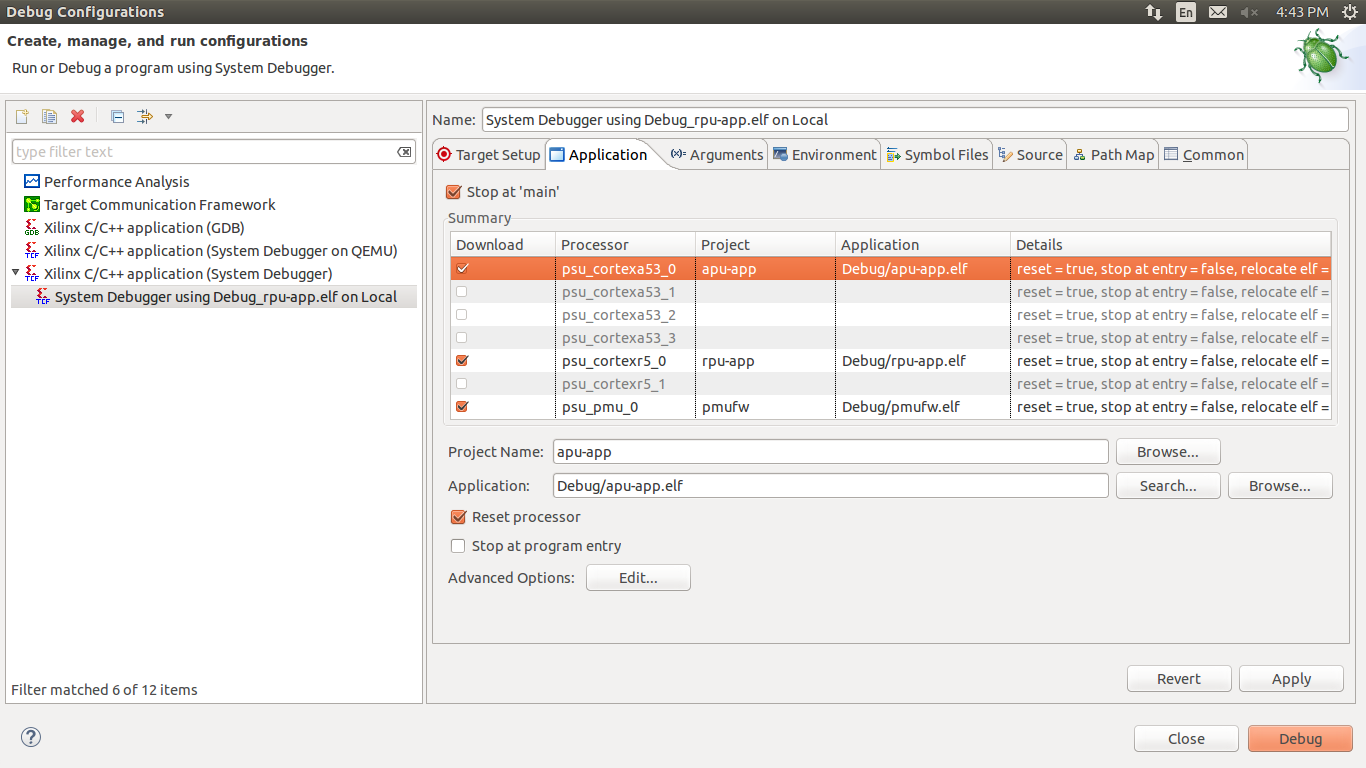
  2. In Project Explorer, right-click the RPU-app project and select Debug As > Debug Configurations... popup window appears. Double click on Xilinx C/C++ application (system Debugger). Click on application tab and select checkbox as per below snapshot for each selected application.

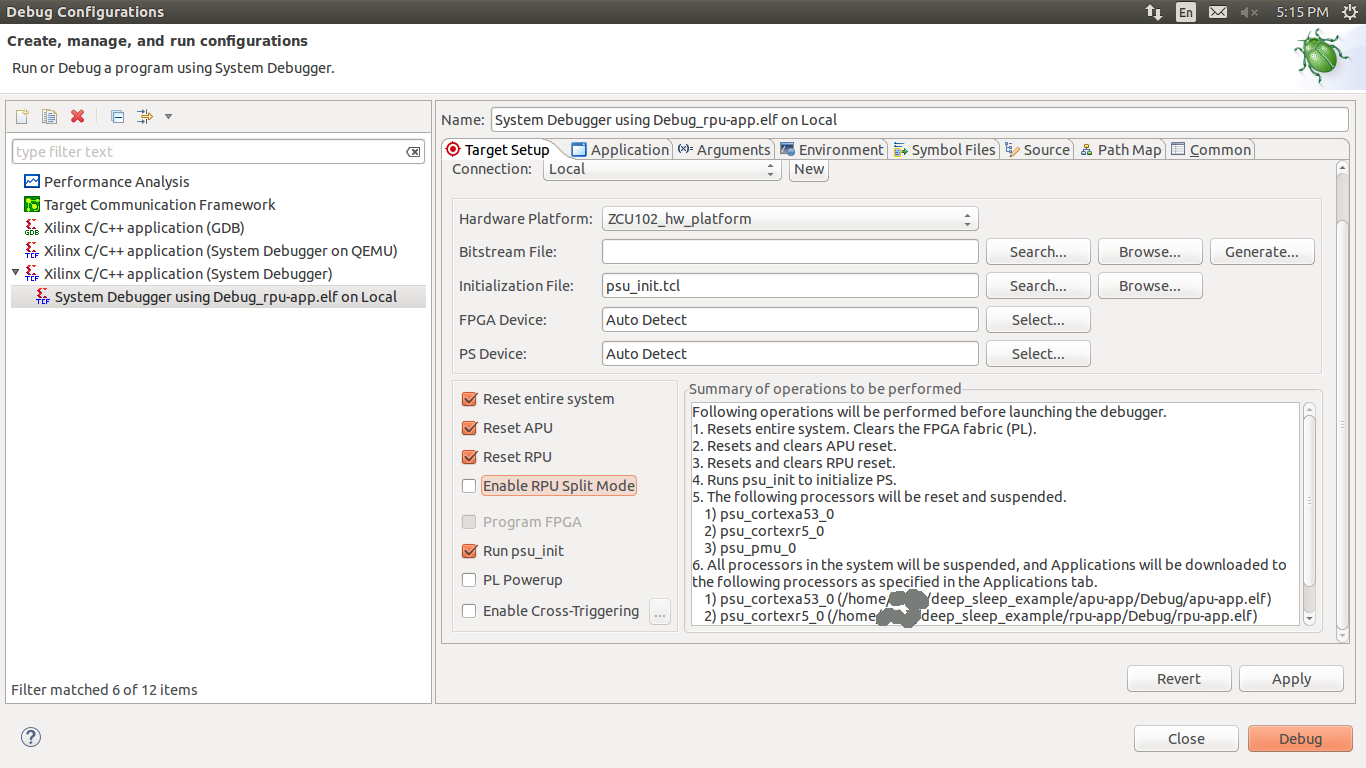
  3. Click on Target Setup tab and select checkbox as per below snapshot and click on Apply.
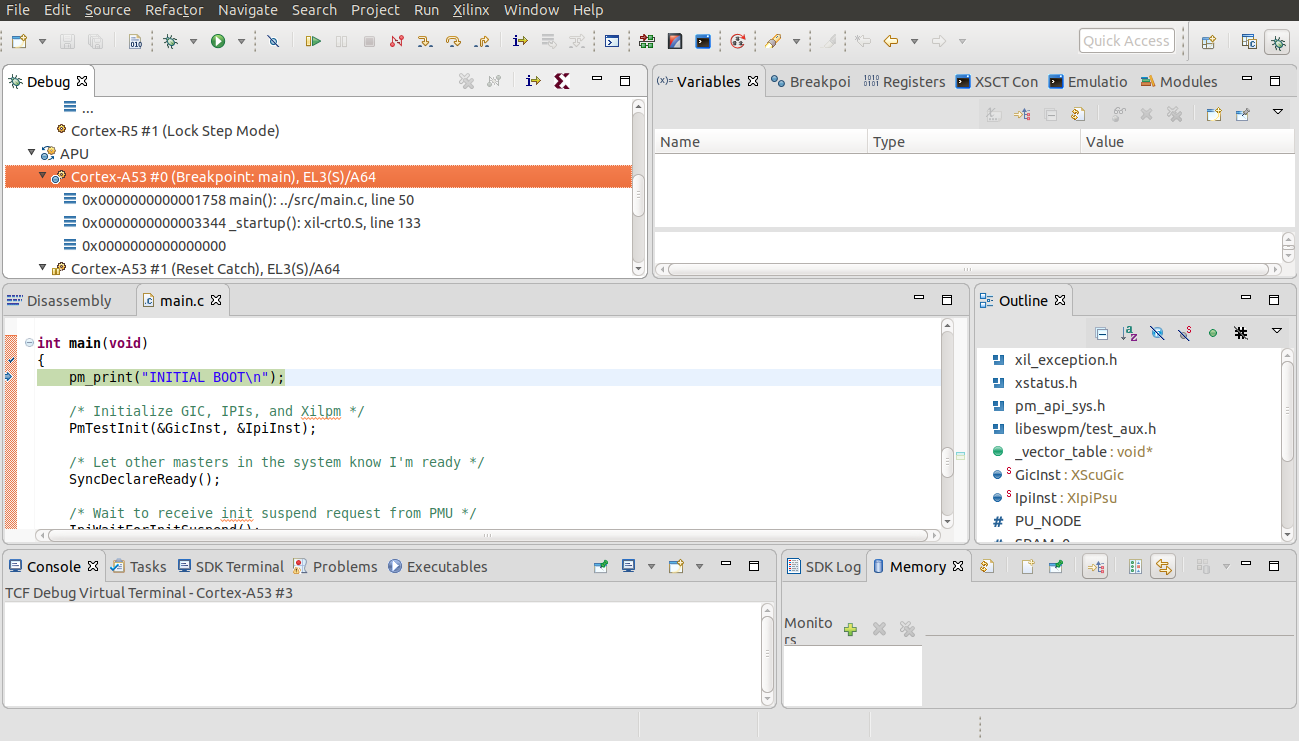
  4. Now click on debug. A new debug popup window with debug prospective configuration appears. Cortex-A53 will be stopped at main() due to breakpoint.


  5. Select Cortex-A53 processor in debug window and click Resume to continue application.
  6. Open serial console COM2 and it will display as per below snapshot.


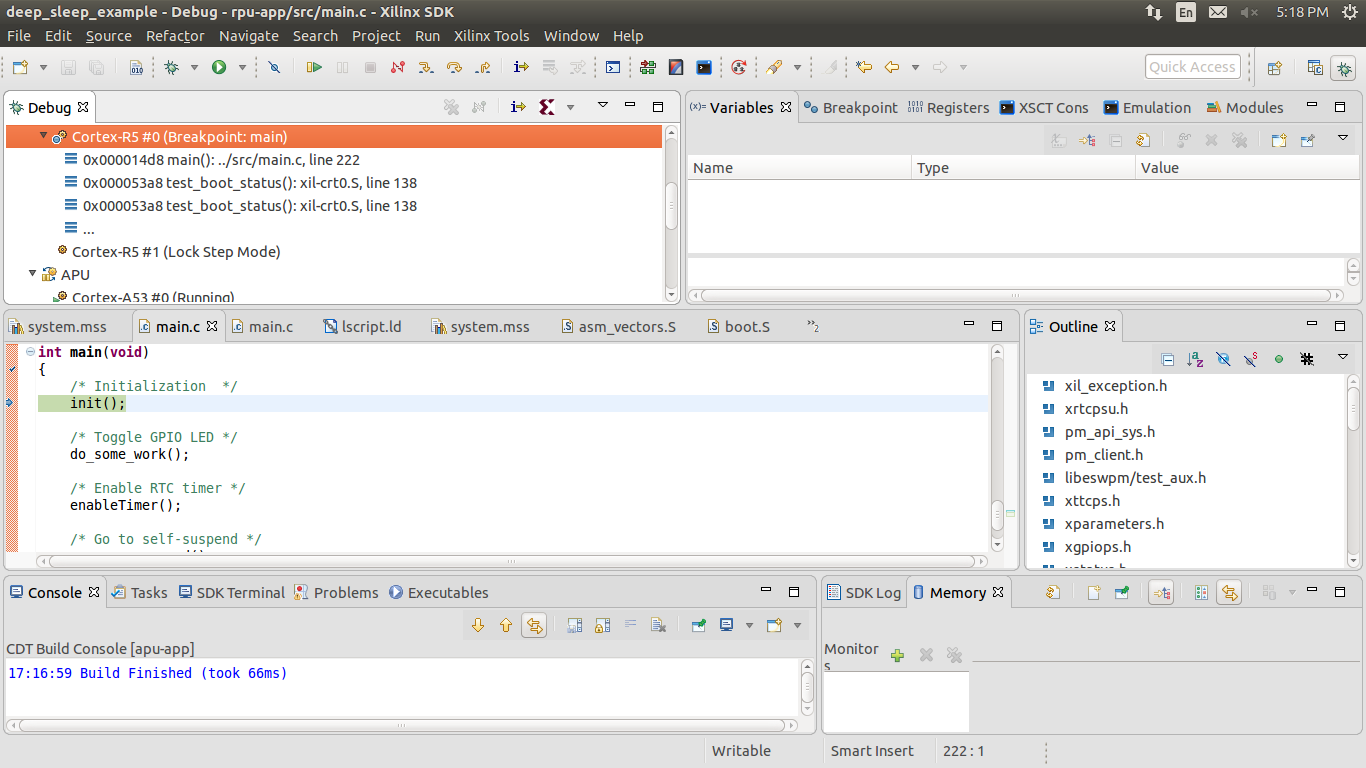
  7. Similarly Cortex-R5 will be stopped at main() due to breakpoint.


  8. Select Cortex-R5 processor in debug window and select Resume to continue running the program.
  9. In serial console COM2 it will display as per below snapshot.


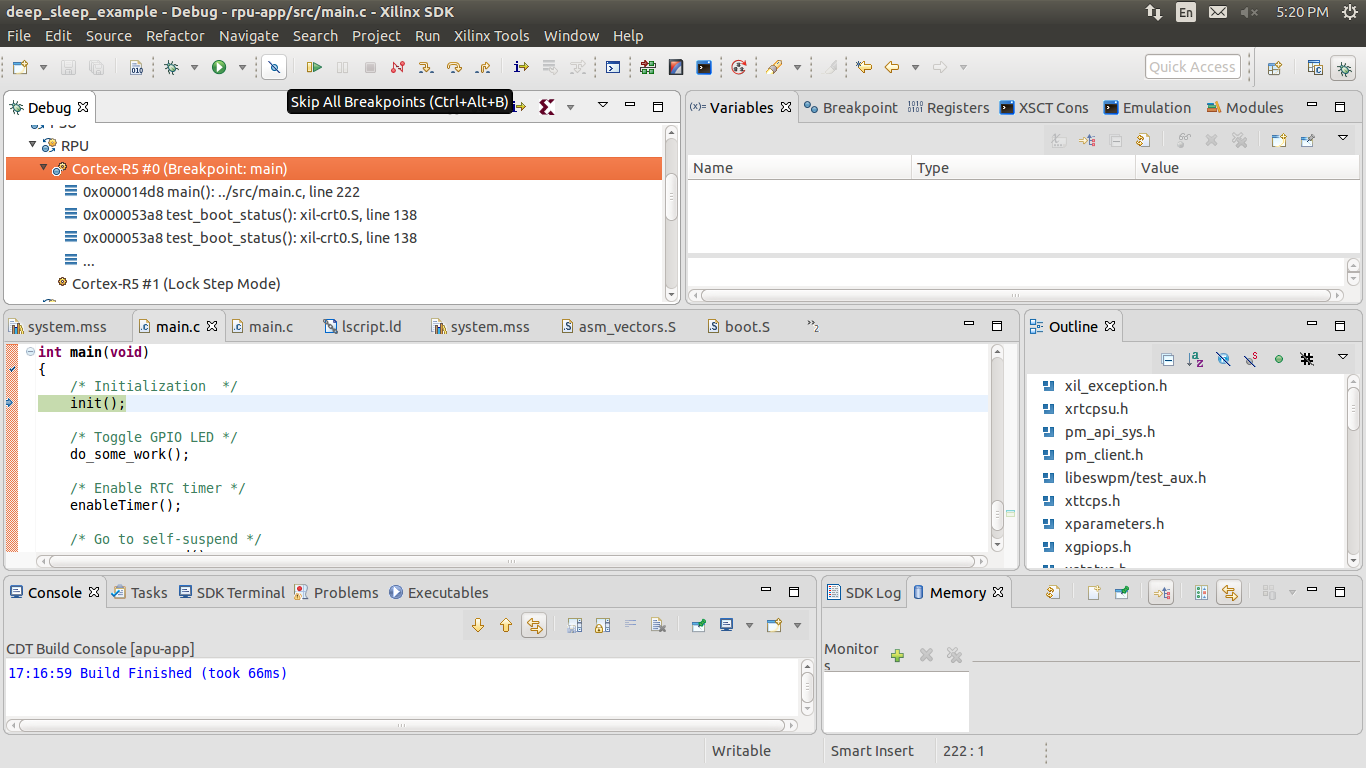
  10. Select Skip All Breakpoints from tool bar. Now click on Resume.


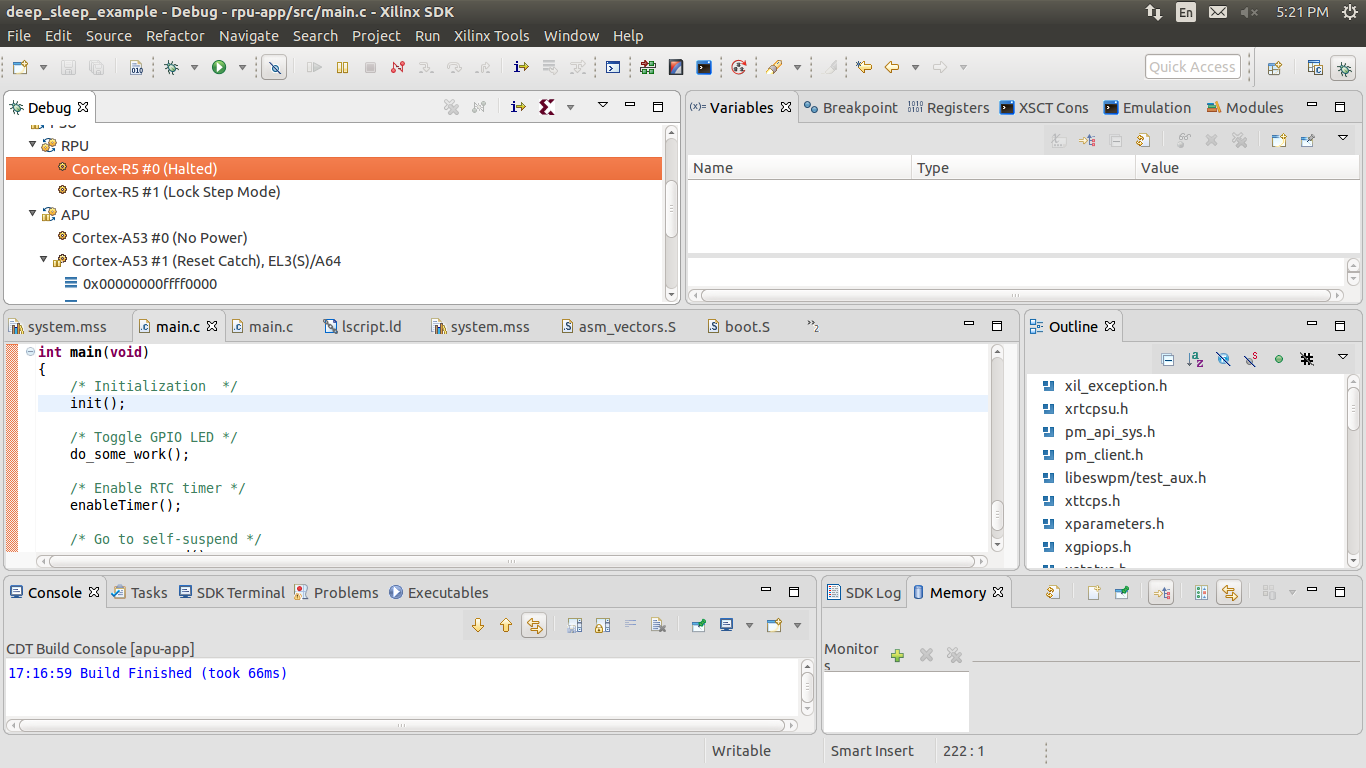
  11. Application will now run without stopping at anywhere. RPU state will change from Running to Halted and vice versa at 2 seconds. Similarly DS50 LED will remain on for 2 seconds after that RPU goes to sleep for 2 seconds.


Related Links