You are viewing an old version of this page. View the current version.
Compare with Current
View Page History
« Previous
Version 3
Next »
For SD booting, we need to have 2 partitions on the SD card. One partition(referred to as boot going forward) will be used to put the images like fsbl, linux image etc. The other partition (referred to as root going forward) will be used to hold the root file system.
Table of Contents
fdisk is text based tool used to create partitions on a disk. One can also use gparted which is gui base partitioning tool.
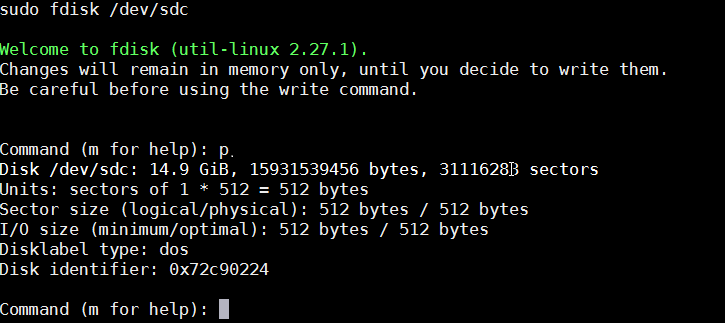
This tutorial assumes you are using a new SD card with no partition on it. Unmount your disk and start fdisk with your device name. In my case my SD card is at /dev/sdc. If you type p, you will see your current partition table.
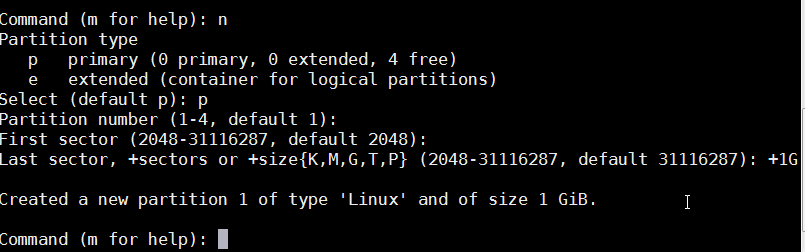
- Make a new partition by typing 'n'. Make it primary by selecting 'p', use default partition number and first sector . Set aside 1G for this partition by typing +1G.
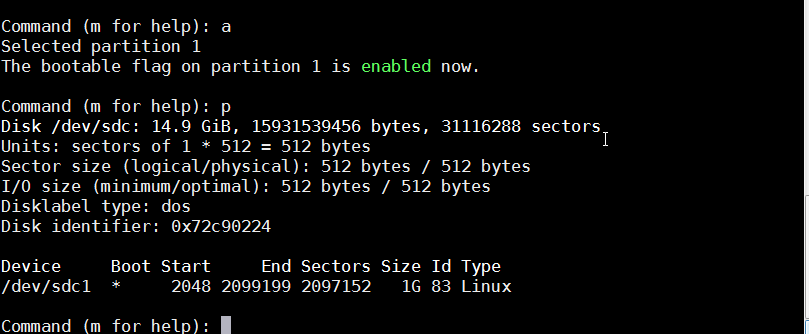
- Make this partition bootable. Set bootable flag by typing 'a'. Now if you print out the partition table, you should see your new partition with a * under Boot.
|
| fdisk - Bootable flag setting |
- Make the root partition by typing 'n'. Select primary partition, leave the first and last sector default.
- If you check your partition table now, you should see the 2 partitions you just created. After verification type 'w' to write to disk and exit.
|
| fdisk - print partition table |
- mkfs.vfat -F 32 -n boot /dev/sdc1 - this will format the first partitions using FAT.
- mkfs.ext4 -L root /dev/sdc2 - this will format 2nd partitions using ext4.
Mount the partitions and copy the needed files.