This page collects various tips & tricks for getting the most out of the Certified Ubuntu on Xilinx Devices release.
Table of Contents
Installing a Graphical Package Manager
The core of the Ubuntu ecosystem is 3rd-party packages. Ubuntu 20.04 LTS provides some packages as tradition Debian .deb packages in apt repositories. Sandboxed modern applications are provided as Snaps (such as xlnx-config). By default, the Certified Ubuntu on Xilinx Devices image does not provide a graphical package manager. If you would like to add one, there are several available in the existing Ubuntu package repository ecosystem.
A common lightweight package manager for apt packages is called synaptic. It can be installed with the following command:
$ sudo apt install synaptic
The Ubuntu snap ecosystem provides a separate GUI for managing and installing snaps. The Ubuntu Snap Store application is called snap-store. It can be installed with the following command:
$ sudo snap install snap-store
Stopping the Ubuntu Graphical Desktop Environment
If you wish to stop the Ubuntu graphical desktop environment and return to a strictly command line environment, you can do so by using the systemd interfaces. The systemd “multi-user” target is equivalent to runlevels 3, 4, or 5 in traditional systems based on SysVInit. This can be used to save system memory which would otherwise be used for running the rich desktop experience.
To switch to the “multi-user” target temporarily:
$ sudo systemctl isolate multi-user.target
To return to the graphical desktop environment:
systemctl isolate graphical.target
To make this change permanent (eg, the graphical desktop environment will no longer start automatically):
$ sudo systemctl enable multi-user.target
$ sudo systemctl set-default multi-user.target
Switching Desktop Environments
The default graphical environment in Ubuntu 20.04 LTS is based on GNOME3. Other desktop environments are available and can be installed to suit personal preference.
Replacement desktop environments can be installed from the command line. You can connect to the system via direct USB UART connection, SSH, or by switching the monitor output from graphical multi-user mode to terminal-only multi-user mode. For details on switching the monitor output to terminal multi-user mode, see the Stopping the Ubuntu Graphical Desktop Environment section.
From the terminal first, make sure that the apt package cache is up-to-date:
$ sudo apt-get -y update
Next, install the new desktop environment using the apt-get tools:
$ sudo apt-get install <desktop environment package name>
For a list of desktop environment packages, see the table below.
Desktop Environment Name | Package Name | Notes |
|---|---|---|
Mate (from ubuntu-mate remix distribution) |
| Tested and works. May take a long time to install depending on the speed of your SD card. |
Unity (traditional Ubuntu desktop environment) |
| |
KDE (from kubuntu remix distribution) |
| |
Xfce (from xubuntu remix distribution) |
| Tested and works. |
LXDE (from lubuntu remix distribution) |
| Tested and works. |
Cinnamon (from ubuntu-cinnamon remix distribution) |
|
NOTE: The default Ubuntu display manager is gdm. Some desktop environments require the lightdm display manager. You may need to switch the default display manager when switching desktop environments
Understanding CMA Usage
Many of the Xilinx designs, particularly those that leverage the Xilinx Video Codec Unit (VCU), make extensive use of Contiguous Memory Allocator (CMA) in the Linux kernel.
There are many resources that explain how CMA works:
The Xilinx VCU User Guide (PG252) has details on how the VCU device drivers leverage CMA and contains references on CMA sizes for various applications.
The default Certified Ubuntu on Xilinx Devices image specifies a CMA size that is best suited for the official out-of-the-box demonstrations. Depending on your workloads and usage, you may find that you need to adjust the default CMA size to meet your needs.
The following Bash line can be used to monitor the current CMA usage:
$ while :; do cat /proc/meminfo | grep Cma; echo '---'; sleep 1; done;
If you would like to alter CMA value to free up memory for other applications, please see the Getting Started with Certified Ubuntu on Xilinx Devices page in the Changing the Kernel bootargs Used By U-Boot section.
For general usage, Xilinx does not recommend lowering the CMA below 256MB
Updating the Board-Level Metadata EEPROM
Xilinx evaluation boards have metadata about the board stored in an I2C EEPROM soldered to the board. Among this data is the serial number of the board, name of the board (eg, ZCU102), board revision, and Ethernet MAC address.
Xilinx declares how & where this information is stored in the device tree DTS file for the ZCU102 here: https://raw.githubusercontent.com/Xilinx/u-boot-xlnx/master/arch/arm/dts/zynqmp-zcu102-rev1.0.dts
&eeprom {
	#address-cells = <1>;
	#size-cells = <1>;

	board_sn: board-sn@0 {
		reg = <0x0 0x14>;
	};

	eth_mac: eth-mac@20 {
		reg = <0x20 0x6>;
	};

	board_name: board-name@d0 {
		reg = <0xd0 0x6>;
	};

	board_revision: board-revision@e0 {
		reg = <0xe0 0x3>;
	};
};
For some boards (especially boards early in the production run), this data may be incomplete. To check this data on your board, stop the boot process during the U-Boot startup phase by pressing CTRL-C when you see the following messages on the USB UART terminal:
U-Boot 2020.01 (Jun 15 2021 - 14:24:32 +0000)

Model: ZynqMP ZCU102 Rev1.0
Board: Xilinx ZynqMP
This will stop the boot process at the U-Boot terminal. U-Boot provides an I2C interface which can read and write data from the meta-data EEPROM. Xilinx has populated the ZCU10x evaluation boards with multiple I2C devices, each attached to the output of an I2C mux. To get the topology of the I2C chain use the following command:
ZynqMP> i2c bus
Bus 0:  i2c@ff020000
   20: gpio@20, offset len 1, flags 0
   21: gpio@21, offset len 1, flags 0
   75: i2c-mux@75, offset len 1, flags 0
Bus 2:  i2c@ff020000->i2c-mux@75->i2c@0
Bus 3:  i2c@ff020000->i2c-mux@75->i2c@1
Bus 4:  i2c@ff020000->i2c-mux@75->i2c@2
Bus 1:  i2c@ff030000  (active 1)
   74: i2c-mux@74, offset len 1, flags 0
   75: i2c-mux@75, offset len 1, flags 0
Bus 5:  i2c@ff030000->i2c-mux@74->i2c@0  (active 5)
   54: eeprom@54, offset len 1, flags 0
Bus 6:  i2c@ff030000->i2c-mux@74->i2c@1
Bus 7:  i2c@ff030000->i2c-mux@74->i2c@2
Bus 8:  i2c@ff030000->i2c-mux@74->i2c@3
Bus 9:  i2c@ff030000->i2c-mux@74->i2c@4
Bus 10: i2c@ff030000->i2c-mux@75->i2c@0
Bus 11: i2c@ff030000->i2c-mux@75->i2c@1
Bus 12: i2c@ff030000->i2c-mux@75->i2c@2
Bus 13: i2c@ff030000->i2c-mux@75->i2c@3
Bus 14: i2c@ff030000->i2c-mux@75->i2c@4
Bus 15: i2c@ff030000->i2c-mux@75->i2c@5
Bus 16: i2c@ff030000->i2c-mux@75->i2c@6
Bus 17: i2c@ff030000->i2c-mux@75->i2c@7
Cross-referencing with the DTS file, we see that the device of interest is on Bus 5, at address 54. First, switch to Bus 5 with the command:
ZynqMP> i2c dev 5
Setting bus to 5
Next, check the contents of the EEPROM at the addresses shown in DTS file:
ZynqMP> i2c md 0x54 0x20 8
0020: 00 00 00 00 00 00 00 00    ........
ZynqMP> i2c md 0x54 0xd0 8
00d0: 5a 43 55 31 30 32 ff ff    ZCU102..
ZynqMP> i2c md 0x54 0xe0 8
00e0: 31 2e 31 ff ff ff ff ff    1.1.....
ZynqMP> i2c md 0x54 0x0 14
0000: 00 00 00 00 00 00 00 00 00 00 00 00 00 00 00 00    ...............
0010: 00 00 00 00    ....
Most of the data is informational only, but two pieces are critical:
Board Name (address
0xd0)MAC address (address
0x20)
If the board name field is not correct, the Certified Ubuntu on Xilinx Devices image will not boot properly. The Certified Ubuntu release uses this data during its initial boot phase (the ImgSel tool) documented by Xilinx here: Booting Certified Ubuntu 20.04 LTS for Xilinx Devices . The ImgSel tool reads the board name and then uses this information to boot the correct BOOT.BIN file.
The MAC address field is probed during boot. If it is found populated with a valid set of values, it will use this data for the remainder of the boot process. If it doesn't, it will randomly create a MAC address which will change from boot to boot.
To fix the data, use the U-Boot I2C commands to write data back to EEPROM. For example, to fix the MAC address, use a sequence of commands to write the MAC address octet values:
ZynqMP> i2c mw 0x54 0x20 0x00 1
ZynqMP> i2c mw 0x54 0x21 0x0a 1
ZynqMP> i2c mw 0x54 0x22 0x35 1
...
The above example is intentionally incomplete. The valid addresses for a MAC address are from 0x20 through 0x25. Repeat the i2c mw commands to write all of the octets. To read them back, simply use the i2c md command sequence shown above. Once you have updated the MAC address and verified it, you can reboot the board with:
ZynqMP> reset
This time just let the boot process proceed like normal. Once Ubuntu starts, you can verify the MAC address at the terminal with the following command:
ubuntu@zynqmp:~$ ip link show
1: lo: <LOOPBACK,UP,LOWER_UP> mtu 65536 qdisc noqueue state UNKNOWN mode DEFAULT group default qlen 1000
    link/loopback 00:00:00:00:00:00 brd 00:00:00:00:00:00
2: sit0@NONE: <NOARP> mtu 1480 qdisc noop state DOWN mode DEFAULT group default qlen 1000
    link/sit 0.0.0.0 brd 0.0.0.0
3: can0: <NOARP,ECHO> mtu 16 qdisc noop state DOWN mode DEFAULT group default qlen 10
    link/can
4: eth0: <NO-CARRIER,BROADCAST,MULTICAST,UP> mtu 1500 qdisc mq state DOWN mode DEFAULT group default qlen 1000
    link/ether [REDACTED] brd ff:ff:ff:ff:ff:ff
You should see the MAC address value set in U-Boot. In the data shown above, the actual MAC address is [REDACTED].
The same basic process can be used to update the Board Name, Board Serial Number, or Board Version fields. Keep in mind that when writing the values for the Board Name, Board Version Number, and Board Serial Number to use the ASCII values in hexadecimal. The MAC address is written in native hexadecimal values.
Ubuntu Internal Error Messages
From time to time, the Ubuntu desktop may display error messages similar to Sorry, Ubuntu 20.04 has experienced an internal error.
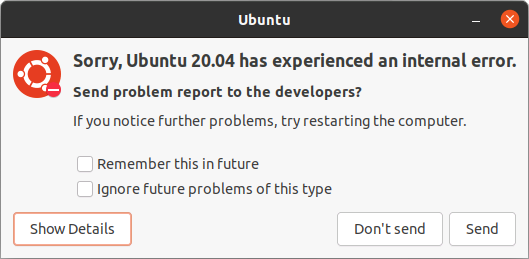
These messages are generated by the Ubuntu error checking tool called Apport. You can learn more about Apport here. If this is the first time you’ve seen the message, you can learn more details by clicking the Show Details button to learn more.

Many types of scenarios can generate Apport errors and not all of them indicate an actual problem in the system. If you wish, you can click the boxes Remember this in future and Ignore future problems of this type to prevent these general types of warnings from being generated. Please be sure to check the details of the error messages before suppressing them.
Apport runs as a background service. If you are confident that the errors you see are not representative of larger errors in your system, you can disable the Apport service by issuing the command:
$ sudo systemctl disable apport.service