This pages provides information related to formatting and SD card for a two partition configuration.
Table of Contents
Introduction
While some Linux systems only require a single FAT-formatted boot partition (e.g. those that use a ramdisk), some systems require a second ext4 formatted partition to hold the root filesystem. In this tutorial, the FAT partition will be referred to as the "boot" partition, which is used to hold the boot image (BOOT.BIN) and Linux image (image.ub or Image + .dtb). The ext4 partition for the root filesystem will be referred to as "root".
Creating Two Partitions
These steps assume you're using a blank, unformatted SD card with no existing partitions on it. We'll use the fdisk utility in Linux to create the new partitions. Fdisk is text based tool used to create partitions on a disk. You can also use gparted which is gui base partitioning tool.
- First, unmount your disk and start fdisk with your device name. In my case my SD card is at /dev/sdc:
$ sudo fdisk /dev/sdc
- Type p, to see your current partition table.
- If you have existing partitions, you can delete them by typing 'd'
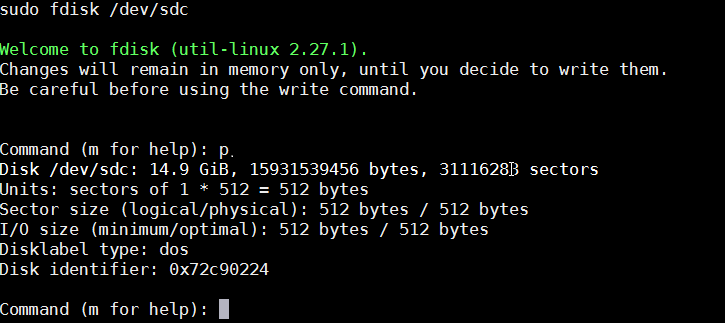 |
| fdisk - check partition |
- Make a new partition by typing 'n'.
- Make it primary by selecting 'p',
- use default partition number and first sector .
- Set aside 1G for this partition by typing +1G (this value can differ based on your needs - the rest of the card will be used for the second partition)
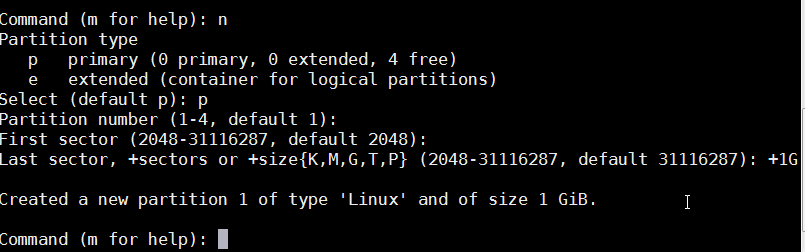 |
| fdisk - new partition |
- Set the bootable flag on this partition by typing 'a'.
- Now if you print out the partition table with 'p', you should see your new partition with a * under Boot.
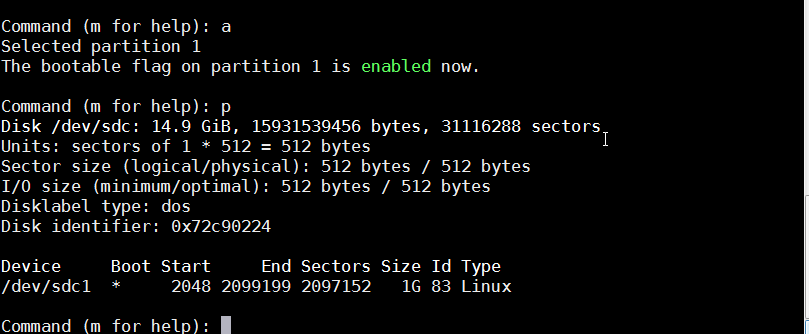 |
| fdisk - Bootable flag setting |
- Make the root partition by typing 'n'.
- Select primary partition
- Leave the first and last sector default.
 |
| fdisk - new partition |
- If you check your partition table now, you should see the 2 partitions you just created.
- After verification type 'w' to write to disk and exit.
 |
| fdisk - print partition table |
Formatting the Partitions
After creating the partitions, the next step is to format them with the appropriate files system.
Boot Partition
The boot partition should always be formatted as FAT. To format the first partition as FAT, use the following command:
$ mkfs.vfat -F 32 -n boot /dev/sdc1
Root Partition
The root partition can be formatted as ext2/ext4 depending on your Linux configuration. To format the second partition as ext4, use the following command:
$ mkfs.ext4 -L root /dev/sdc2
If your root file system build artifact is an uncompressed ext4 image (i.e. rootfs.ext4) you can skip this step
Coping the Images to the New Partitions
Boot Partition
For the boot images, simply copy the files to the FAT partition. This typically will include BOOT.BIN, image.ub, and boot.scr (2020.1 and later). However, your system may require additional files on the FAT file system.
Root Partition
For the root file system, the process will depend on the format of your root file system image.
dd if=rootfs.ext4 of=/dev/sdc2