In this simple tutorial we will discuss how to build a Linux image in Petalinux 2018.3, from the BSP, or from scratch using the HDF file that is export from Vivado IP Integrator. The wiki will also discuss the various debug options available to enable the user to fully debug any application targeting the RFDC IP driver.
See the wiki here for information on the ZCU111 Clocking
Building the Linux Image:
Using BSP:
petalinux-create -t project -s <path to BSP>
cd <plnx proj dir>
petalinux-config -c rootfs
	base -> [*] i2c-tools
petalinux-build --sdk
petalinux-package --sysroot
Using zynqMP template:
petalinux-create -t project --template zynqMP -n rfdc_linux
cd rfdc_linux
petalinux-config --get-hw-description=<path to HDF>
	DTG Settings -> (zcu111-reva) MACHINE_NAME
	Open rfdc_linux\project-spec\meta-user\recipes-core\images\petalinux-image-full.bbappend
	IMAGE_INSTALL_append = " rfdc"
	IMAGE_INSTALL_append = " rfdc-read-write"
	IMAGE_INSTALL_append = " rfdc-selftest"
petalinux-config -c rootfs
	base -> [*] i2c-tools
	user packages ->
		[*] rfdc
		[*] rfdc-read-write
		[*] rfdc-selftest
Add the rfdc-examples folder to project-spec/meta-user/recipes-bsp
Create the rfdc-selftest_%.bbappend and add the content shown below here:
do_compile (){
    make all BOARD_FLAG=-DXPS_BOARD_ZCU111 OUTS=rfdc-selftest RFDC_OBJS=xrfdc_selftest_example.o
}
petalinux-config
	Yocto Settings ->
	(zcu111-zynqmp) YOCTO MACHINE NAME
petalinux-build
petalinux-package --boot --fpga system.bit --u-boot
petalinux-build --sdk
petalinux-package --sysroot
petalinux-build --sdk
This steps can take along time ~ 40 mins to complete
Users can expedite this using the commands below:
mkdir sysroot
tar -xzf rfdc_linux/images/Linux/rootfs.tar.gz -C sysroot ./usr ./lib
The RFDC driver is delivered as a shared object in Linux. The makefile can be seen here and below:
APP = rfdc

LIBSOURCES=*.c
OUTS = *.o
NAME := rfdc
MAJOR = 1
MINOR = 1
VERSION = $(MAJOR).$(MINOR)

all: lib$(NAME).so

lib$(NAME).so.$(VERSION): $(OUTS)
	$(CC) $(LDFLAGS) $(OUTS) -shared -Wl,-soname,lib$(NAME).so.$(MAJOR) -o lib$(NAME).so.$(VERSION) -lmetal

lib$(NAME).so: lib$(NAME).so.$(VERSION)
	rm -f lib$(NAME).so.$(MAJOR) lib$(NAME).so
	ln -s lib$(NAME).so.$(VERSION) lib$(NAME).so.$(MAJOR)
	ln -s lib$(NAME).so.$(MAJOR) lib$(NAME).so

%.o: %.c
	$(CC) $(CFLAGS) -c -fPIC $(LIBSOURCES)

clean:
	rm -rf *.o *.so *.so.*
So, this .so is built and delivered in the /usr folder in the root file system. The recipe can be seen here:
SUMMARY = "rfdc Library"
SECTION = "rfdc"
LICENSE = "BSD"
LIC_FILES_CHKSUM = "file://${WORKDIR}/git/license.txt;md5=71602ce1bc2917a9be07ceee6fab6711"

inherit pkgconfig

REPO ??= "git://github.com/Xilinx/embeddedsw.git;protocol=https"
BRANCH ??= "release-2018.3"
SRCREV ??= "56f3da2afbc817988c9a45b0b26a7fef2ac91706"
BRANCHARG = "${@['nobranch=1', 'branch=${BRANCH}'][d.getVar('BRANCH', True) != '']}"

COMPATIBLE_MACHINE = "^$"
COMPATIBLE_MACHINE_zynqmpdr = "zynqmpdr"

FILESEXTRAPATHS_prepend := "${THISDIR}/files:"

SRC_URI = " \
	${REPO};${BRANCHARG} \
	"

S = "${WORKDIR}/git/XilinxProcessorIPLib/drivers/rfdc/src/"

PACKAGE_ARCH = "${SOC_FAMILY}${SOC_VARIANT}"

DEPENDS = "libmetal"

PROVIDES = "rfdc"

do_configure() {
    cp ${S}/Makefile.Linux ${S}/Makefile
}

do_install() {
    install -d ${D}${libdir}
    install -d ${D}${includedir}
    oe_libinstall -so librfdc ${D}${libdir}
    install -m 0644 ${S}/xrfdc_hw.h ${D}${includedir}/xrfdc_hw.h
    install -m 0644 ${S}/xrfdc.h ${D}${includedir}/xrfdc.h
    install -m 0644 ${S}/xrfdc_mts.h ${D}${includedir}/xrfdc_mts.h
}

FILES_${PN} = "${libdir}/*.so.*"
FILES_${PN}-dev = "${libdir}/*.so  ${includedir}/*"
We can see this .SO added to the sysroots created above:
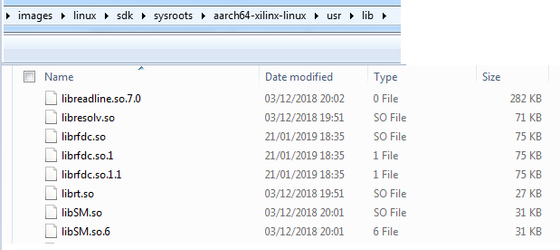
These will also be in the respective folder in the rootfs when you boot Linux.
Creating Linux Application in SDK:
The SDK 2018.3 can be used to create the Linux application
File → New → Application Project

sysroots
Point to the Linux System Root that was created using the petalinux-build --sdk step above
![]()
Finish, to continue
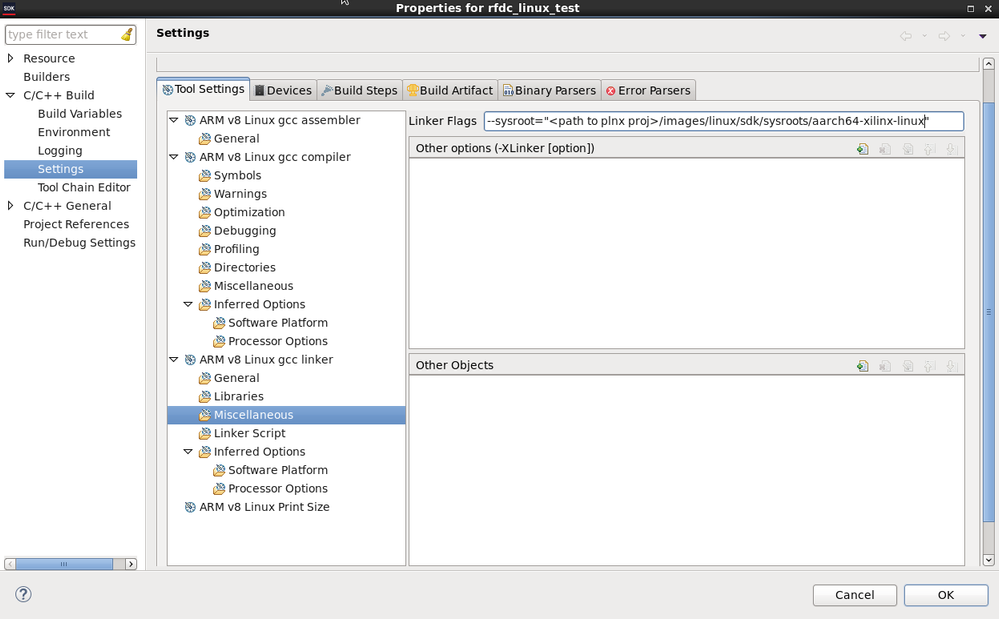
Right Click on the application in Project Explorer and select the C/C+ Build Settings:

Add the path to the sysroot path to the linker flags:
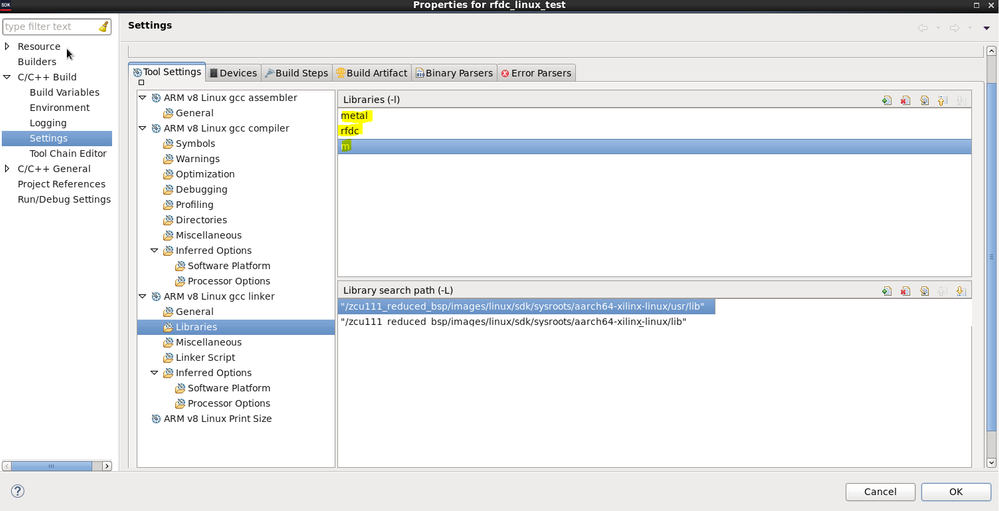
Add the libraries (highlighted):
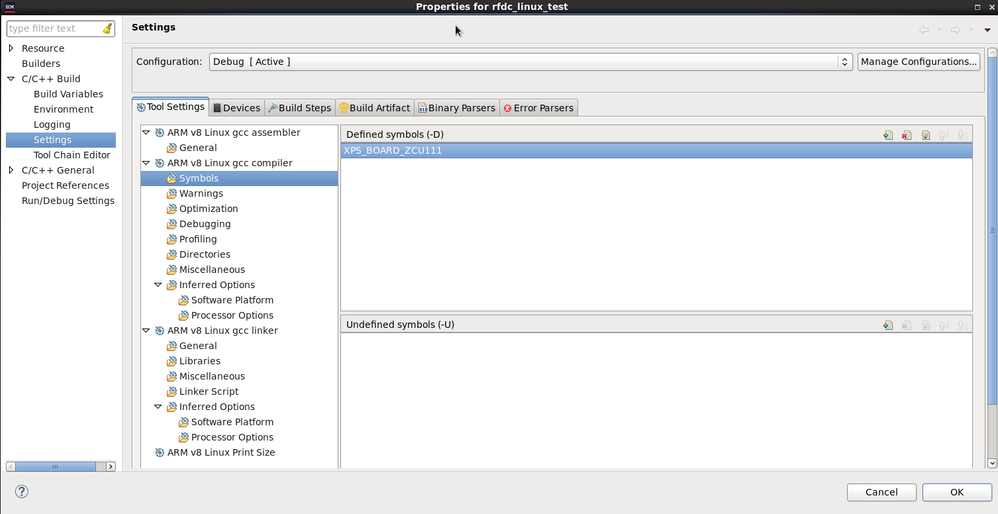
If using the ZCU111, then there is code to program the clocks on the board:
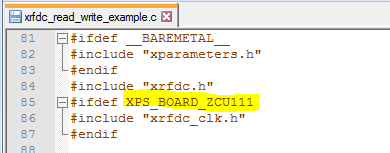
As seen above, there is a pre-compiler ifdef. This can be added as a symbol in the C/C++ Build settings too:
In this demo, I will be using the rfdc_selftest that is delivered with the driver. However, the full API suite for the RFDC can be found here.
To add the code, right click on the src folder in Project explorer and select Import:
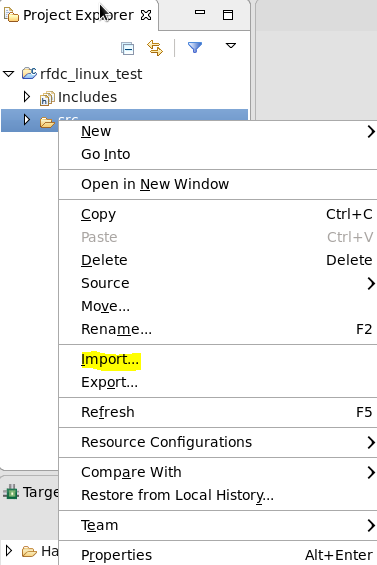
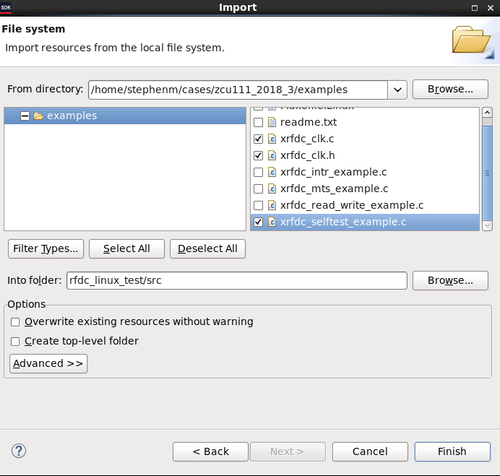
General → File System:
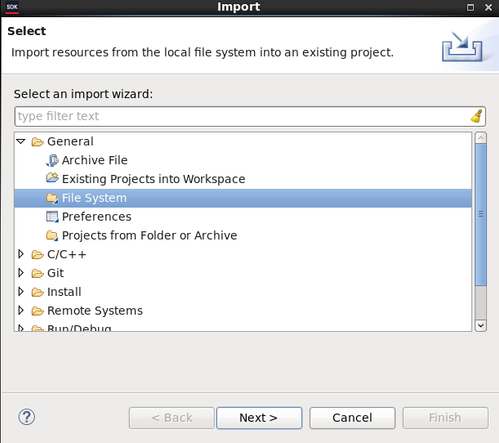
Browse to your source code and select Finish:
Debugging Linux Application on ZCU111:
Set up the LAN between your board and you PC:
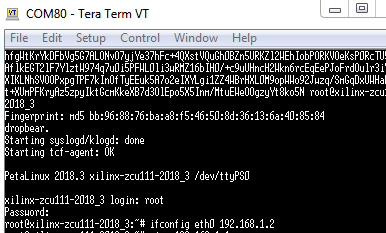
Make sure you can ping your PC from the Linux console.
firewall
You may need to disable your firewall on your PC
Set up the Target Connection:
Drop down the Linux TCF Agent → Linux Agent

Select Add new target connection icon:

Next, right click on your application in Project explorer, and select Debug As → Debug Configurations:
Double Click on Xilinx C/C++ application (System Debugger)
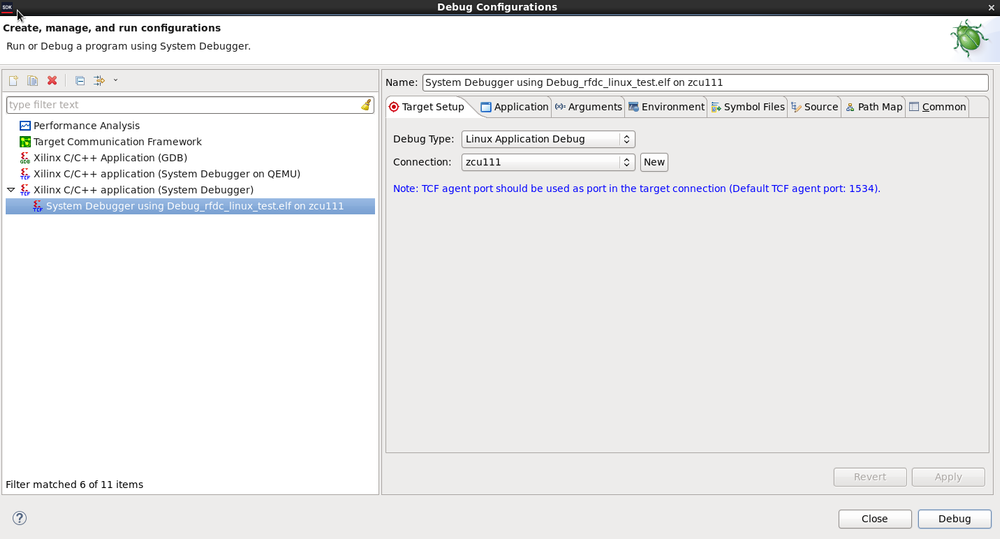
Select Debug to launch the debug perspective.
Creating Linux Application in Petalinux:
Once the user is satisfied that everything works correct, then they can create a Linux Application in Petalinux:
petalinux-create --type apps --name rfdc-test --enable
default files
This will create an app with a default rfdc-test.c in the project-spec/meta-user/recipes-apps/rfdc-test/files folder. This should be deleted as it may cause issues during compile
Open the makefile at project-spec/meta-user/recipes-apps/rfdc-test/files and make the changes below:
APP = rfdc-test

# Add any other object files to this list below
APP_OBJS = xrfdc_selftest_example.o
APP_OBJS += xrfdc_clk.o

LDLIBS += -lmetal
LDLIBS += -lrfdc


all: $(APP)


$(APP): $(APP_OBJS)
    $(CC) $(LDFLAGS) -o $@ $(APP_OBJS) $(LDLIBS)

clean:
    -rm -f $(APP) *.elf *.gdb *.o $(APP_OBJS)

%.o: %.c
    $(CC) -c -Wall -O0 -g3 -c -fmessage-length=0 -MT"$@" -MMD -MP -MF"$(@:%.o=%.d)" -MT"$(@)" -o "$@" "$<"
Add the source files to the project-spec/meta-user/recipes-apps/rfdc_test/files directory.
Update the project-spec/meta-user/recipes-apps/rfdc-test/rfdc-test.bbappend file:
#
# This file is the rfdc-test recipe.
#

SUMMARY = "Simple rfdc-test application"
SECTION = "PETALINUX/apps"
LICENSE = "MIT"
LIC_FILES_CHKSUM = "file://${COMMON_LICENSE_DIR}/MIT;md5=0835ade698e0bcf8506ecda2f7b4f302"

SRC_URI = "file://xrfdc_selftest_example.c \
	   file://xrfdc_clk.c \
	   file://xrfdc_clk.h \
	   file://Makefile \
	   	  "

S = "${WORKDIR}"

DEPENDS = "rfdc"

PROVIDES = "rfdc-test"

do_compile() {
	     oe_runmake
}

do_install() {
	     install -d ${D}${bindir}
	     install -m 0755 rfdc-read-write ${D}${bindir}
}