Zynq UltraScale + MPSoC Ubuntu + VCU + Gstreamer - Building and Running "Ubuntu Desktop" from Sources
This page is deprecated and is no longer being updated. The content is being retained for reference. For more information about running Ubuntu on Zynq UltraScale+ MPSoC, please refer to Canonical Ubuntu
Document History
| Date | Author | Version | Description Of Version |
|---|---|---|---|
| 20 June 2019 | Surender Polsani | 1.0 |
|
Summary
The ZCU106 is a general-purpose evaluation board for rapid-prototyping based on the ZU7EV silicon part and package in the 16 nm FinFET Zynq® UltraScale+™ MPSoC. The ZU7EV device integrates a quad core Arm® Cortex™-A53 processing system (PS) and a dual core Arm Cortex-R5 real-time processor, which provides application developers an unprecedented level of heterogeneous multiprocessing. The ZCU106 evaluation board provides a flexible prototyping platform with high-speed DDR4 memory interfaces, FMC expansion ports, multi-gigabit per second serial transceivers, video codec unit (VCU), several peripheral interfaces, and FPGA fabric for customized designs.
This Tech-Tip covers step by step instructions to build and boot Ubuntu Desktop on the Zynq® UltraScale+™ MPSoC with VCU and Gstreamer targeting the ZCU106 board.
HDMI Video Display Design:

NOTE: In this wiki we are using VCU TRD DM7 Design and TRD bsp for latest changes applied on VCU and gstreamer.
The following Zynq® UltraScale+™ MPSoC PS and PL components are used in this design
- Quad-core ARM® Cortex™-A53 Application Processing Unit
- Graphics Processing Unit
- DDR controller.
- UART
- SD/eMMC interface
- Gigabit Ethernet
- USB 3.0
- Video Codec Unit
- HDMI Tx
Software Stack used for this design
- SMP Linux on APU subsystem
- Ubuntu Desktop root file system
- Gstreamer Framework
- Openmax
- VCU Firmware
- ARM-Mali, OpenGL ES2.0, OSG
Requirements
- Xilinx ZCU106 evaluation kit with power supply
- Class 10 SD card (8 GB)
- Ethernet Cable (for Internet connectivity, installing packages using apt-get utility)
- Micro USB to Standard USB cable
- 4K Monitor or Full HD HDMI Monitor and HDMI cable
- USB Hub to connect USB mouse/USB keyboard /USB keyboard with mouse integrated, etc.
Files Provided | |
Archived file
| |
Procedure to build from sources
This section covers the following topics
- Creating the Hardware design using Vivado.
- Exporting the hardware design to Petalinux
- Configuring the hardware
- Creating petalinux project
- Configuring the kernel
- Configuring the Rootfs
- Creating the bootable Linux images
- Preparing the SD card with the built Images or ready to test images
- ZCU106 Board setup
- Steps to execute the Demo
Creating hardware design using Vivado
This section explains the procedure to create the hardware design using 2019.1 Vivado Design suite.
- Open the Vivado Design Suite and run the project.tcl file which will generate the block design which uses Zynq UltraScale+ MPSoC IP.
- Download and Extract the Zcu106_Ubuntu_Desktop_Release_2019_1.zip file to on to your Linux directory
$ unzip Zcu106_Ubuntu_Desktop_Release_2019_1.zip
Note: For user convenience prebuilt hardware description file is provided along with the design files.User can use the vcu_hdmitx_wrapper.hdf file found under the /Zcu106_Ubuntu_Desktop_Release_2019_1/ HDF_file directory and skip to the section"Preparing Linux images using Petalinux 2019_1". - Launch the Vivado Design Suite 2019.1 (On Linux)
- The Vivado Design Suite opens to the Welcome window. From the Welcome window you can create a new project, open an existing project, or enter Tcl commands directly into the Vivado Design Suite as well as access documentation and example

- In the TCL console of the Vivado Welcome screen, change the directory to /Zcu106_Ubuntu_Desktop_Release_2019_1/Hardware where the all the project files present.
$ cd /Ubuntu_Desktop_Release_2019_1/Hardware - Source the scripts/vcu_hdmitx_proj.tcl file in the Vivado GUI TCL console by following the below command.
source scripts/vcu_hdmitx_proj.tcl
 |
Fig: source the project.tcl file |
This TCL script will do the following
- Automatically create a Vivado project
- Creates a new block design and automatically populates the Zynq UltraScale+ MPSoC PS System,and PL required components and connections.
- After the block diagram opens run Generate Bitstream.
- After the process is completed the, vcu_hdmitx__wrapper.hdf will be generated under the /Zcu106_Ubuntu_Desktop_Release_2019_1/Hardware/vcu_hdmitx/vcu_hdmitx.sdk directory.
Preparing Linux Images using Petalinux 2019.1
- This section describes how to build the Linux images for zcu106 target platform using latest release Petalinux SDK of version 2019.1
Creating the petalinux project
- Create the petalinux project using the respective bsp provided with Design Files
- Download the Petalinux petalinux-v2019.1-installer.run and use bsp which is present at /Zcu106_Ubuntu_Desktop_Release_2019_1/petalinux_bsp/

- Install the Petalinux by running the above downloaded installer
$ ./petalinux-v2019.1-installer.run
Note: please refer the Petalinux user guide. - After installation is done set the Petalinux environment by running below command in bash shell
$ source <Petalinux_installation_path>/settings.sh
Note: use source <Petalinux_installation_path>/settings.csh command for c shell. - Cross check if PETALINUX environment variable is set to the above installation path by using below command
$ echo $PETALINUX - Create the Petalinux project with the below command
$ petalinux-create -t project –s <path to the bsp which is provided with the design files >/xilinx-vcu-trd-zcu106-v2019.1-final.bsp
Note: The bsp is available in design files /Zcu106_Ubuntu_Desktop_Release_2019.1/Petalinux_bsp/ folder. - Change the directory to created Petalinux project.
$ cd <petalinux-project>
- Configure the Petalinux project with the hardware description file .User can use the prebuilt vcu_hdmitx_wrapper.hdf file can be found under the directory /Zcu106_Ubuntu_Desktop_Release_2019_1/Hdf_file or can use the vcu_hdmitx_wrapper.hdf file built in the above section.
$ petalinux-config --get-hw-description=<path to hdf file directory>
The PetaLinux configuration wizard opens. - Enable the SD card for rootfs: select ‘Image Packaging Configuration->Root file system type->SD card’
- Save and Exit the wizard.
- Wait until PetaLinux reconfigures the project
- Clean the existing Bootloader image. This is to ensure that the bootloader is recreated in sync with new hardware design.
$ petalinux-build -c bootloader -x distclean
Configuring the kernel
- Change directory to <petalinux-project> and enter the following command to configure the kernel:
$ petalinux-config -c kernel
- Following are some of the mandatory configurations needed for successful booting of Ubuntu Desktop.
- Disable initramfs in kernel configuration GUI at ‘General setup -> Initial RAM file system and RAM disk (initramfs/initrd) support’
- Following settings are required to enable Input device, multimedia and USB related settings
- Device Drivers->Input device support->Event interface’
- Device Drivers->Input device support->Keyboards’
- Device Drivers->Input device support->Mouse interface’
- Device Drivers->Multimedia support->Media USB Adapters->USB Video Class (UVC)
- Device Drivers->Multimedia support->Cameras/video grabbers support’
- Device Drivers->Multimedia support->V4L platform devices
- Device Drivers->USB support and enable all required classes
- Device Drivers->HID support->Generic HID driver
- Device Drivers->HID support->USB HID support->USB HID transport layer
- Disabling the PMBUS PMIC so that power demo can use them without any issues
- Device Drivers->Hardware Monitoring support->PMBus support->Maxim MAX20751’
- Enable the PHY settings
- Device Drivers->PHY Subsystem’
- Device Drivers->PHY Subsystem->Xilinx ZynqMP PHY driver’
- Disable the PCI settings
- Bus Support->PCI support’ This needs to be disabled for this version
- Enable the sound related settings:
- Device Drivers->Sound card support’
- Device Drivers->Sound card support->Advanced Linux Sound Architecture’ enabling ALSA support
- Kernel hacking > Tracers > Kernel Function Tracer
- Enable VCU driver Device Drivers->SOC (System On Chip) Specific Drivers->Xilinx SoC Drivers->[m] Xilinx VCU logicoreIP Initsupport
- Save and Exit the kernel configuration.
Configuring the Rootfs:
$ petalinux-config -c rootfs
- Enable mali user libraries and mali driver
Filesystem Packages->libs->libmali-xlnx->[*] libmali-xlnx
Filesystem Packages->libs->libmali-xlnx->[*] libmali-xlnx-dev
- Save and exit the rootfs configuration.
- Enable HDMI kernel module
Filesystem Packages->misc->hdmi-module->[*] kernel-module-hdmi
- Make it vcu_hdmitx.dtsi as system-user.dtsi
$ cp project-spec/meta-user/recipes-bsp/device-tree/files/vcu_hdmitx.dtsi project-spec/meta-user/recipes-bsp/device-tree/files/system-user.dtsi
- add following to system-user.dtsi file
/ {
chosen {
bootargs = "earlycon clk_ignore_unused consoleblank=0 cma=1700M uio_pdrv_genirq.of_id=generic-uio root=/dev/mmcblk0p2 rootfstype=ext4 rw rootwait ";
stdout-path = "serial0:115200n8";
};
};
- Build the images
$ petalinux-build
Creating bootable linux images
- Change directory to <petalinux-project> and enter the following command to build Linux Images. Output binaries can be found in <petalinux-project>/images/linux directory.
- Wait until the project builds.
- Create BOOT.bin (with above created binaries) using below command
$ petalinux-package --boot --fsbl images/linux/zynqmp_fsbl.elf --u-boot images/linux/u-boot.elf - Move to folder images/linux/ and copy BOOT.BIN and image.ub files to boot partition of SD card.
Note: If changes happen to be ONLY in kernel, then use below command to rebuild ONLY kernel
petalinux-build -c kernel
Preparing the SD card with bootable Images:
- This section provides the steps to prepare the SD with the above built images and Ubuntu file system.
- Create two partitions in SD Card one for bootable images (fat32) and another for Rootfs (Ext4).
- Boot partition should have at least 1GB and root partition should be 7GB or more.
- Copy the images prepared in previous section BOOT.BIN and image.ub into boot parttion.
- Extract the Root Filesystem provided with design files in directory /Zcu106_Ubuntu_Desktop_Release_2019_1/Ubumtu_Rootfs to root partition.
- Copy vcu kernel modules into rootfs partition root folder modules directory
$ cp -rf build/tmp/sysroots-components/zynqmp/kernel-module-vcu/lib/modules/4.19.0-xilinx-v2019.1/extra/* /<path to sd root partition>/root/modules/
- Copy hdmi kernel modules
$ cp -rf build/tmp/sysroots-components/zynqmp/kernel-module-hdmi/lib/modules/4.19.0-xilinx-v2019.1/extra/* /<path to sd root partition>/root/modules/
- Copy mali user module
$ cp build/tmp/sysroots-components/zynqmpev/kernel-module-mali/lib/modules/4.19.0-xilinx-v2019.1/extra/mali.ko /<path to sd root partition>/root/modules/
- Copy vcu firmware to lib/firmware
$ cp build/tmp/sysroots-components/zynqmp/vcu-firmware/lib/firmware/* /<path to sd root partition>/lib/firmware/
Preparing the SD card with pre-built Images:
- Preparing the SD card for SD boot mode:
- Find the "ZCU106_UbuntuDesktop_2019_1.img" in /Zcu106_Ubuntu_Desktop_Release_2019_1/Ready_to_test_images directory.
- Extract the ZCU106_UbuntuDesktop_2019_1.img file to SD card using below steps.
Steps for Windows PC:
- Install Win32DiskImager.exe Tool .This tool can be downloaded and installed from http://sourceforge.net/projects/win32diskimager/
- Burn the SD card image (ZCU106_UbuntuDesktop_2019_1.img) into 8 GB SD card (bigger device if any issues with the size) using Win32 disk Image writer.
Step1 : As highlighted below, browse the path to ZCU106_UbuntuDesktop_2019_1.img file
Step2 : Select SD card partition as Device (This has to be selected with utmost care as this tool is going to format the selected drive)
Step3 : Select the option "write",it will creates the partitions on to the SD card and burn images on it.

- After extracting the image on to the SD card, you will find following images in it.
- BOOT.BIN
- image.ub
Steps for Linux PC
- This can be done on Linux PC using the DD command
- dd if=name.img of=/dev/sdb
- Where ‘if’ is pointing to name.img file of the Ubuntu Desktop image and ‘of’ points to the SD card to which the image has to be extracted.
ZCU106 Board Setup:
- Connect the Micro USB cable into the ZCU106 Board Micro USB port J83, and the other end into an open USB port on the host PC. This cable will be used for UART over USB communication.
- Connect one end of Ethernet cable into the ZCU106 connector J73, and another end connect to the Ethernet socket.
- Insert SD card into the SD card slot J100.
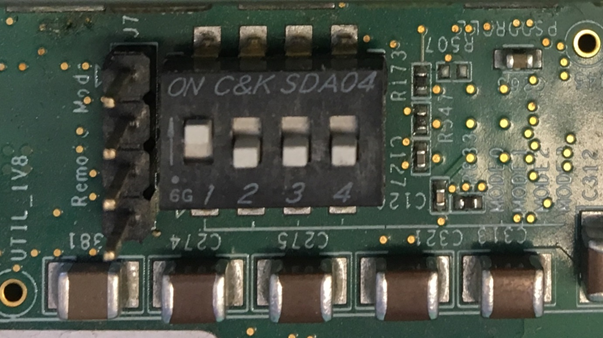
- Set the SW6 switches as shown. This configures the boot settings to boot from SD:
- Connect 12V Power to the ZCU102 6-Pin Molex connector.
- Connect the monitor using HDMI cable to HDMI-TX (top).
- The following figure shows the ZCU106 board with connections.
Steps to execute the demo:
- Switch on the ZCU106 Board at SW1 (red switch).
- In few seconds the Ubuntu Desktop will boot up.
- As shown in the following figure there are few icons tailor made like Hard_glmark2, Soft_glmark2,3D car model etc to execute the Zynq UltraScale+ MPSoC specific applications.
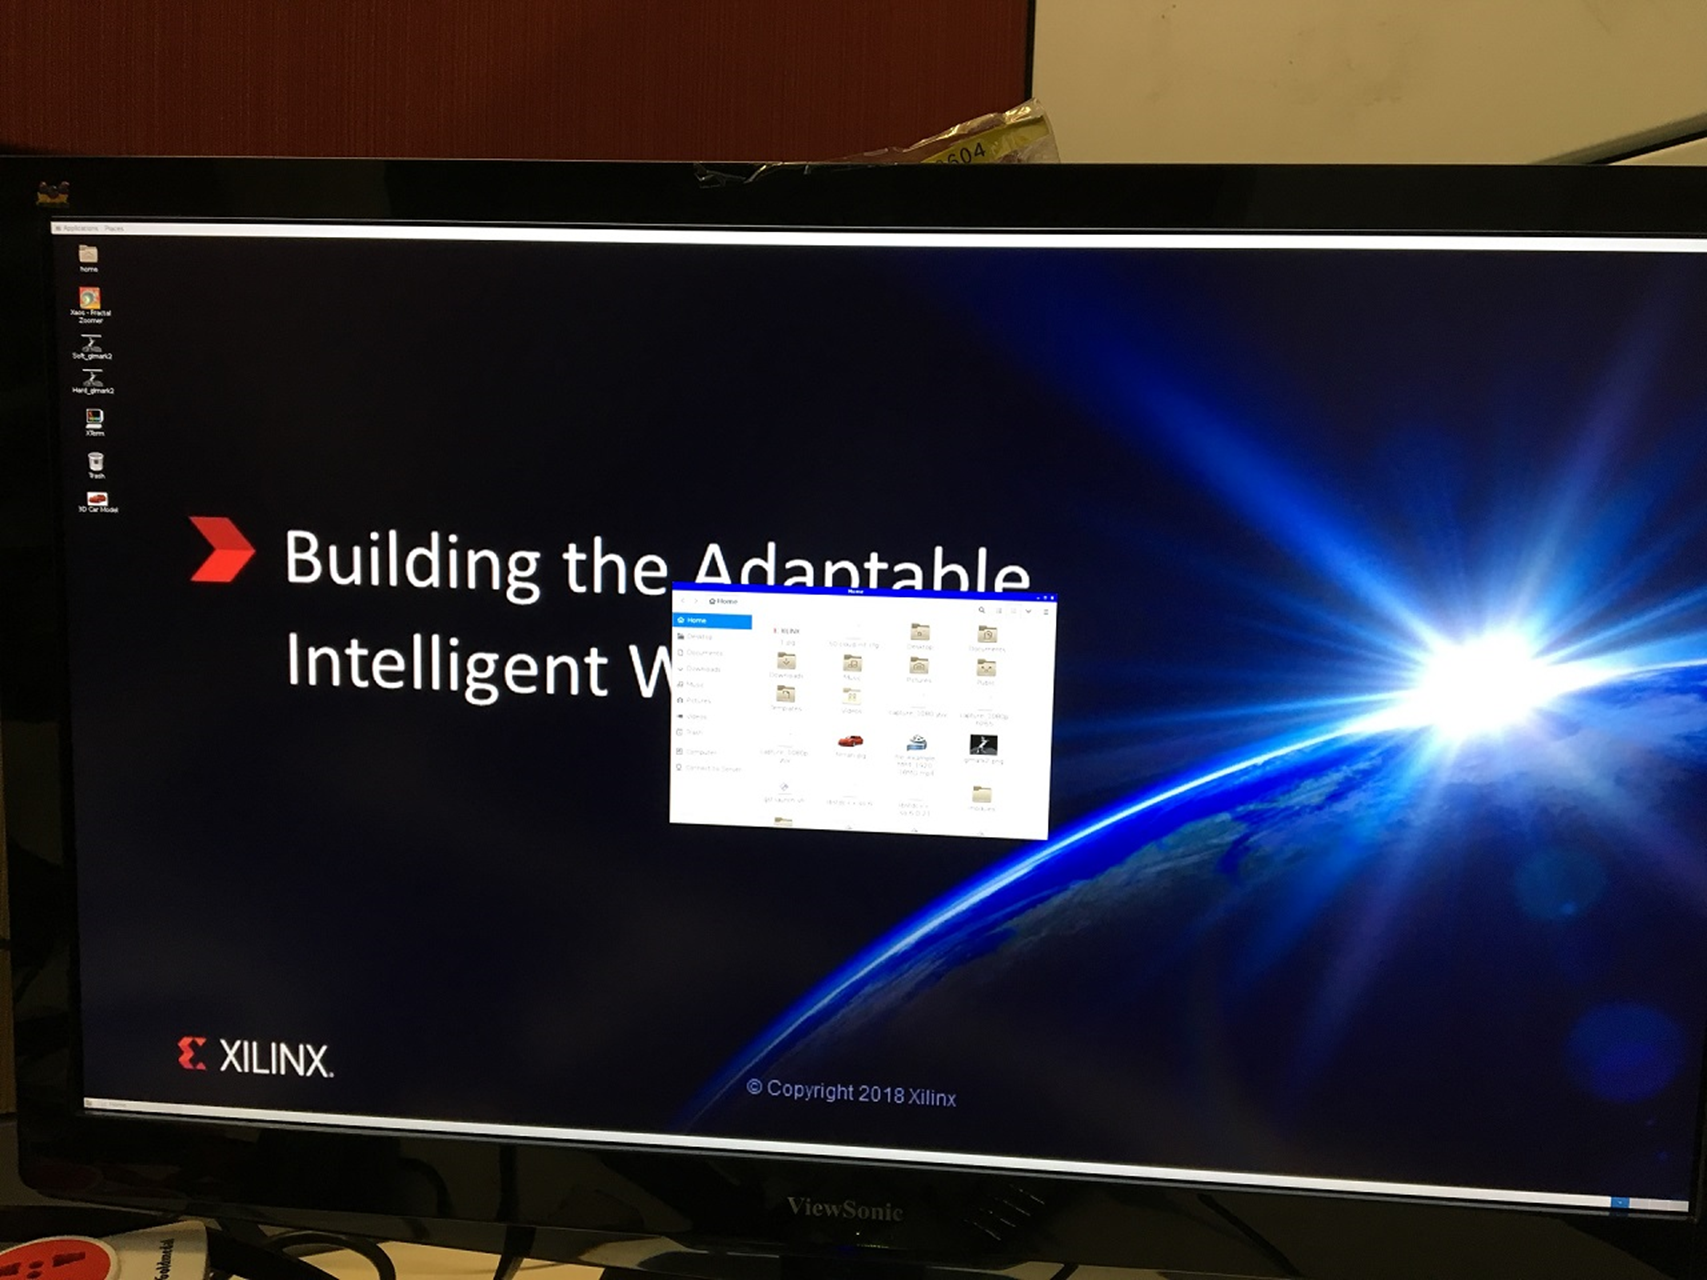
Fig:Ubuntu Desktop
- Connect mouse and keyboard to ZCU106 hardware USB port via USB hub. Observe mouse and keyboard to be working.
- Double click/open "Hard_glmark2" application to launch it and observer a horse 3D models is rotating. All the models in this application are rendered by the GPU as shown in the following figure.
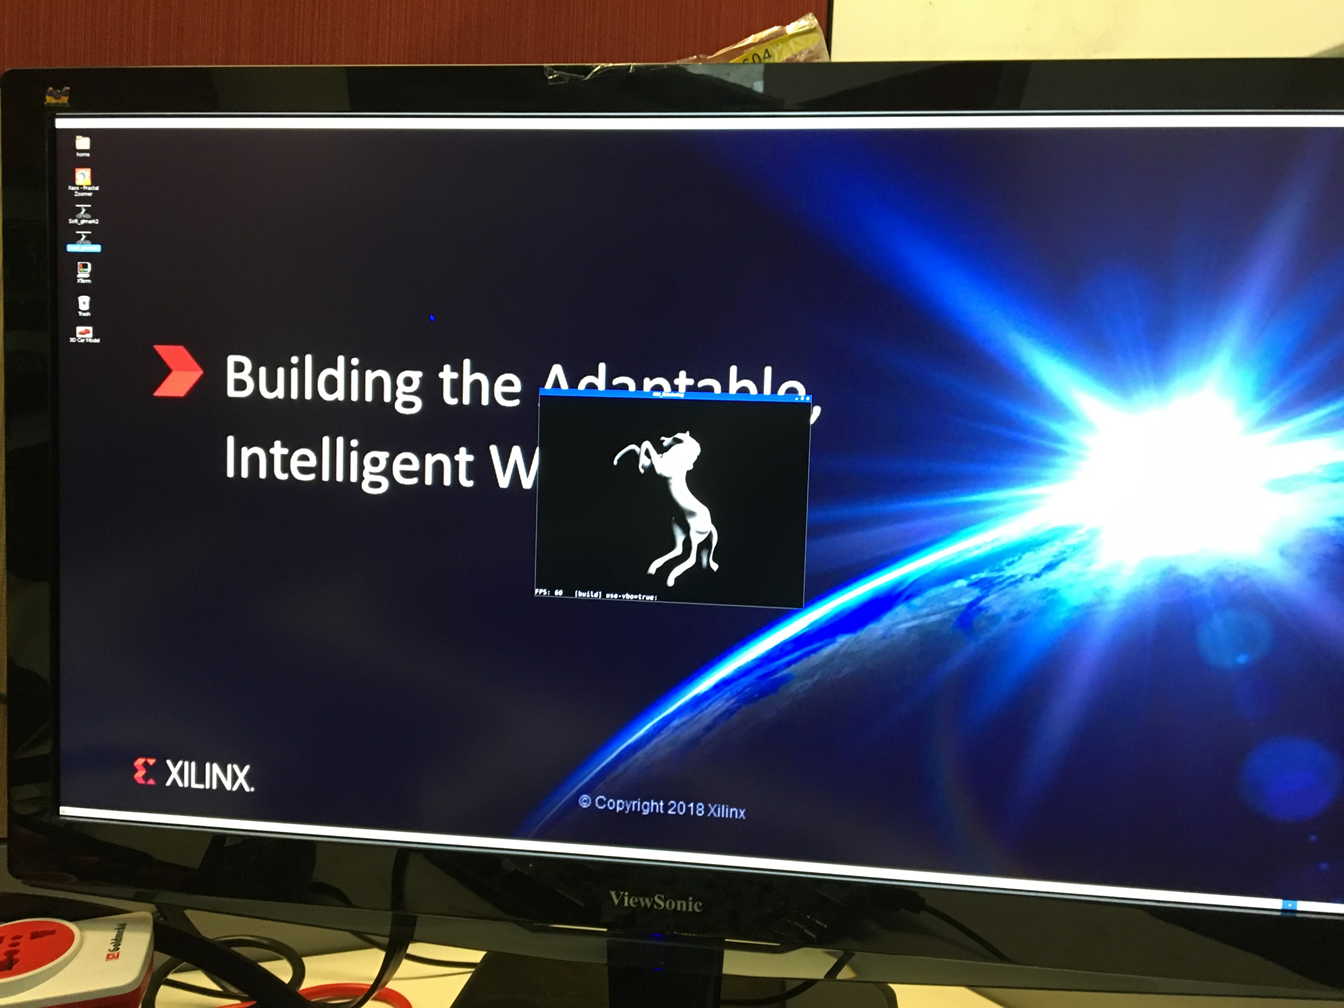
Fig:Hard glmark2
- Launching the OSG car demo: Select the icon “3D Car Model" and double click on it. Window opens with Car image in it. Using mouse hold the car and rotate it. Observe Car rotating in the same direction as that of your mouse. To close the window use 'ALT+F4' keyboard command.

Fig: OSG 3D Car Application
Running the VCU Test Case:
- To set the transparency between graphics and video planes run below command.
$ modetest -D a0070000.v_mix -w 36:alpha:150
- Here we are doing filesrc->encode->decode->display. Below is the pipeline
Run the below pipeline or run gst-launch.sh script located at /root directory.
$ gst-launch-1.0 filesrc location=/root/1080p_nv12.yuv ! videoparse format=nv12 width=1920 height=1080 ! omxh265enc ! h265parse ! omxh265dec latency-mode=normal ! queue max-size-bytes=0 ! kmssink bus-id=a0070000.v_mix plane-id=34
- The Display shows video like shown in below figure
NOTE: In rootfs we integrated latest VCU firmware and gstreamer with required all plugins. You can try different test cases on VCU with gstreamer.

Conclusion:
- This demonstration showcases Zynq® UltraScale+™ MPSoC APU ,GPU and VCU capabilities by running "SMP Linux with UI based applications" and OpenGL ES 2.0 API based 3D graphics application rendering" and VCU processing (encode + decode) using gstreamer and Openmax on rich Ubuntu Desktop system.
Appendix A:File description in Design directory
- Zcu106_Ubuntu_Desktop_Release_2019_1.zip:
Zcu106_Ubuntu_Desktop_Release_2019_1:
- Hardware
- ip
- ip_repo
- constrs/vcu_hdmitx.xdc
- srcs
- scripts
- bd_layout.tcl
- vcu_hdmitx_bd.tcl
- vcu_hdmitx_proj.tcl
- HDF_file
- Vcu_hdmitx_wrapper.hdf
- Ready_to_test_images
- ZCU106_UbuntuDesktop_2019_1.img
- Petalinux_bsp
- Xilinx-vcu-trd-zcu106-v2019.1-final.bsp
- Ubuntu_Rootfs
- Ubuntu_Rootfs.tar.gz
© Copyright 2019 - 2022 Xilinx Inc. Privacy Policy