...
Table of Contents
| Table of Contents |
|---|
Introduction
The default XSDK debug configuration for Linux applications copies the elf file to the target before running it. It is desirable to be able to debug an application that was launched outside XSDK (e.g. at system startup). This is not shown in the default debug templates but can be done manually, as shown here. A working knowledge of XSDK is assumed, as well as familiarity with the ZCU102 board.
...
...
Test environment
You may be able to use a different test setup, so long as the following principles are preserved:
- The laptop can, via Ethernet, access the ZCU102
- The application being debugged has its source code available on the laptop
- If the application was not developed in XSDK or was developed on a different machine, you may need path mappings to locate the sources
...
SD Card
Use an SD card that was supplied with, or is compatible with, the ZCU102.
...
Cables
- USB-to-miniUSB cable supplied with the ZCU102
- Two Ethernet cables (RJ45)
- Power cable for ZCU102
...
Router
It establishes a private Ethernet network containing the laptop and the ZCU102. Ensure the router is enabled as a DHCP server and powered on, with two spare RJ45 ports. This test uses up three IP addresses – one for the laptop, one for u-boot and one for Linux on the ZCU102. Ensure the router can serve these three clients. Reboot it if necessary.
...
ZCU102 hardware configuration
- Rev 1.1 board
- Boot mode is SD card
...
...
Laptop configuration
...
Hardware
- SD card reader
- Spare USB port
- Spare Ethernet port configured for DHCP slave
...
...
Software
- Windows 7
- XSDK 2018.2
- ZCU102 2018.2 release image
- CP210x USB to UART Bridge VCP Drivers
...
...
Connect Cables
- USB-UART cable between ZCU102 and laptop
- Ethernet cable between ZCU102 and router
- Ethernet cable between laptop and router
- ZCU102 power cable (leave powered down)
...
...
Insert SD Card In Card Reader
Ensure the SD card is writeable.
...
Locate COM port
- Open 'Device Manager' via Windows -> Control Panel, and open the 'Ports (COM & LPT)' section
- The line that reads 'Interface 0' has the COM port number (in this case, COM46):
...
- It is possible that you may need to power up the ZCU102 for this information to be visible. If so, power it down after obtaining the above information.
...
...
Prepare SD Card Image
- Copy ZCU102 2018.2 release image, uncompressed, to SD card
- Launch XSDK
- Select a workspace location
- Create a Linux application 'hello' using the 'Hello world' template.
- Change the code to add a forever loop:
...
- Ensure the active Build Configuration is set to 'Debug'
- Build the application
- Copy the application 'Debug\hello.elf' to the SD card
- Safely eject the SD card from the laptop
- Leave XSDK running
...
Launch Application
- Insert the SD card in the ZCU102 SD card slot
- Open an XSDK terminal for the COM port:
...
- You should see 'Connected to COM46 at 115200' if it succeeds.
- Apply power to the ZCU102.
- You should see boot messages from Linux. Wait for the prompt: xilinx-zcu102-2018_2 login:
- Login with user root and password root.
- Run this command: ifconfig eth0
- Note the value of 'inet addr'
- Mount the SD card to a known path: mount /dev/mmcblk0p1 /media
- Check the SD card contents, you should see hello.elf: ls /media
- Run the application: /media/hello.elf &
- It will run forever, sleeping 10 seconds and printing 'Hello World\n' each loop
...
...
...
Setup Remote Systems Explorer in XSDK
- Select: Window -> Perspective -> Open Perspective -> Other…
- When the 'Open Perspective' window pops up, select 'Remote System Explorer' and click 'OK'
...
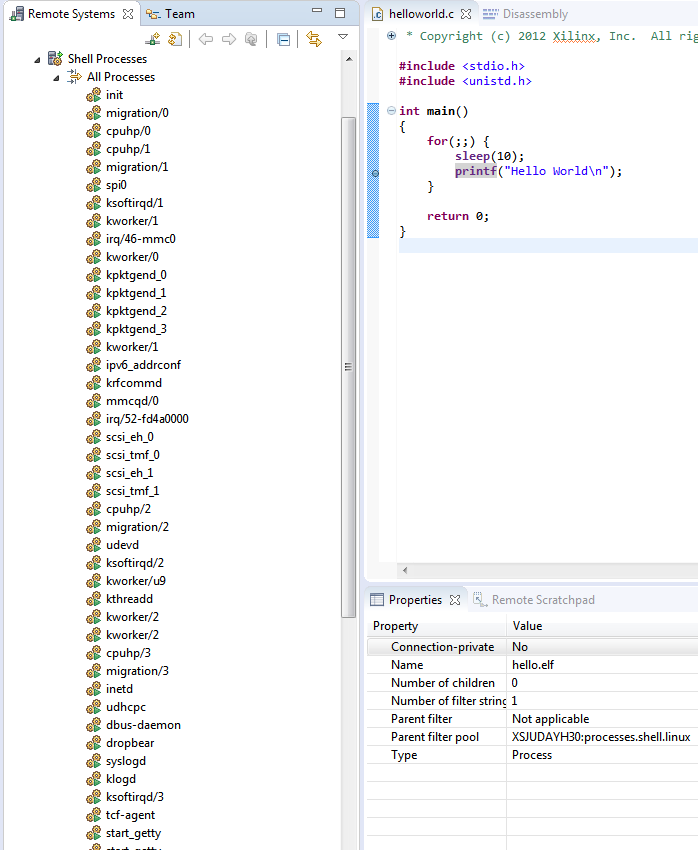
- You will see a list of all processes running on the target. Scroll down and confirm you can see 'hello.elf' running.
...
Setup Debug Configuration
- Right click on the 'hello' application in the 'Project Explorer' tab, and select 'Debug As' -> 'Debug Configurations…'. The 'Debug Configurations' window pops up.
...
- You should now be able to continue with debug, setting breakpoints, stepping, etc.
...